Petestack Blog

11 August 2019

Working through the ‘later?’ list

Filed under: Sailing — admin @ 12:17 pm

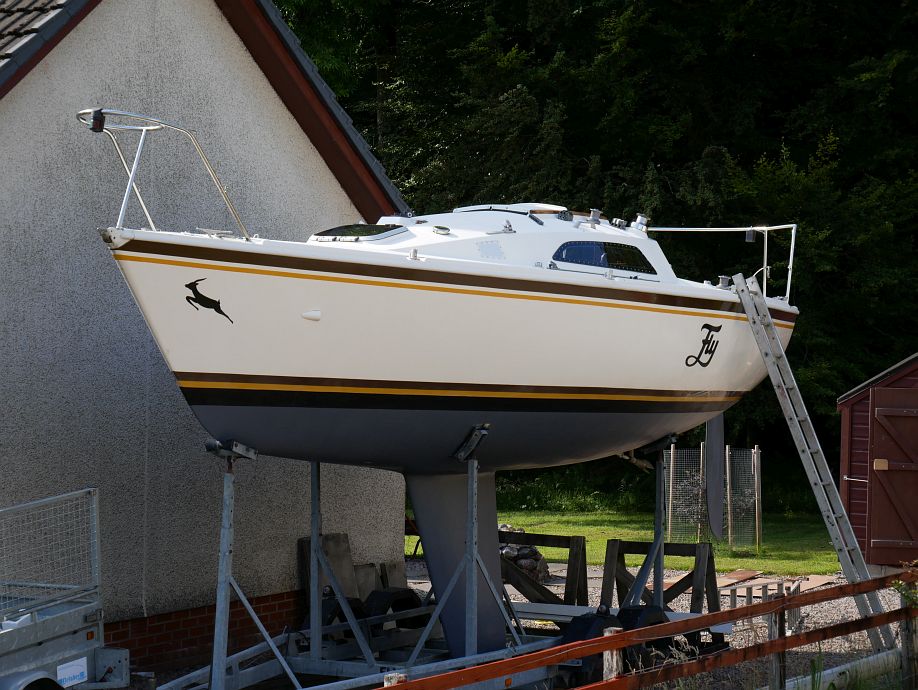
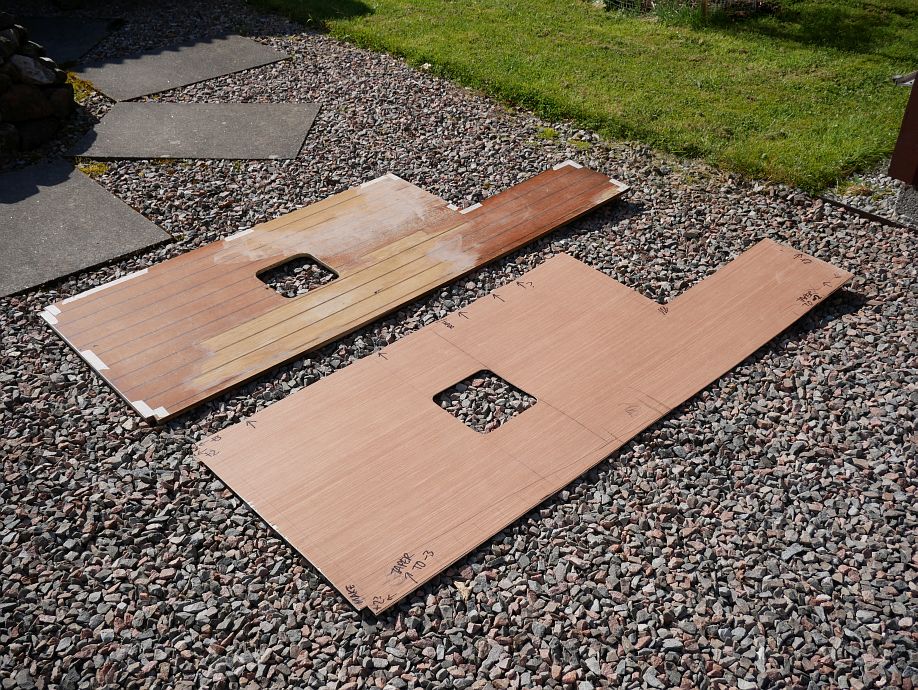
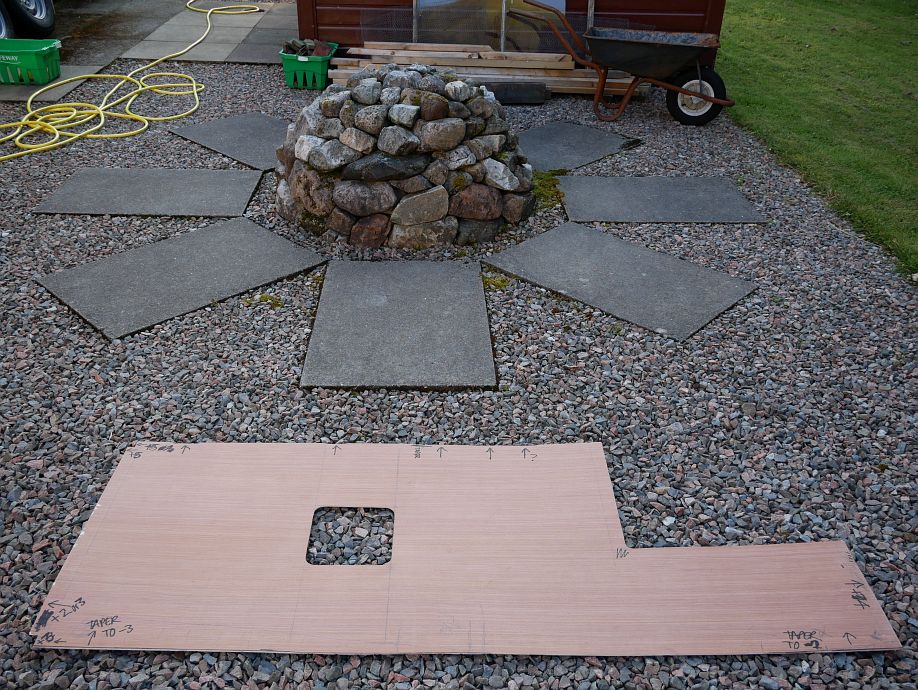
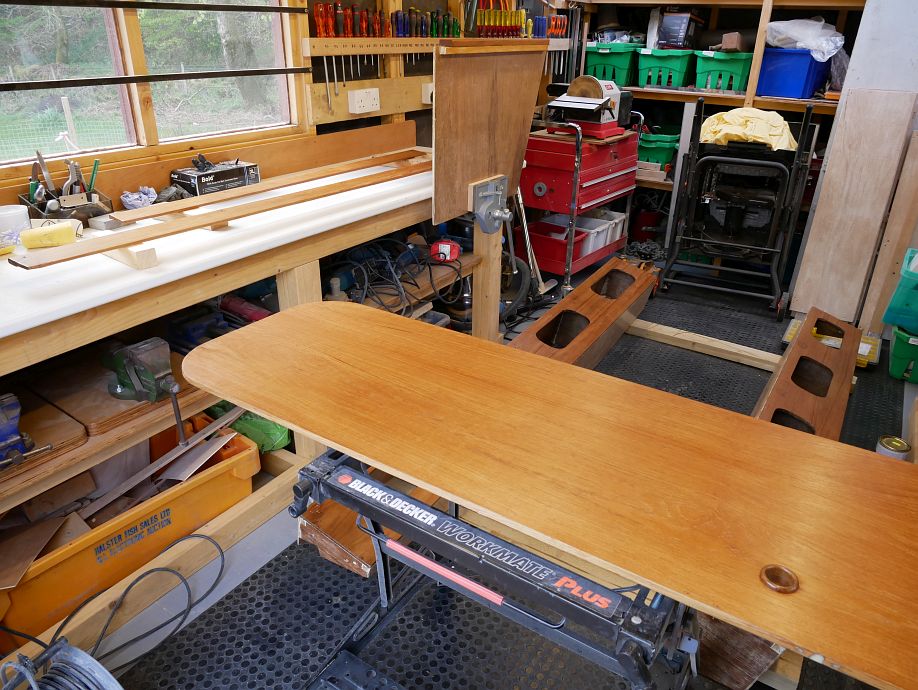
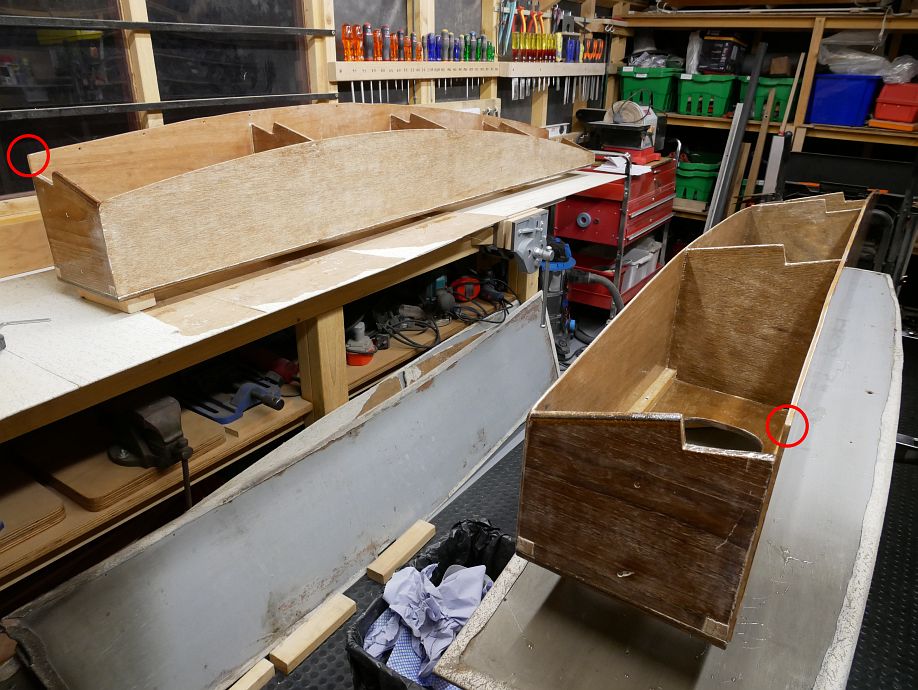
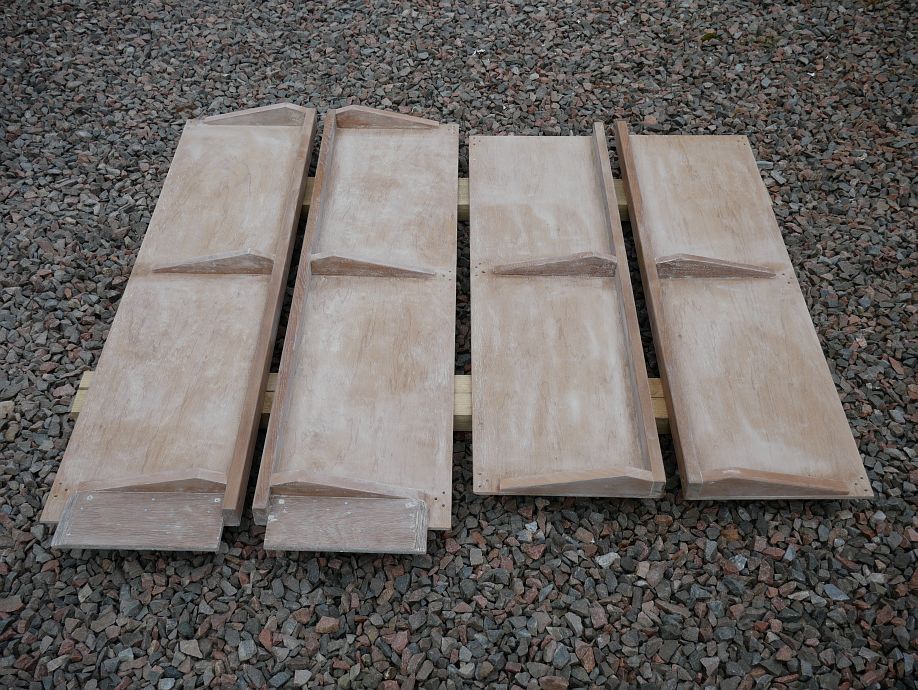
Three blog posts ago, I mentioned my ‘diminishing, but by no means empty, list of ‘pre-launch’ and ‘later?’ jobs’. So, now Fly’s afloat, has been sailing and worked on some more, it’s good to report that just one ‘pre-launch’ job remains (taking a pattern to make new washboards) and the ‘later?’ list has progressed close to what I can reasonably achieve afloat before the winter. But let’s start with fitting the mainsail and going sailing before the new lifelines (guard rails) were even made…

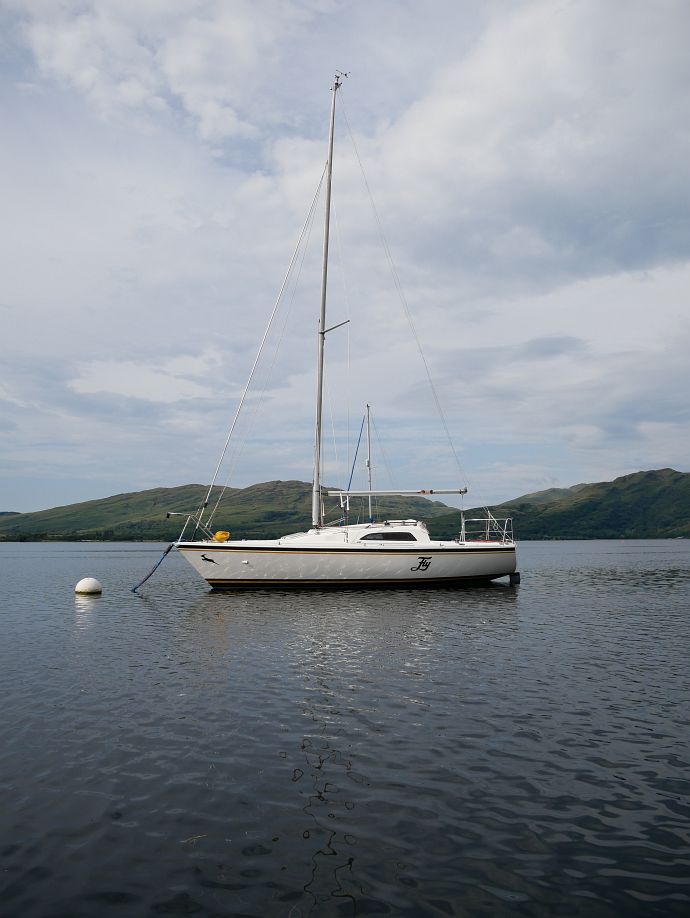
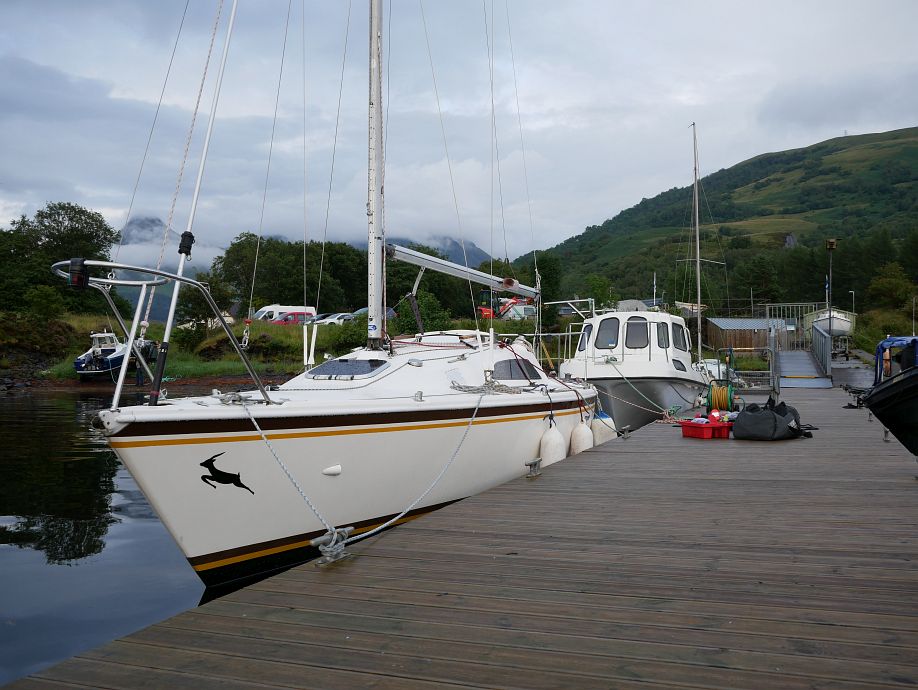
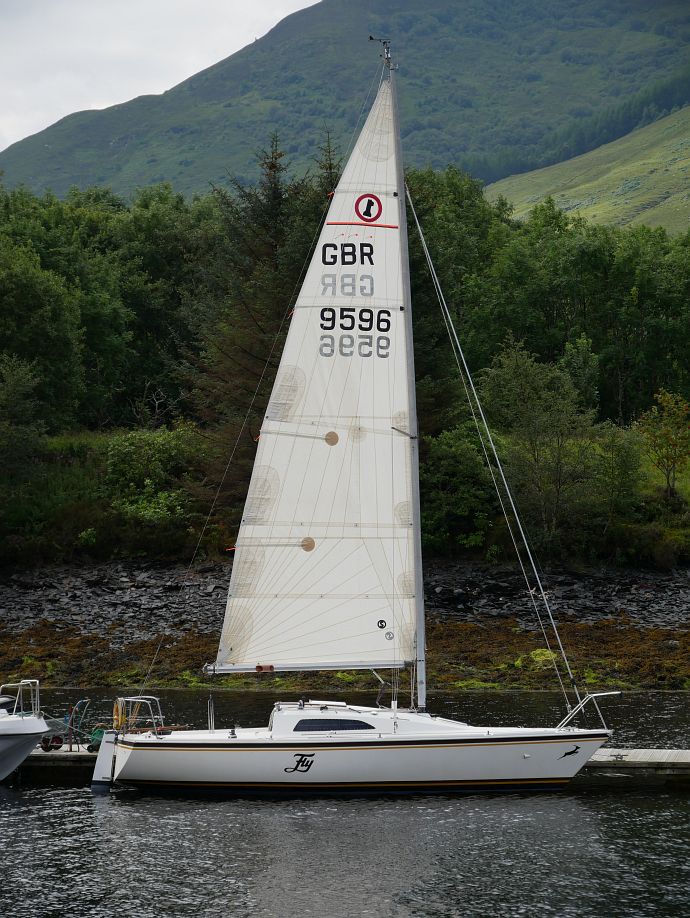
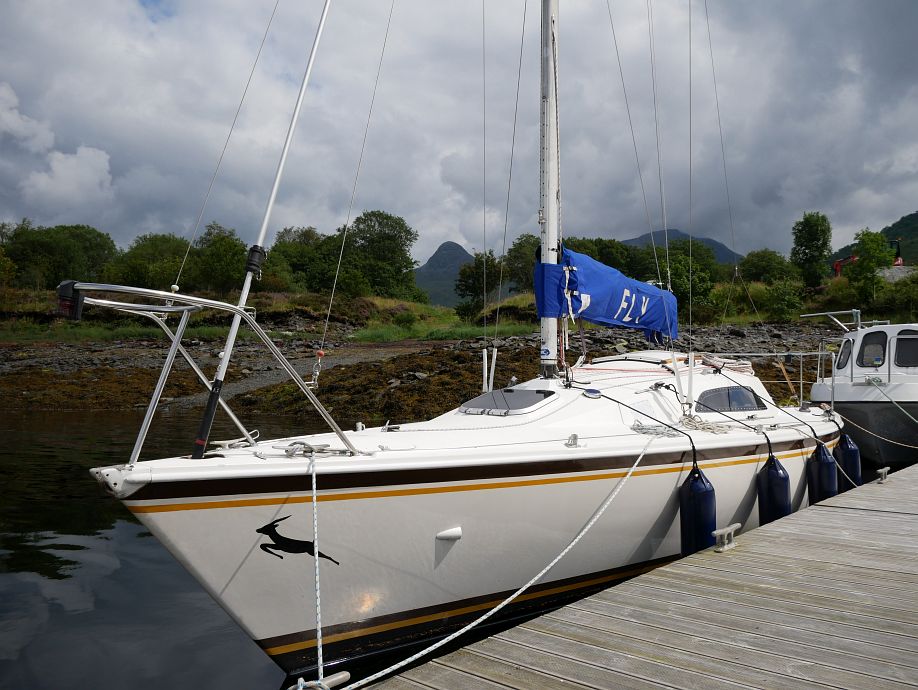
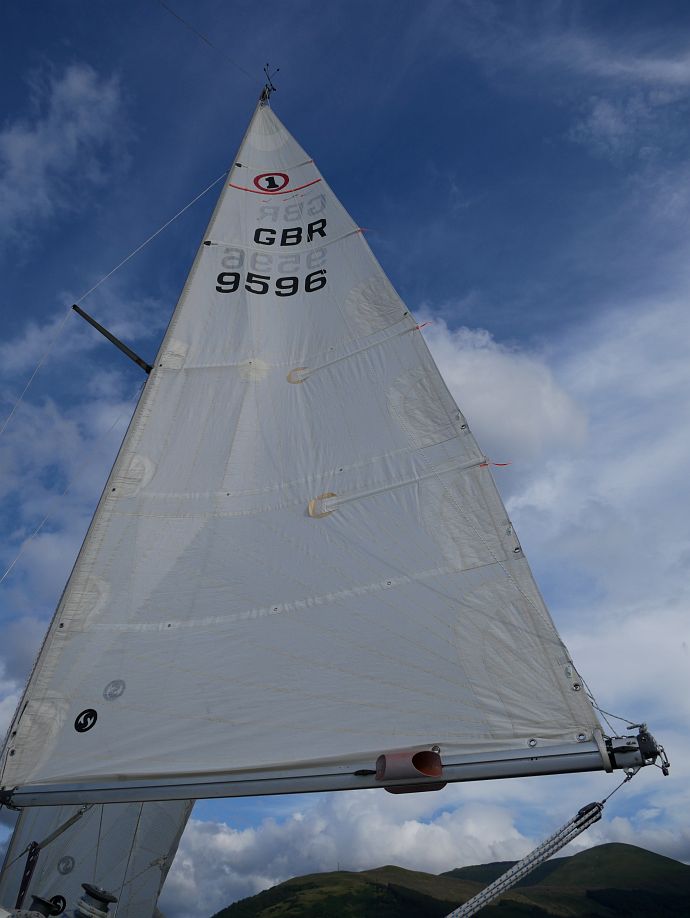
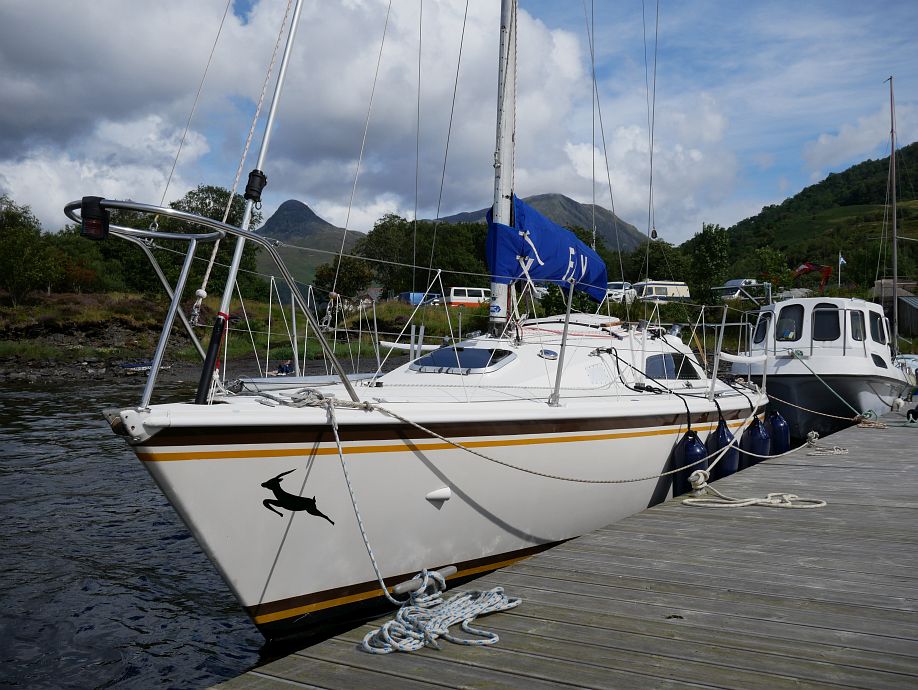
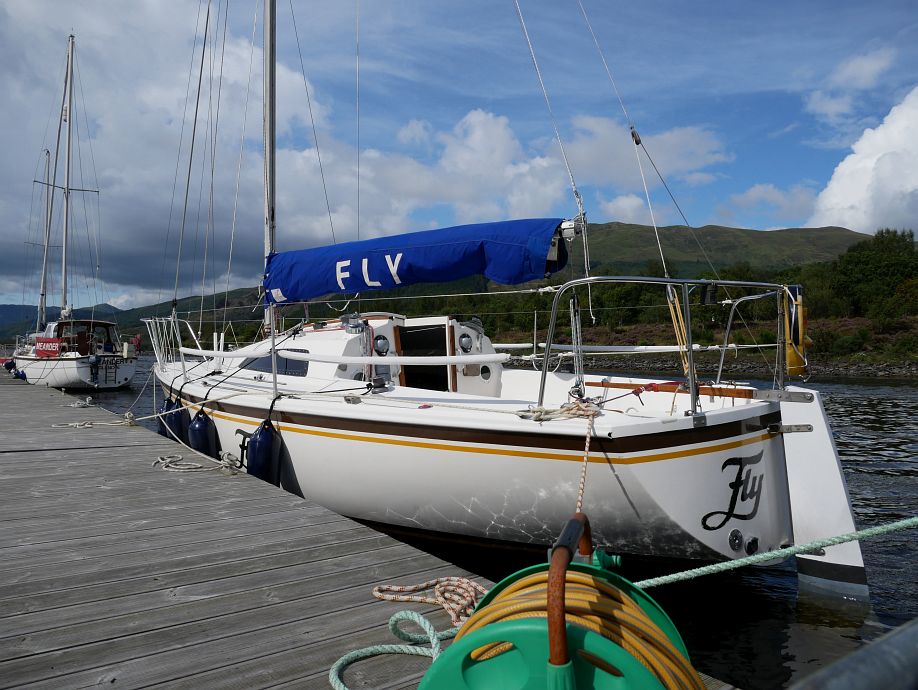
So here’s Fly at the pontoon on 2 August with the mainsail up, then down and covered (when flaking it down on your own is never easy, but patience, sail ties to hand and calm conditions all help!):

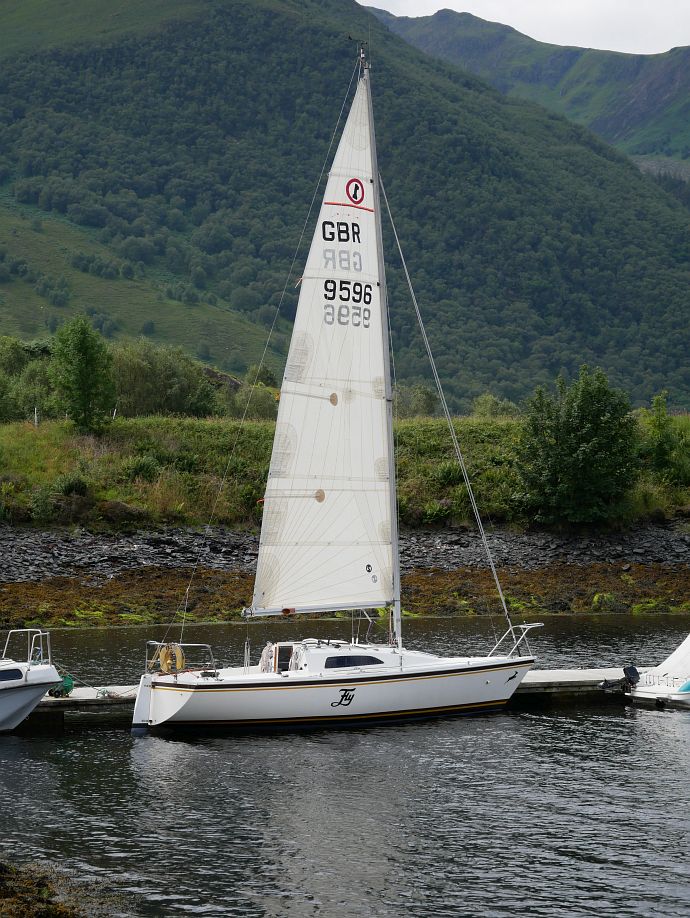
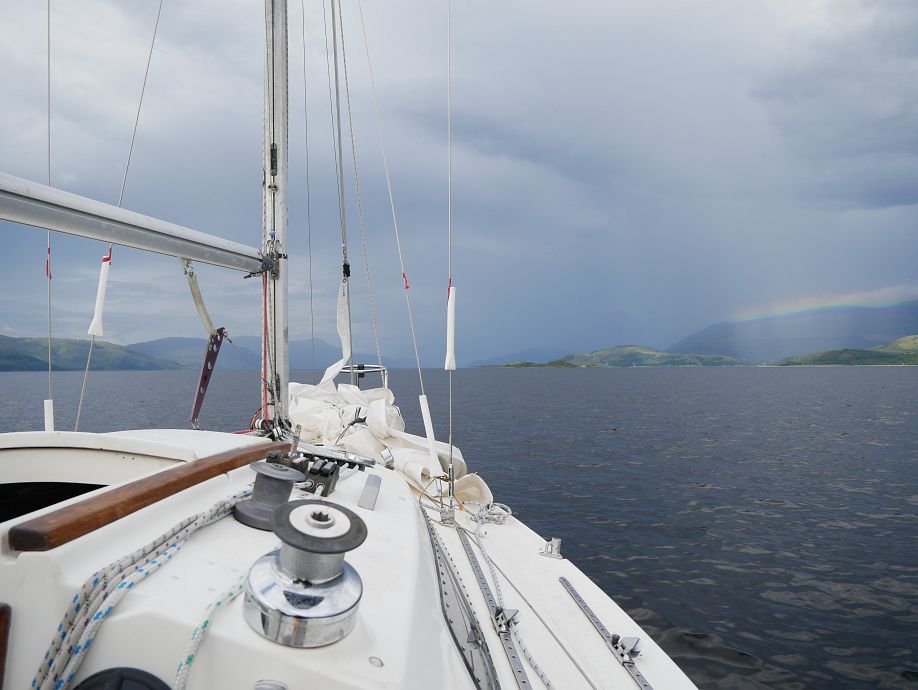
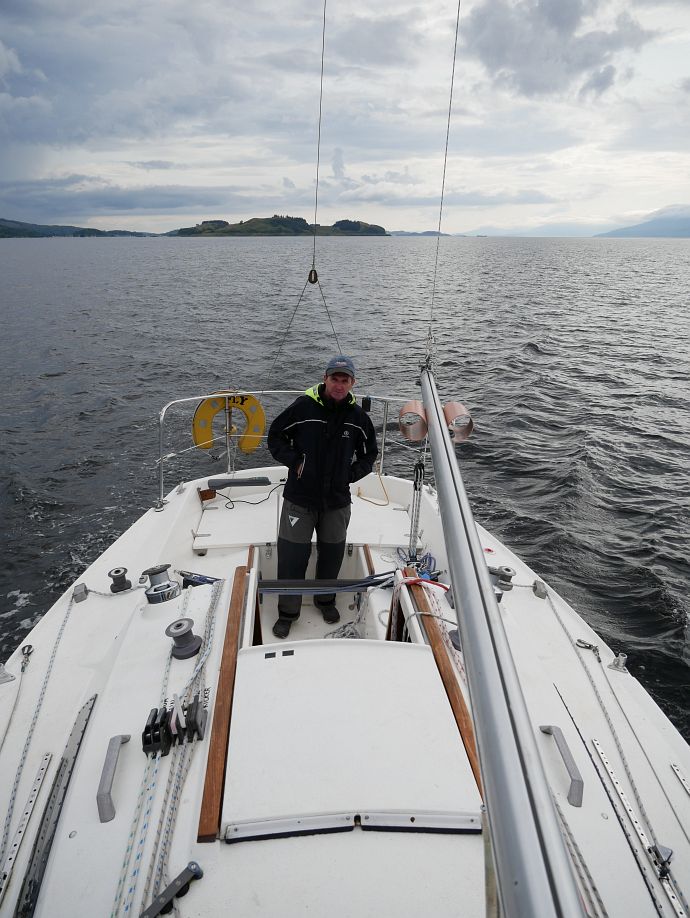
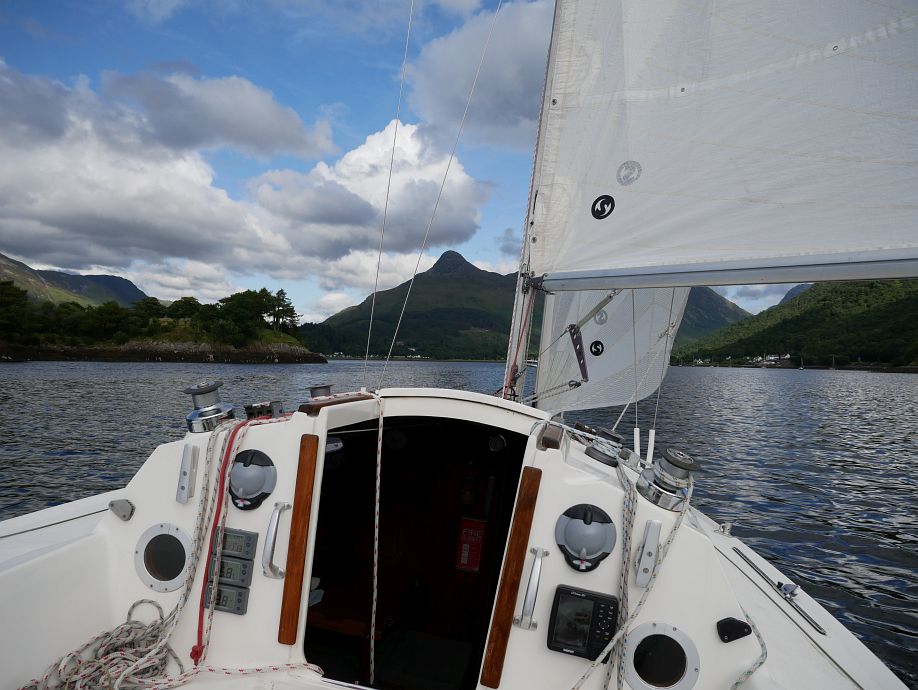
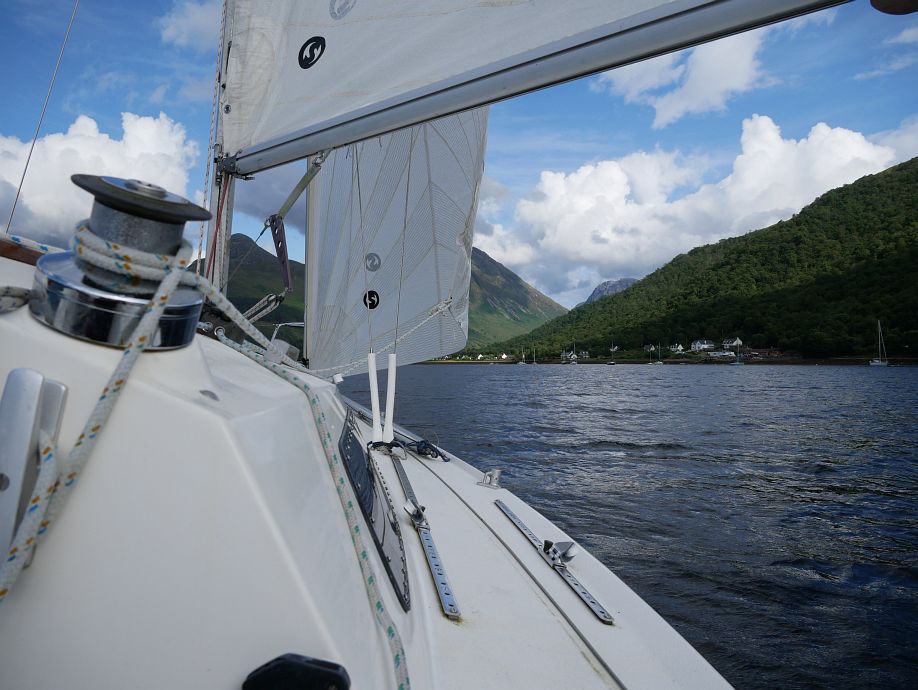
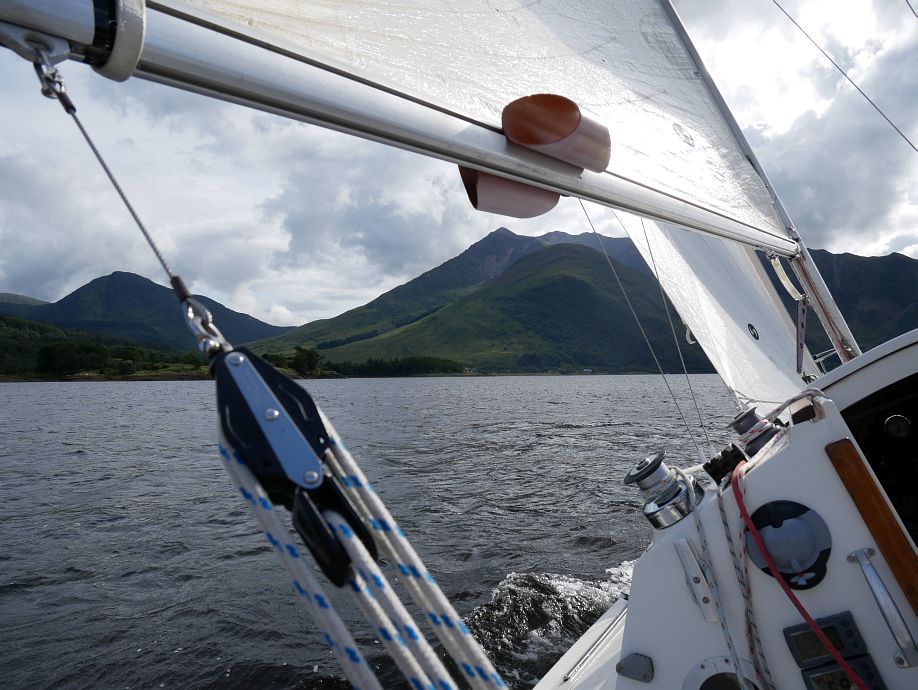
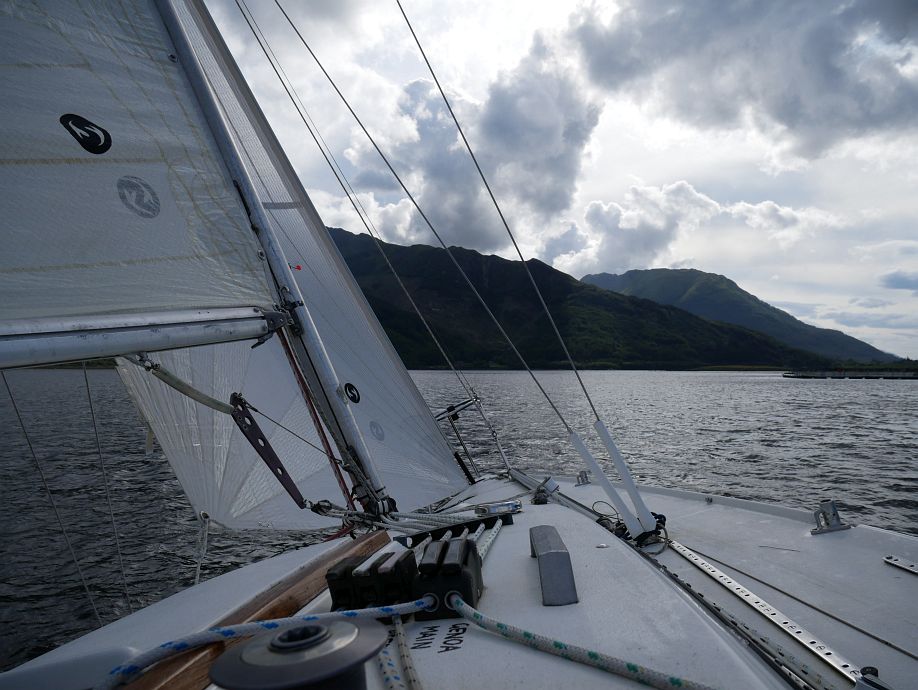
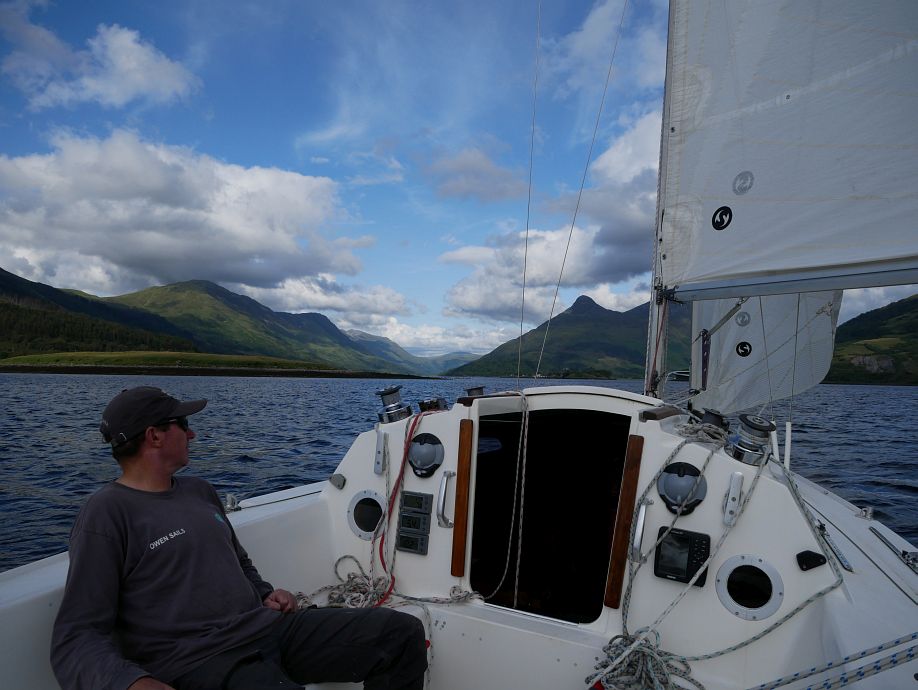
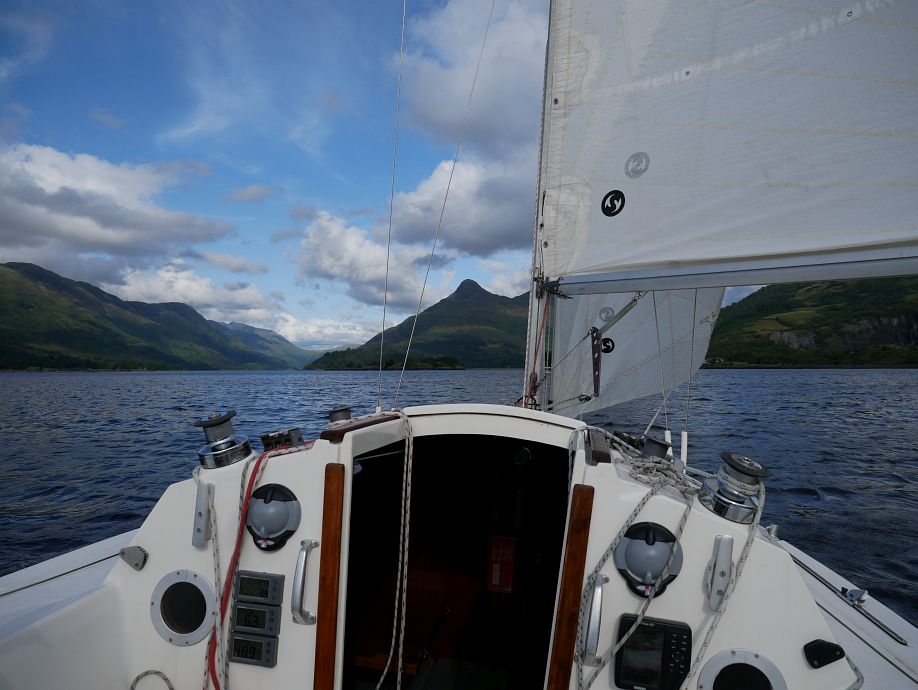
And here she is out for a wee sail on 5 August under main and No.3 in breezy conditions with just two crew (Peter Watt and me), showing some main outhaul and then obvious kicker applied as I moved about looking at the shape of that sail:

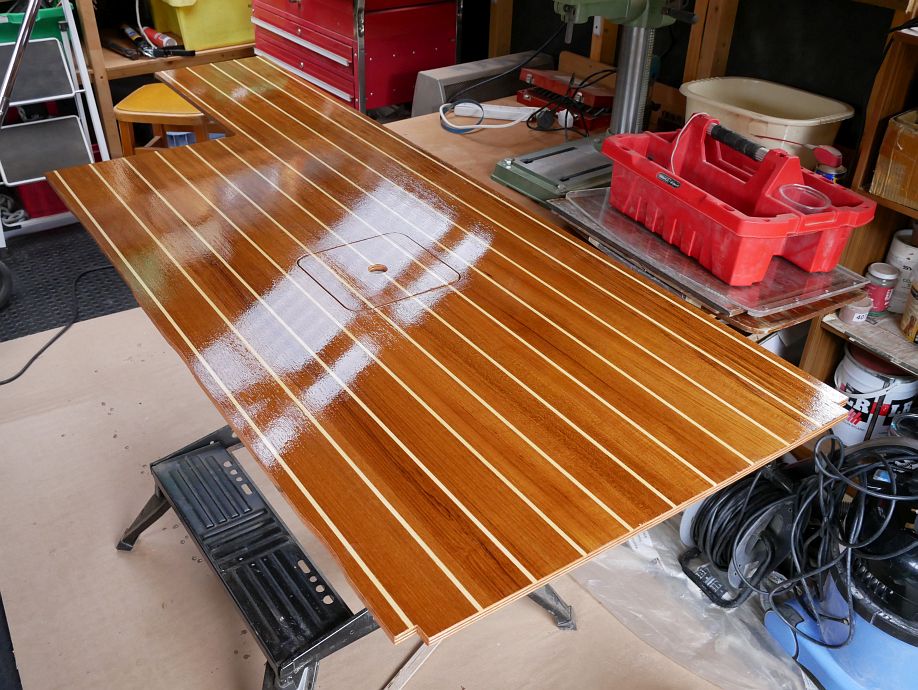
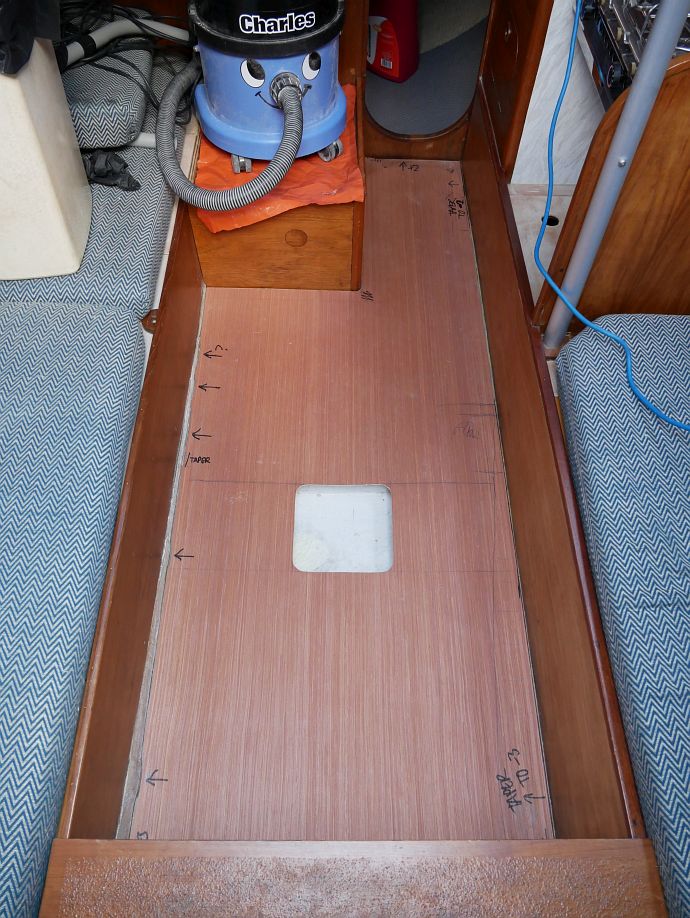
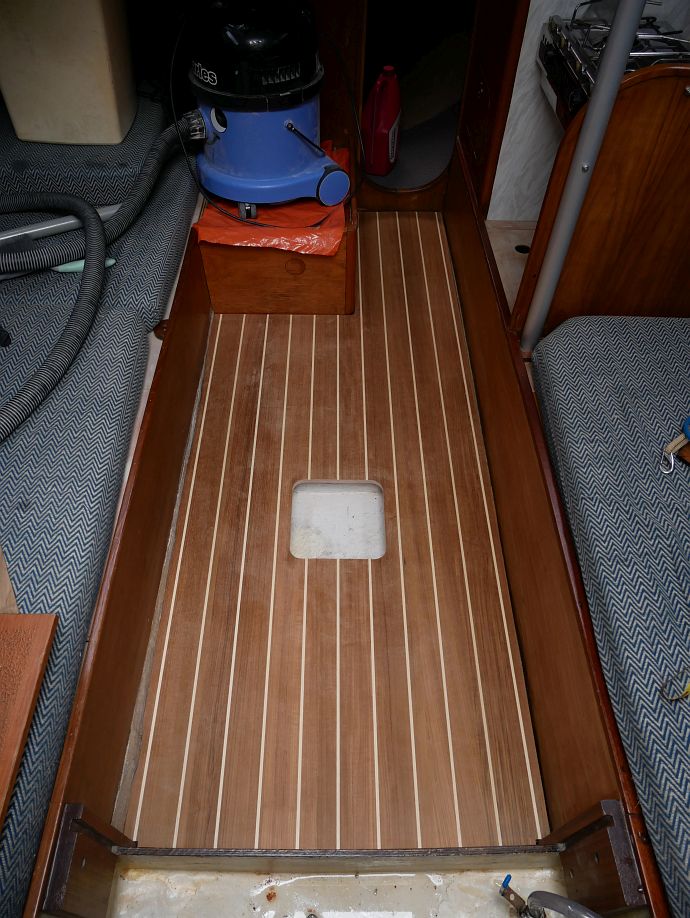
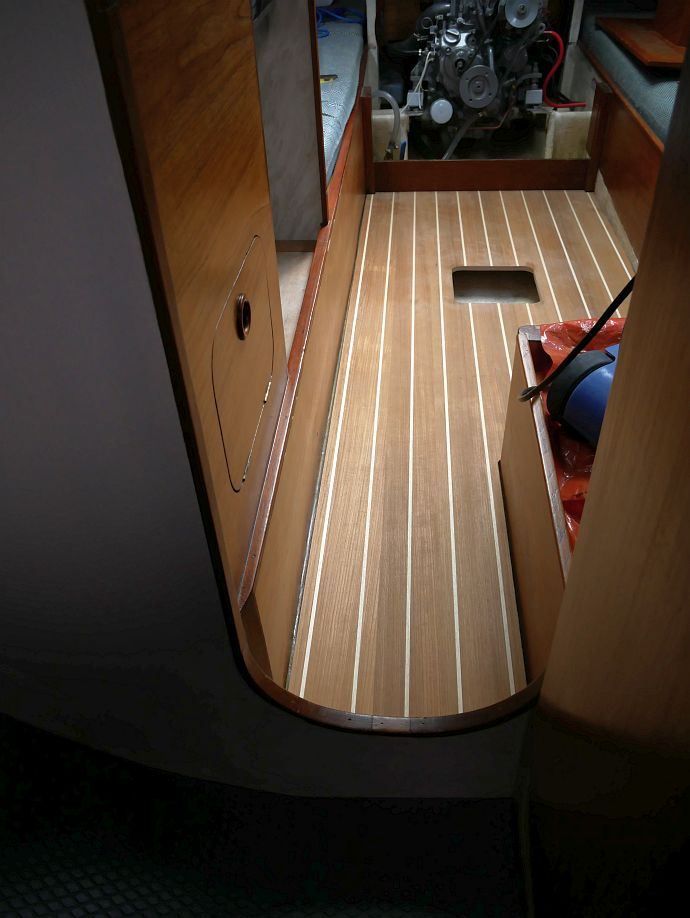
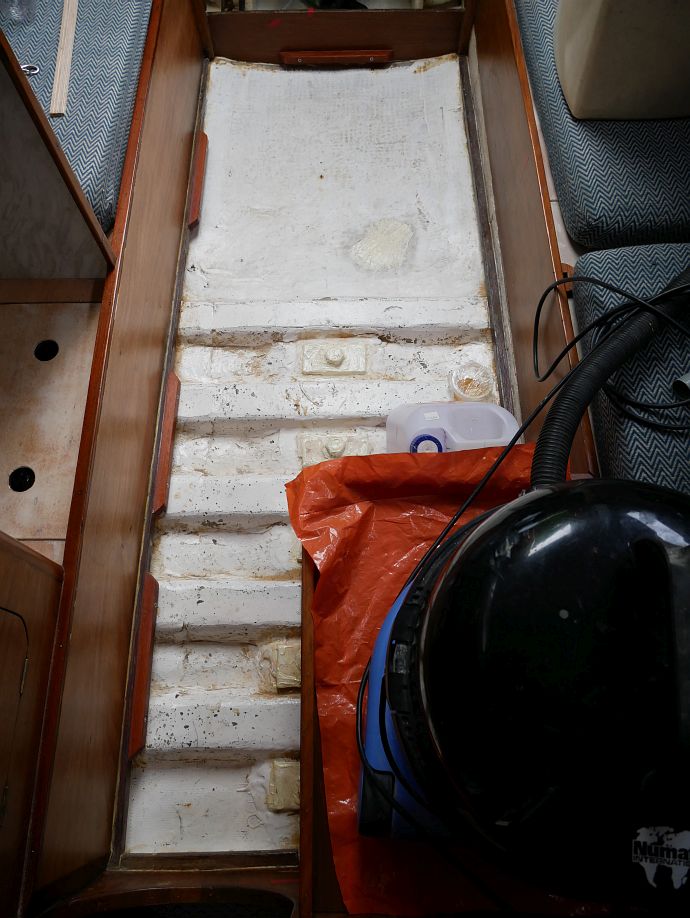
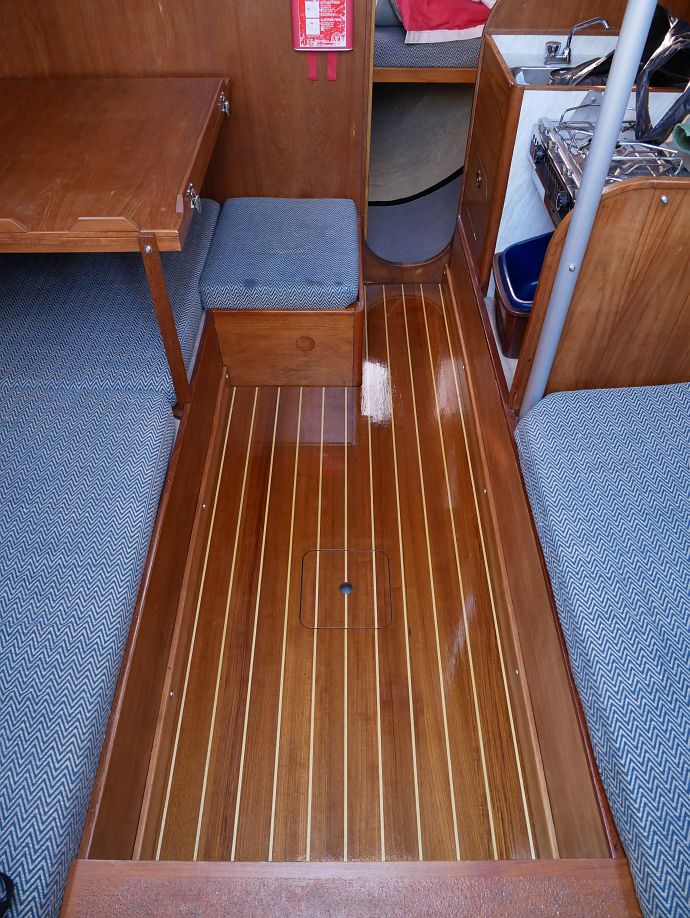
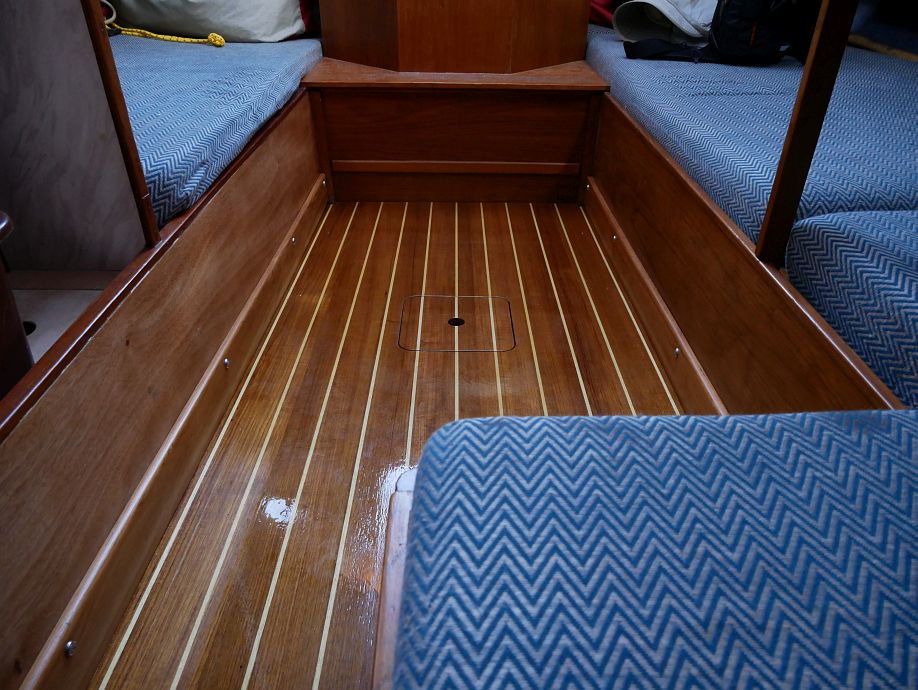
That morning, I’d fitted my new cabin sole and it got its first dent during our afternoon sail from unsecured, flying washboards in the cabin… my fault when I should know better, but it’s ultimately for walking on, not admiring, and you can’t actually see the mark here even though it’s in the photos:

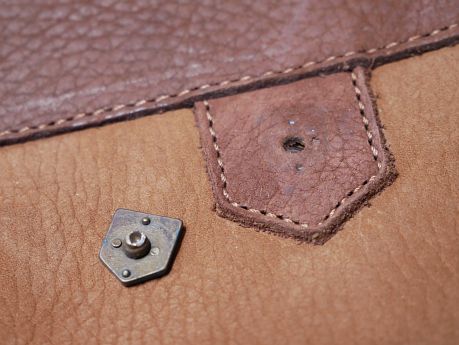
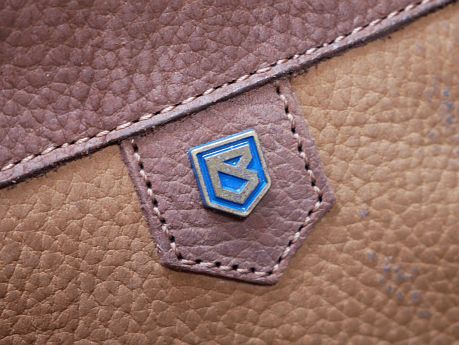
My other slight gripe from the sail was ripping a wee metal badge off my new Dubarry boots, for which I blame Dubarry and not me for such a vulnerable and unneeded addition to expensive boots built to be used in situations where it’s almost bound to catch on something sooner or later (in this case sooner!). So I now have one with badge and one without, and have pondered without further action whether they’d both be better ‘clean’:

I’d also fitted new Lewmar winch handle pockets that afternoon before discovering that they really don’t take my new Harken handles comfortably at all, so also already pondering replacing them with something which does.

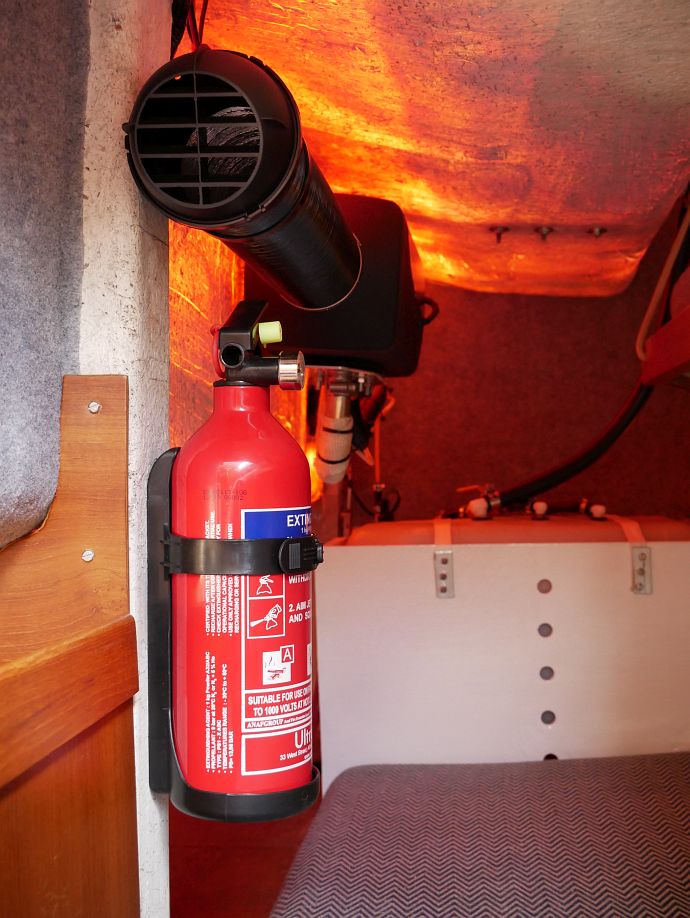
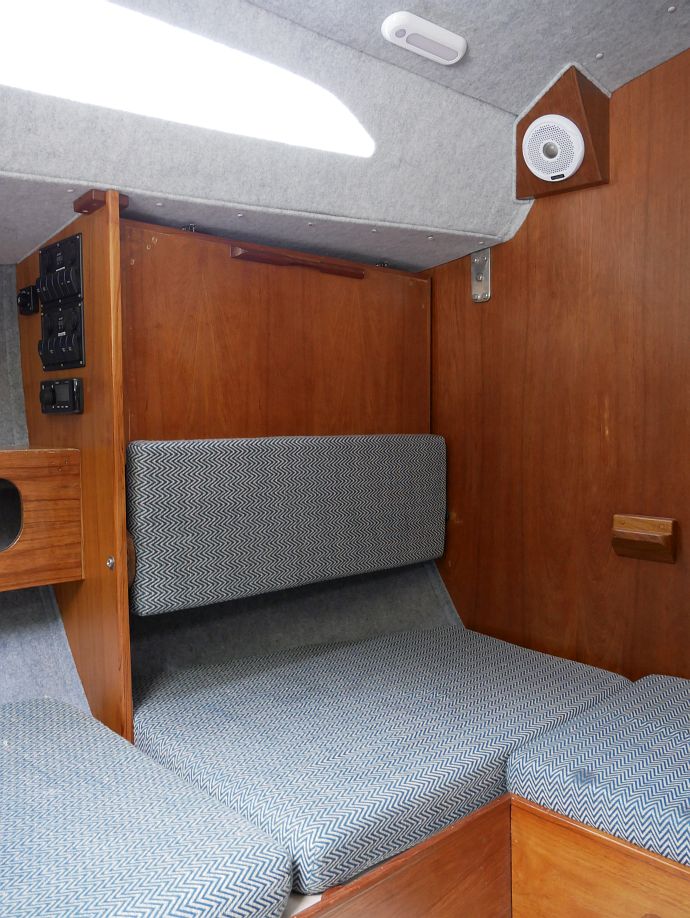
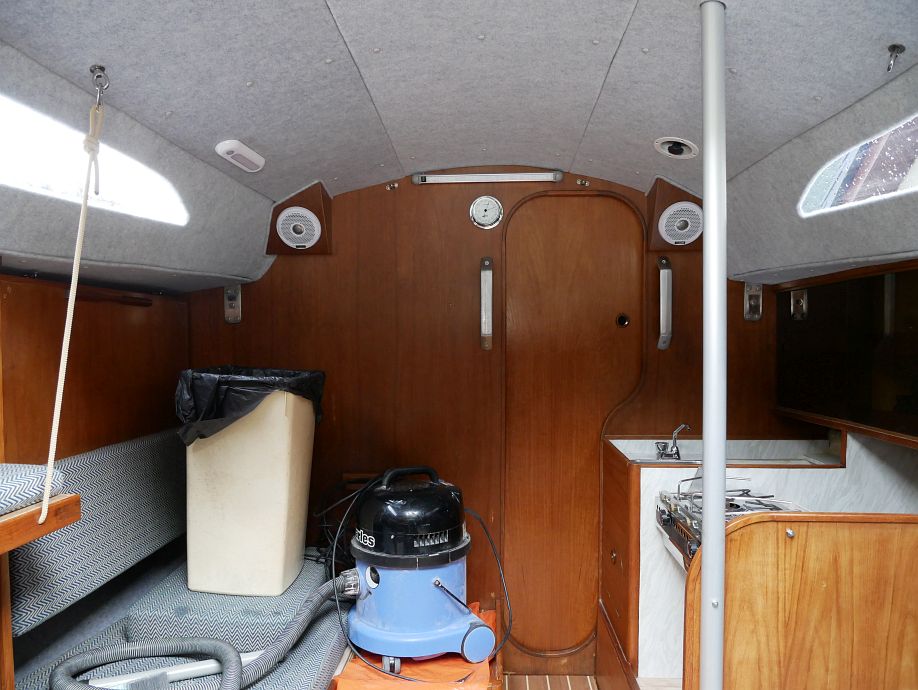
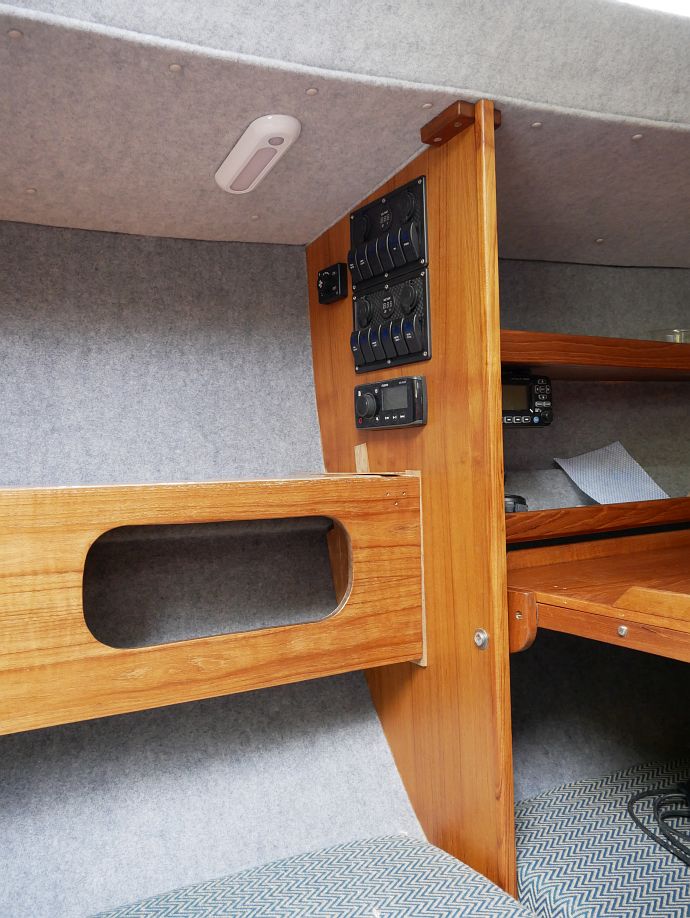
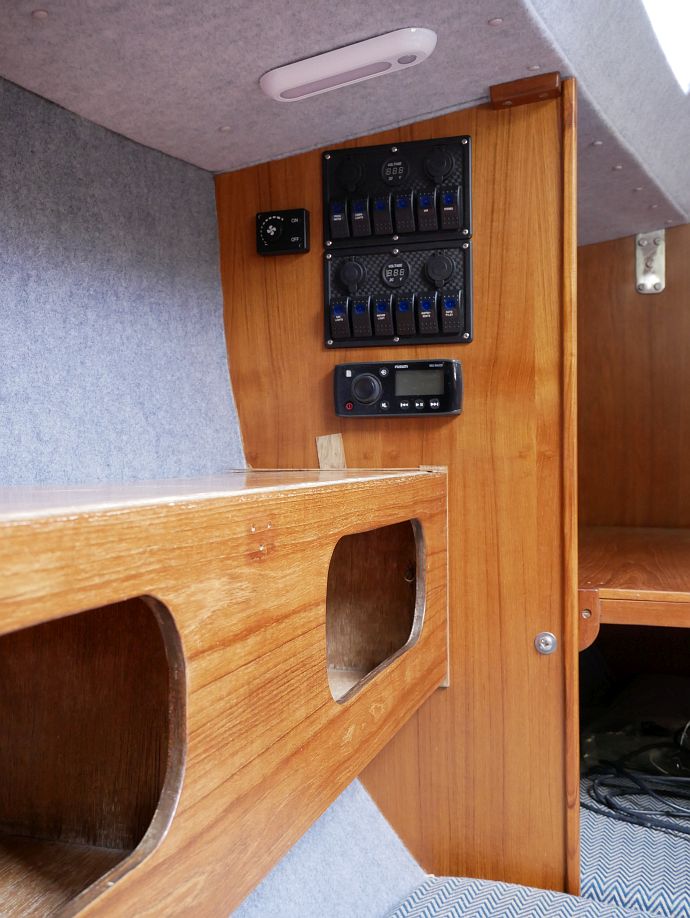
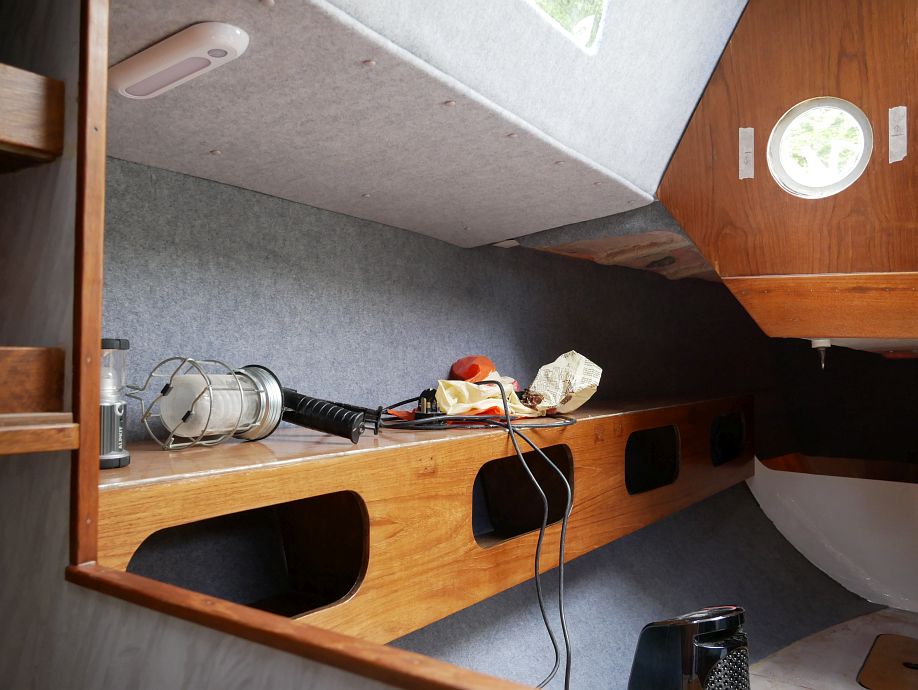
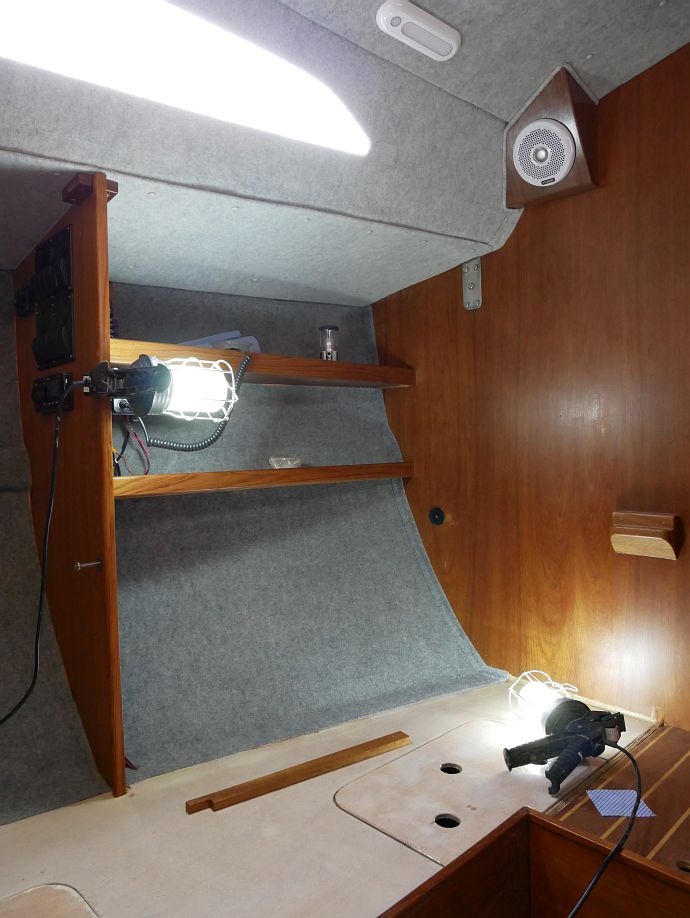
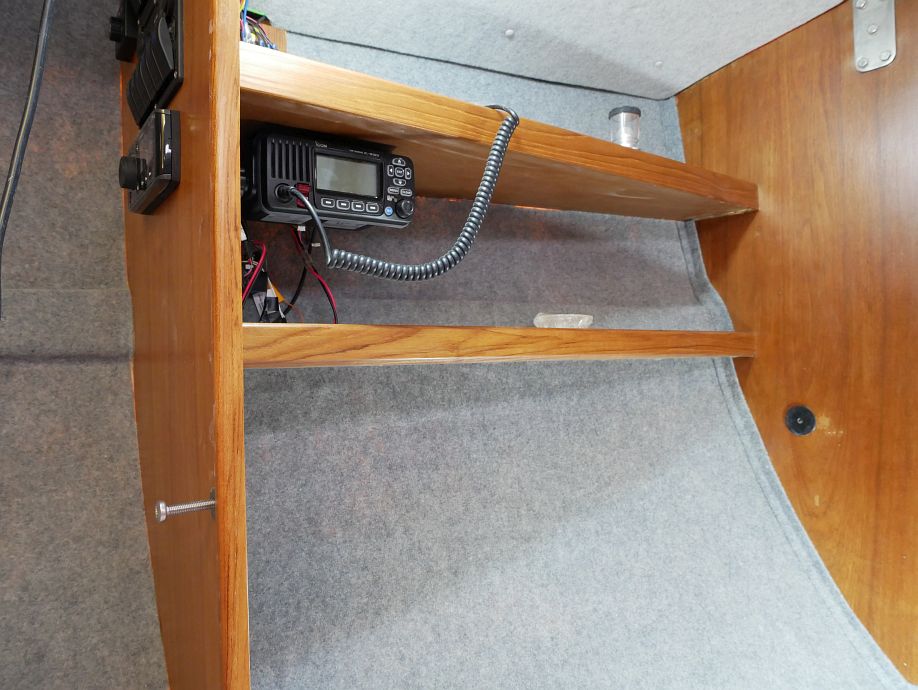
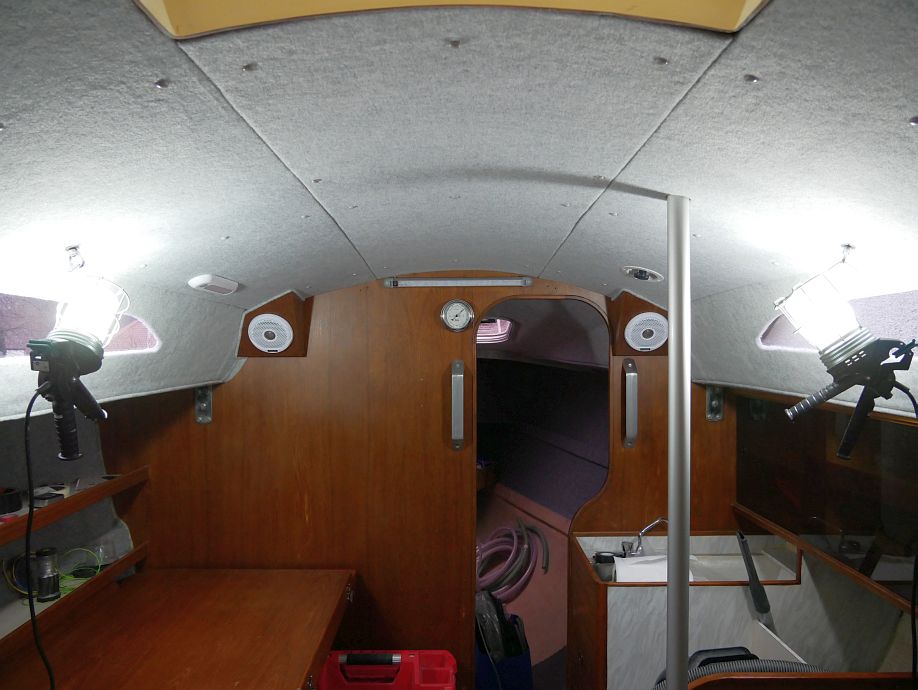
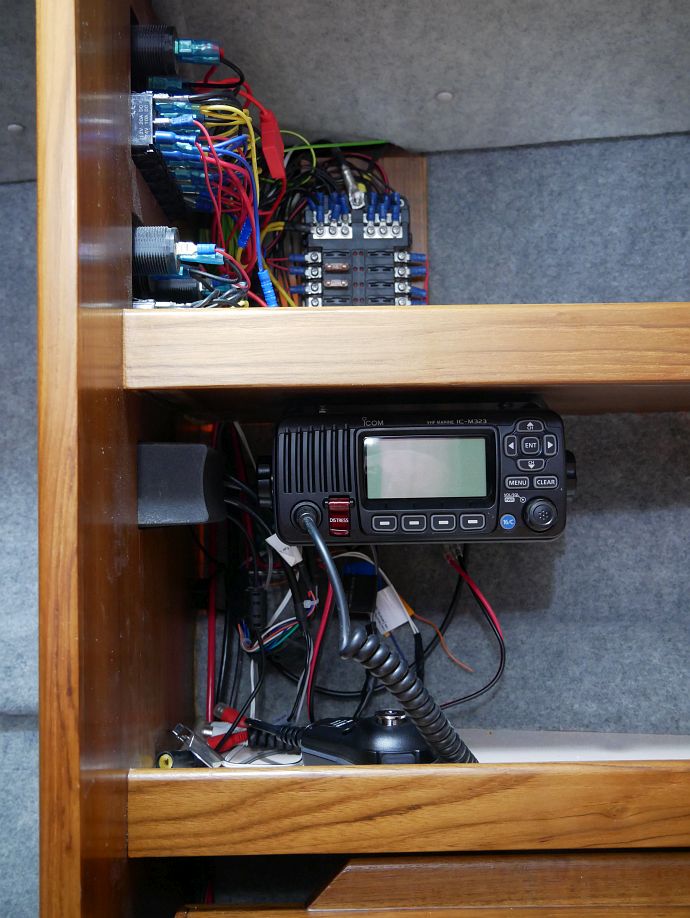
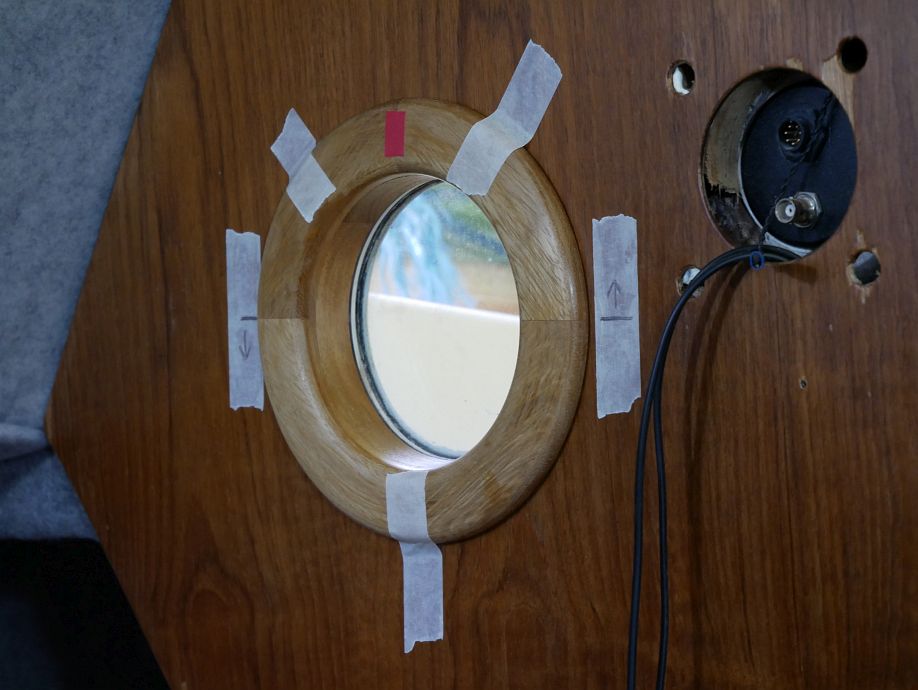
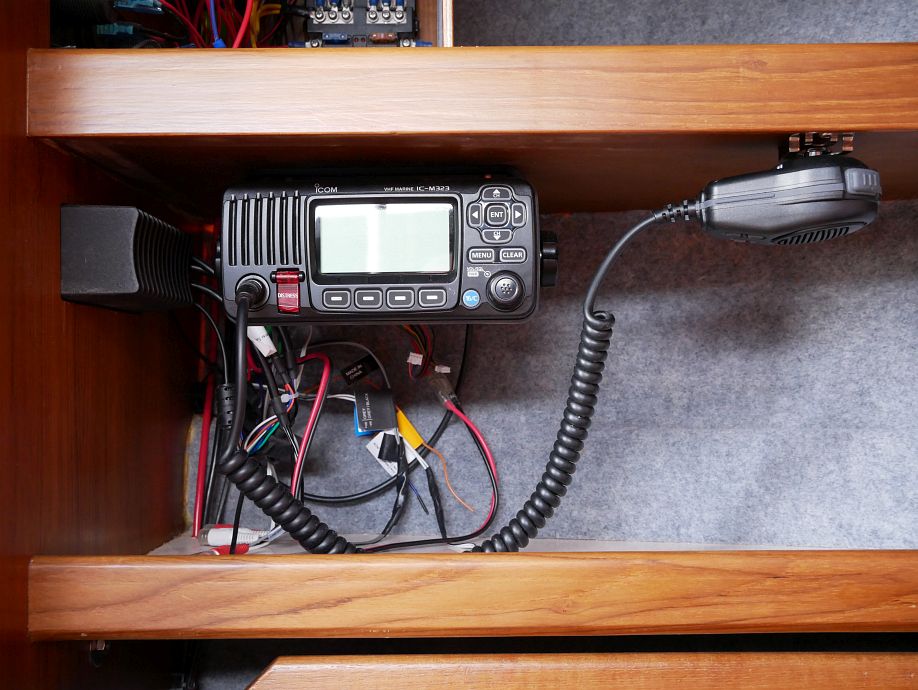
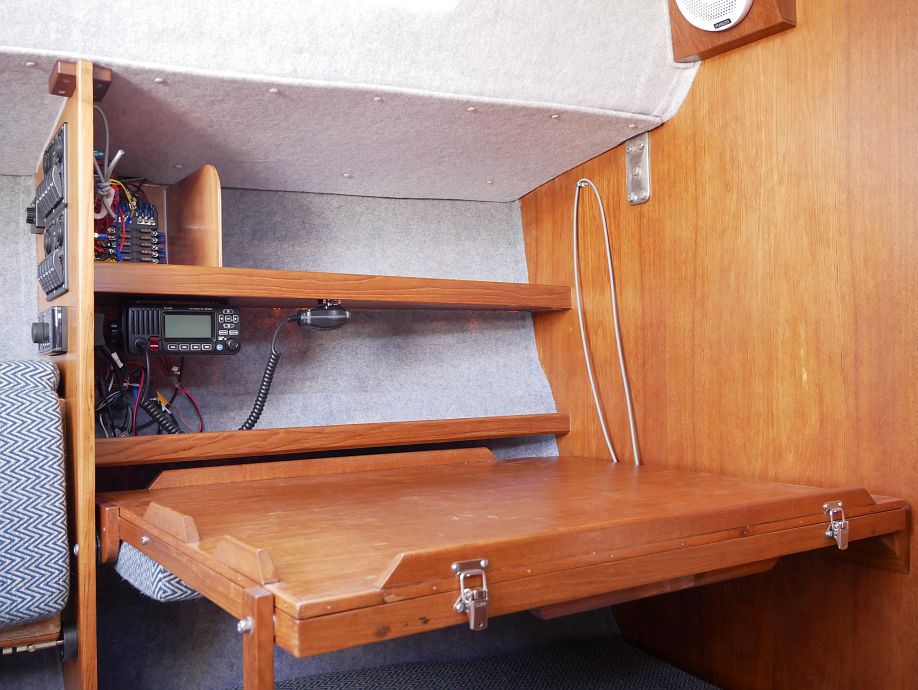
Getting back to more interior fitting out, the best place for the VHF mic clip was under the shelf, which required the angle drill I’d wanted for months so finally just bought:

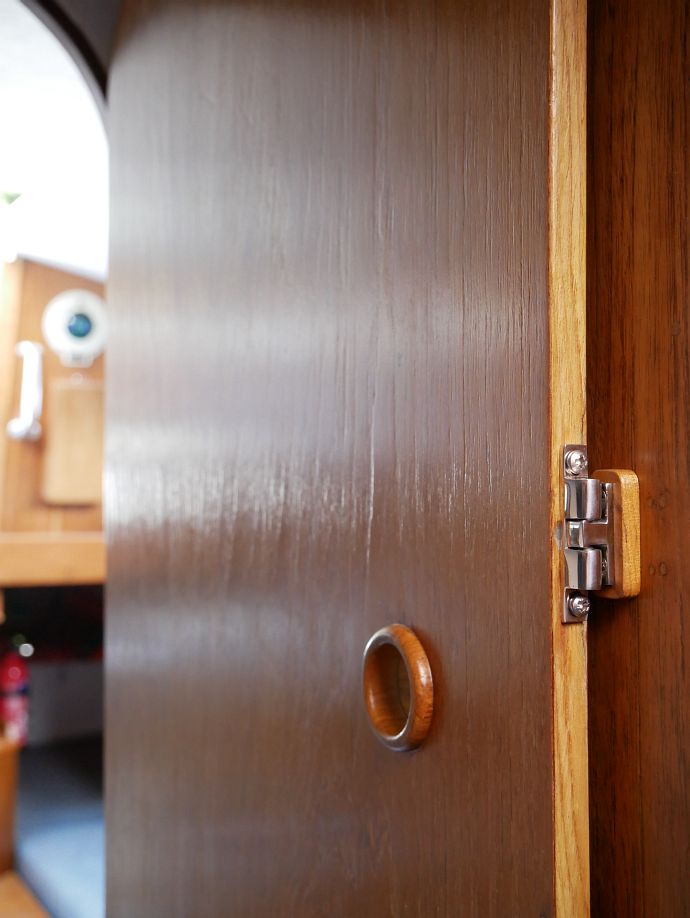
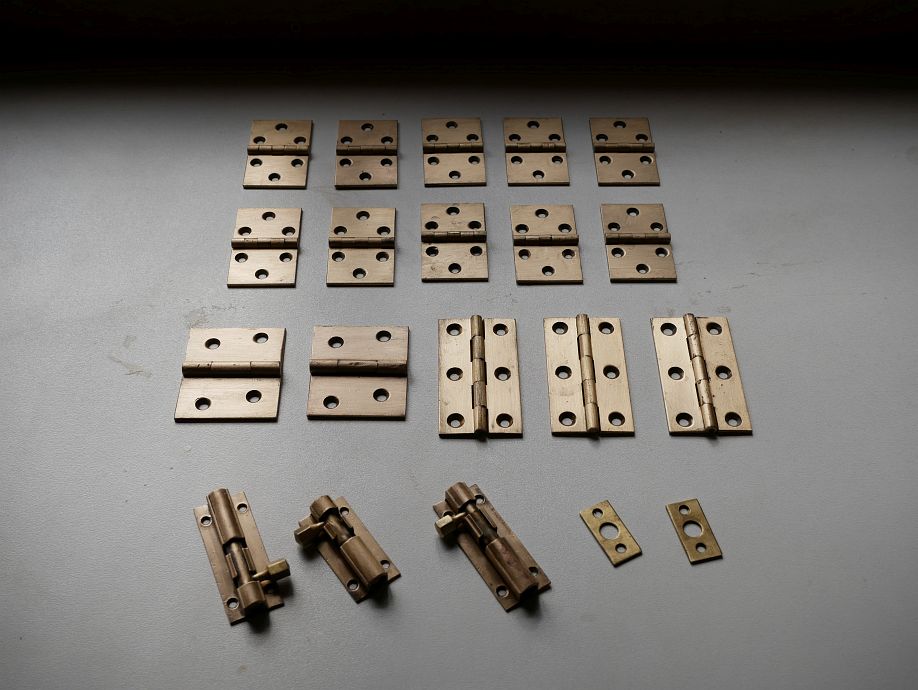
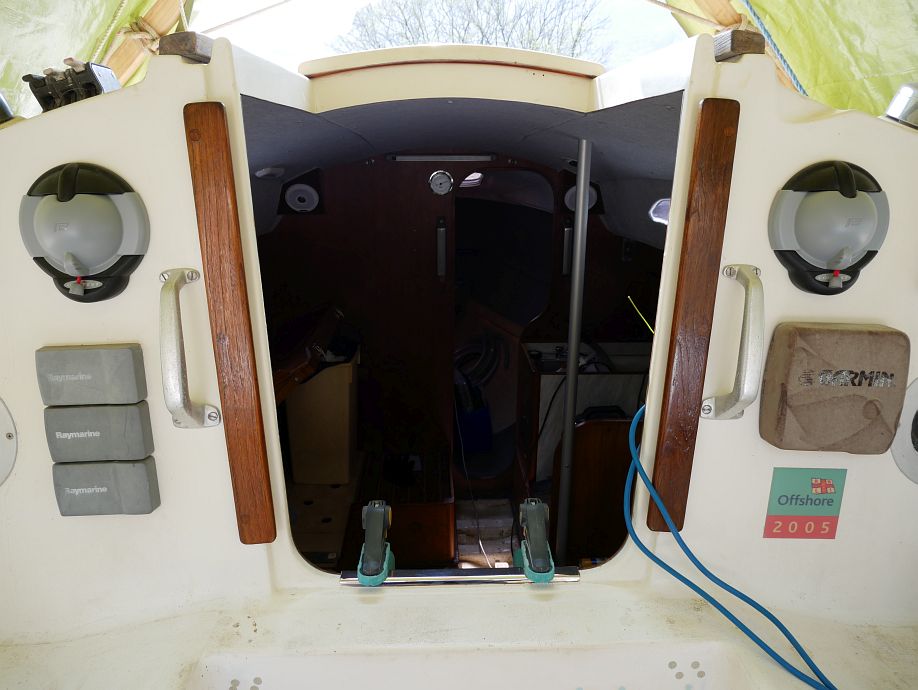
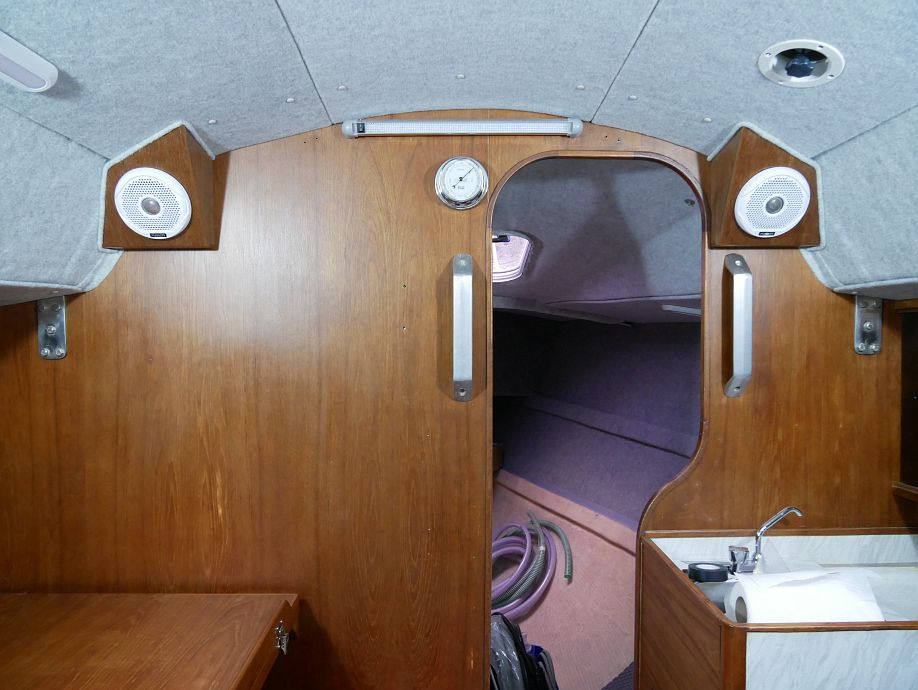
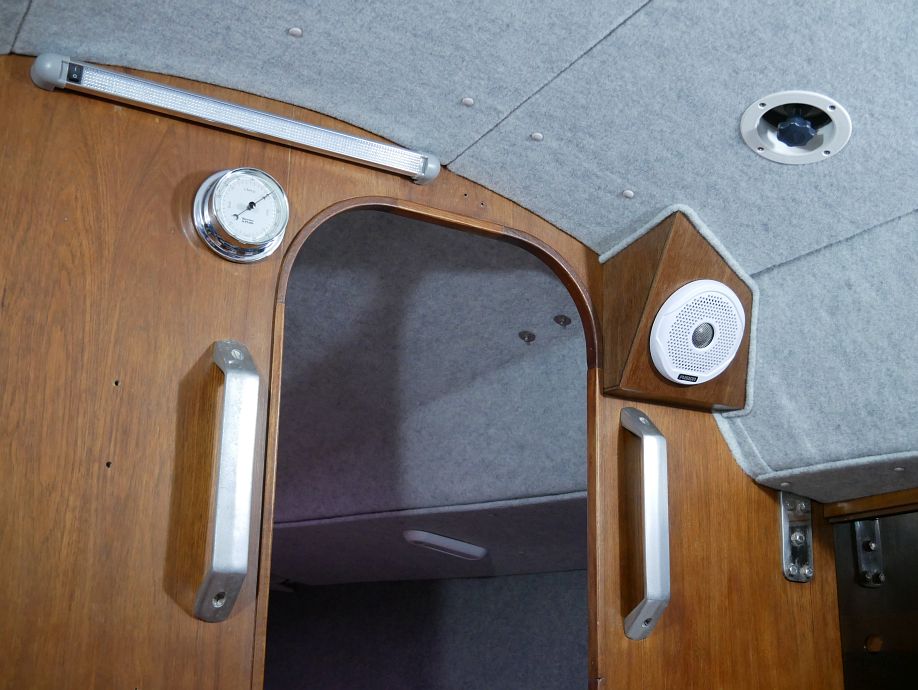
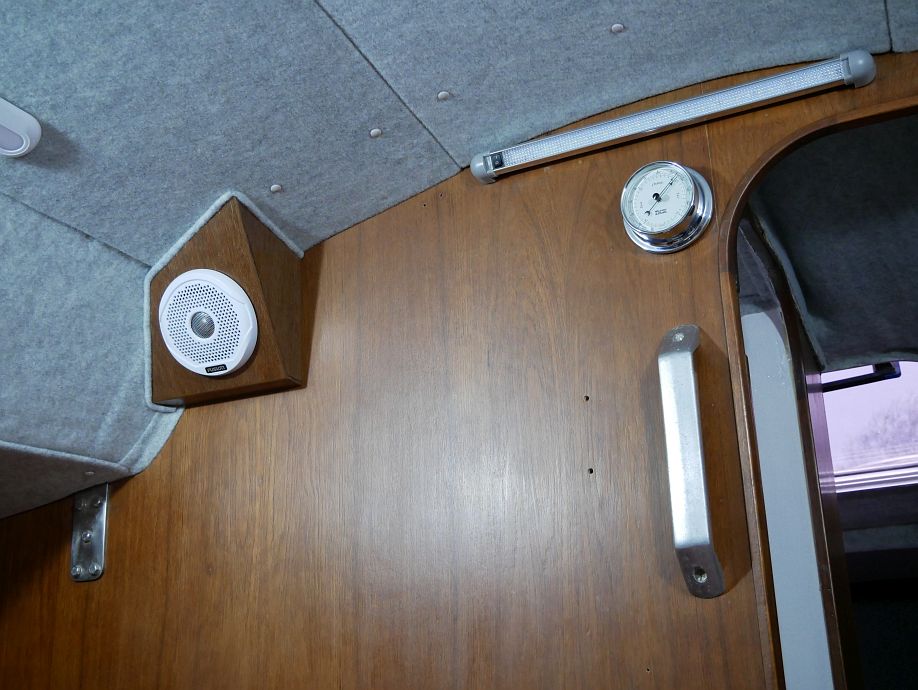
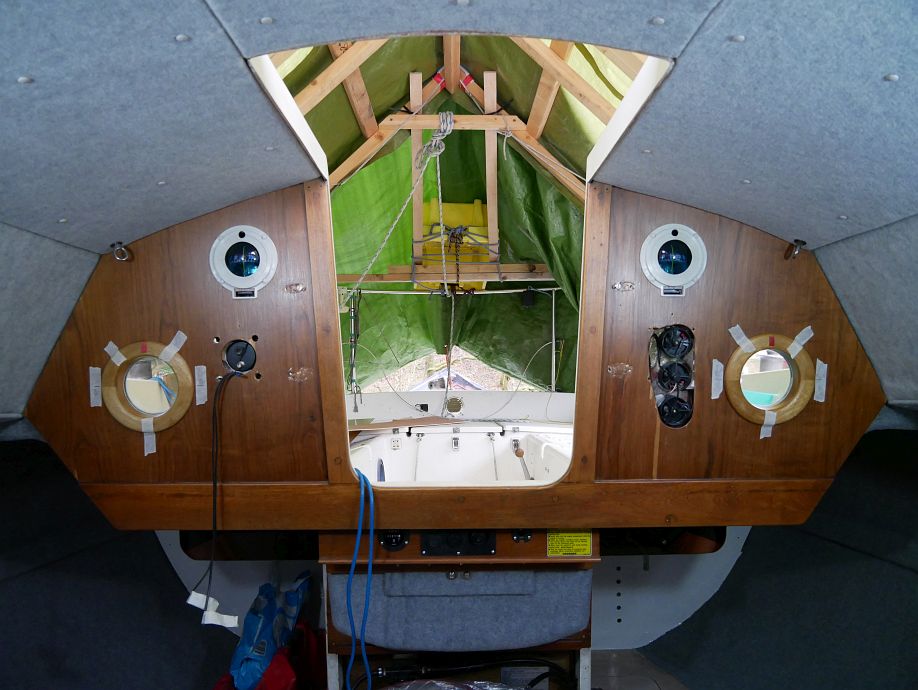
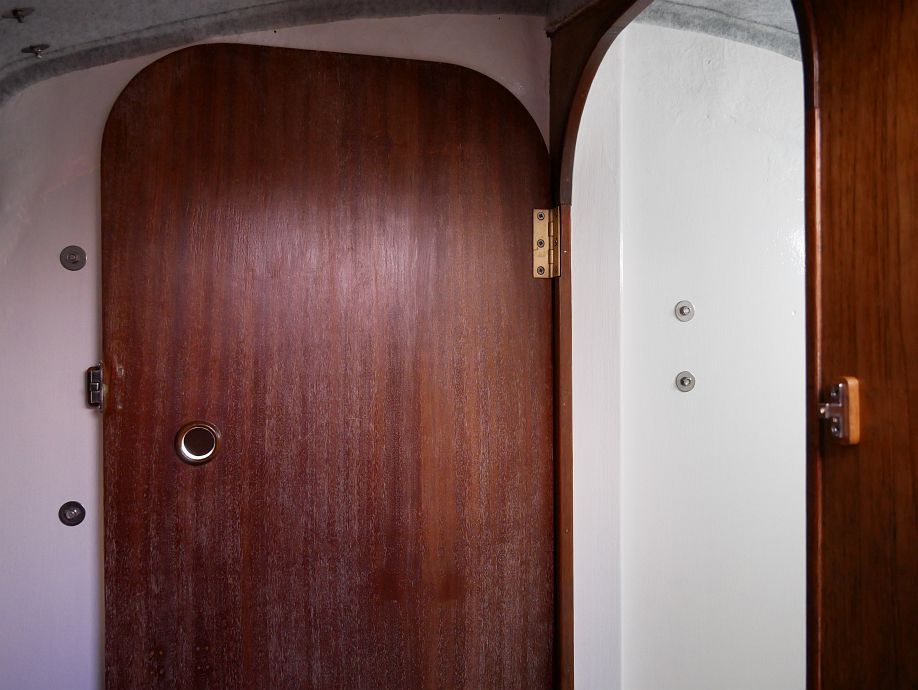
I got that heads/main bulkhead door to work in both positions with the same catch body, but had to adjust the bit I’d already done slightly now the boat’s afloat and rigged before fitting the second small part. Fortunately the main part in the edge of the door was easy to adjust because its screw holes are short slots rather than just round:

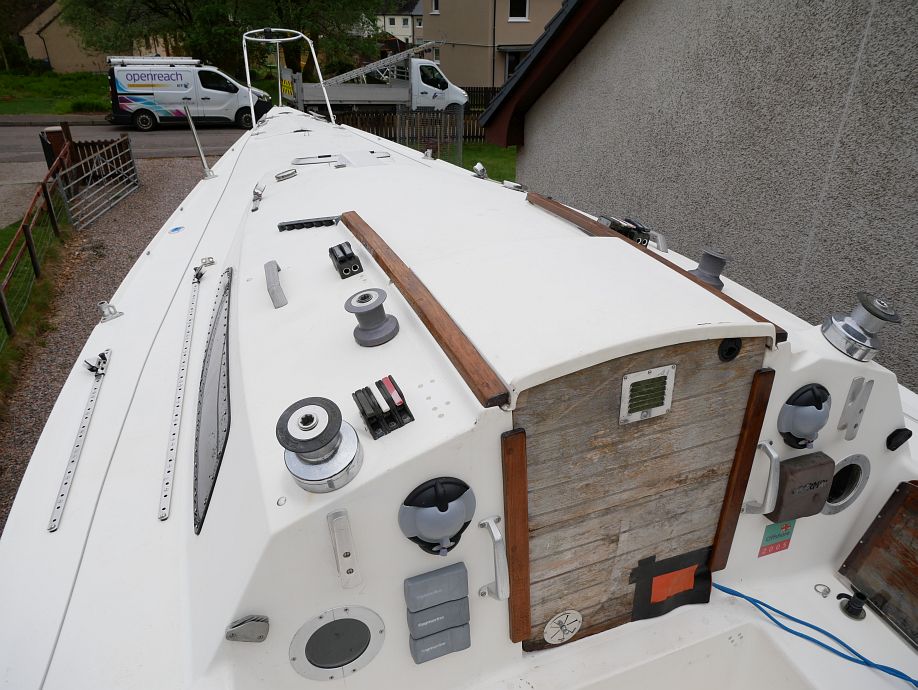
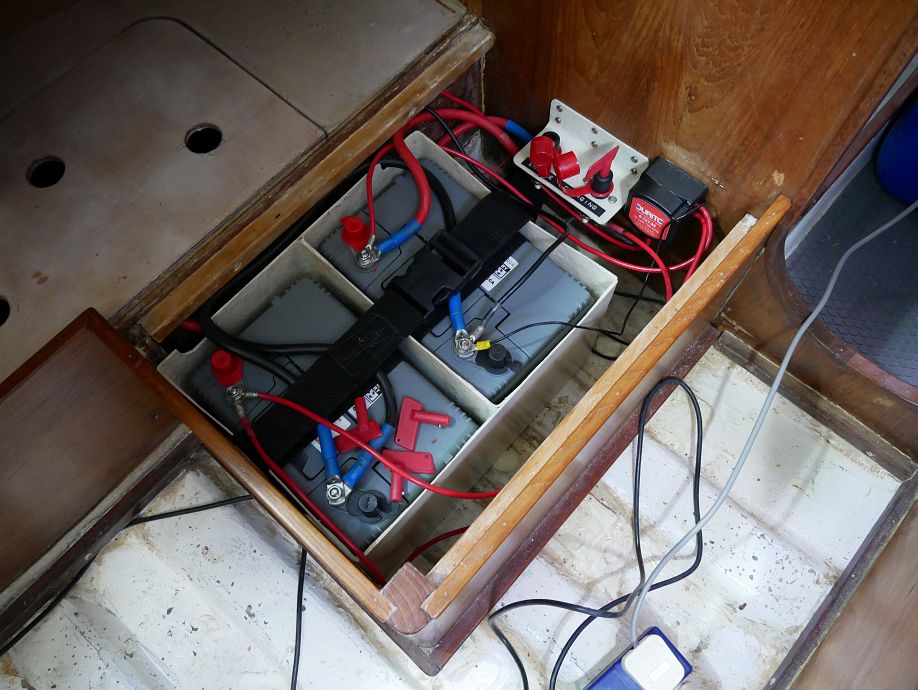
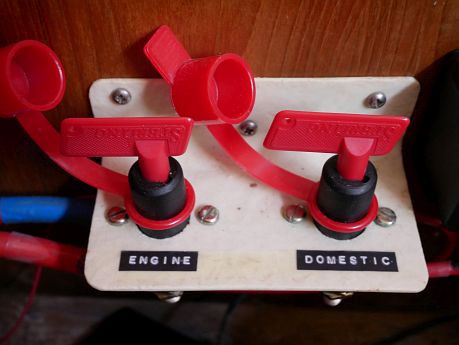
The labels that came with the switch panels didn’t have everything I wanted so I started again with Dymo (actually done pre-launch). Quite tricky when the cutter on the Dymo will only give you three letters in the available width, but careful trimming with scissors gives you four and I’m OK with most of my abbreviations (not sure about H20, but didn’t like WAT, and not set on RA55 for STEREO, but thought STE or STER could get read as STERN). Also discovered the other night that the blue LEDs stop the cabin getting completely dark when switched on, so still considering ways to deal with that if necessary. The battery switches used to say ENGINE and CHARGING but Twig told me to change that after rewiring:

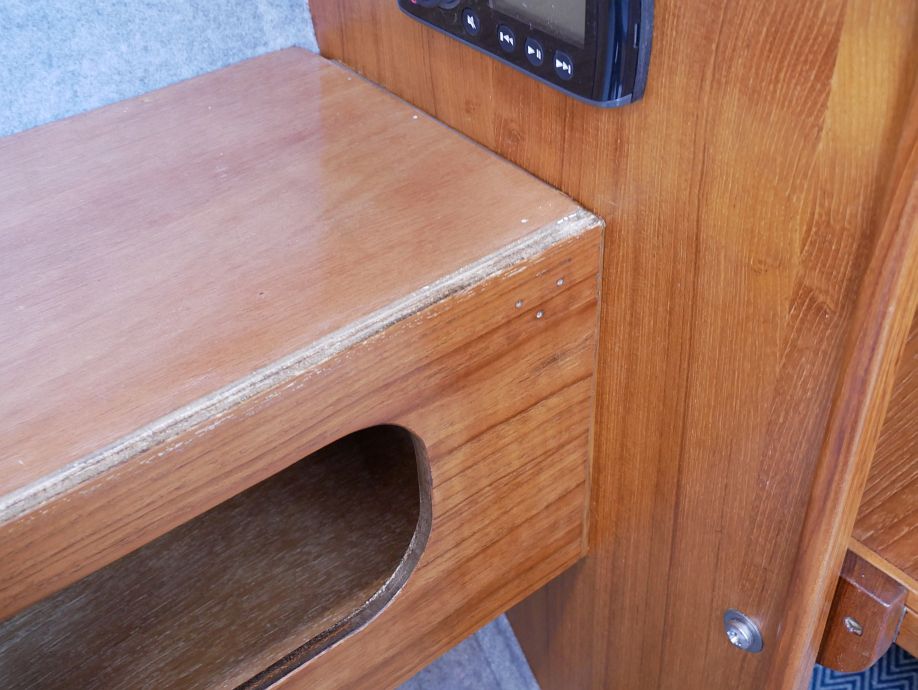
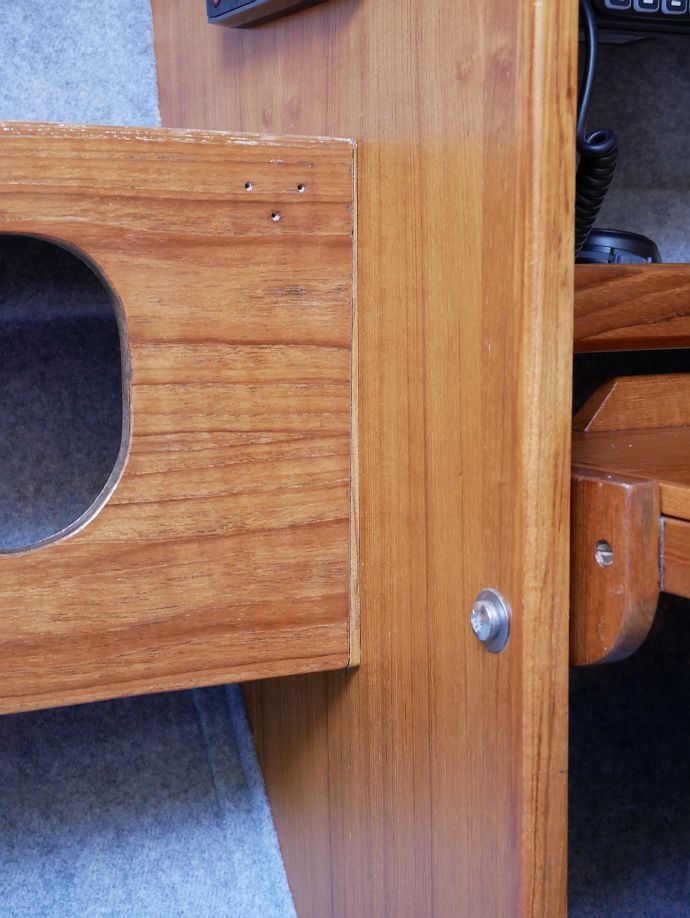
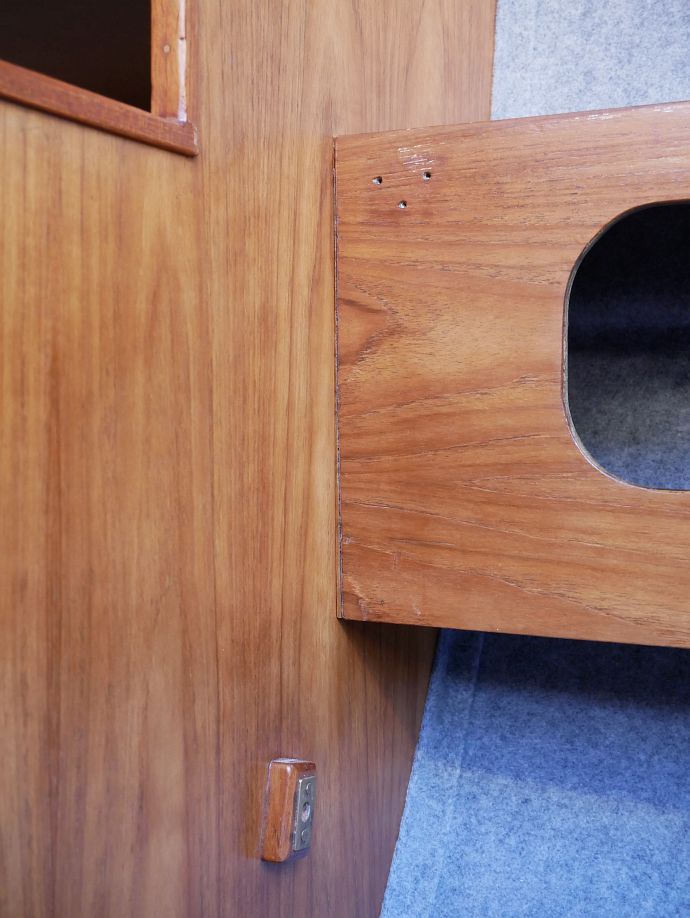
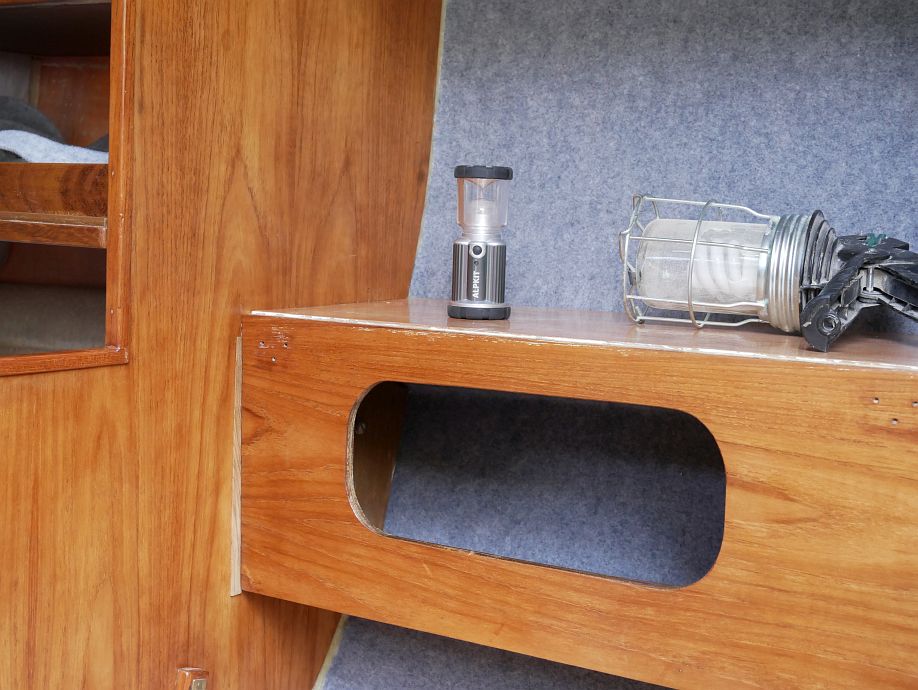
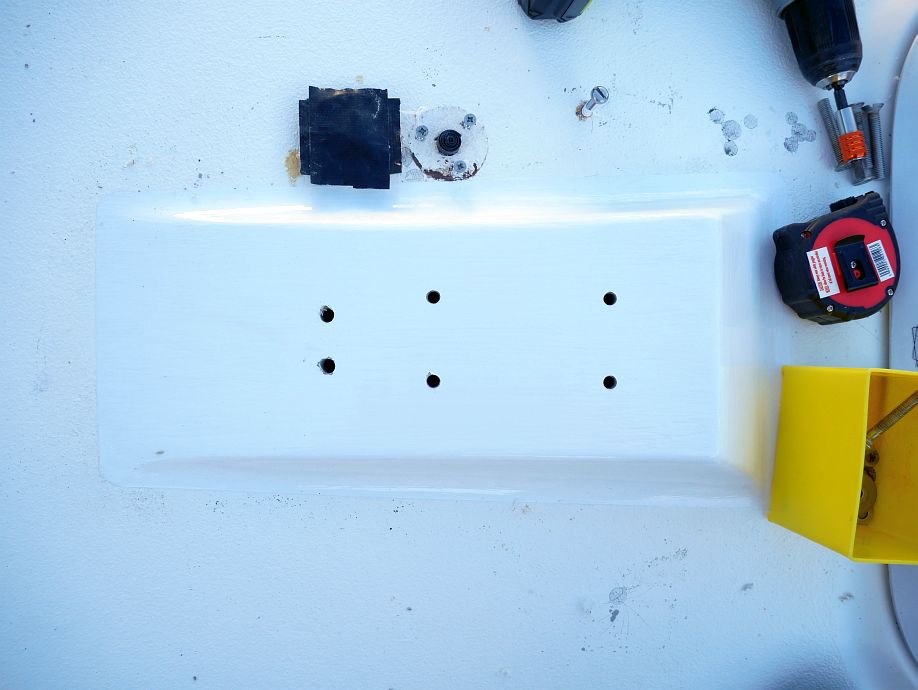
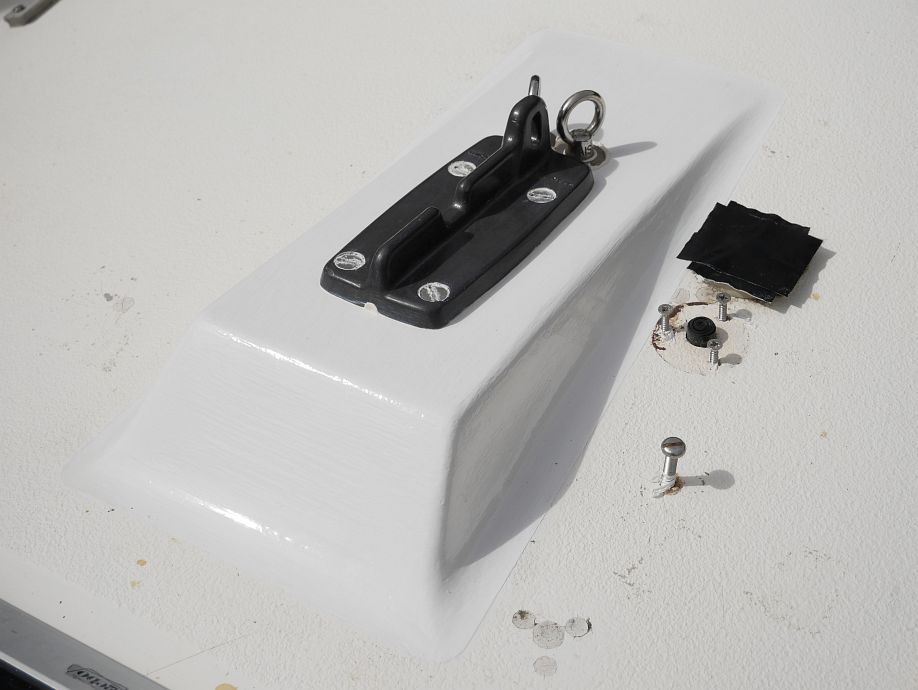
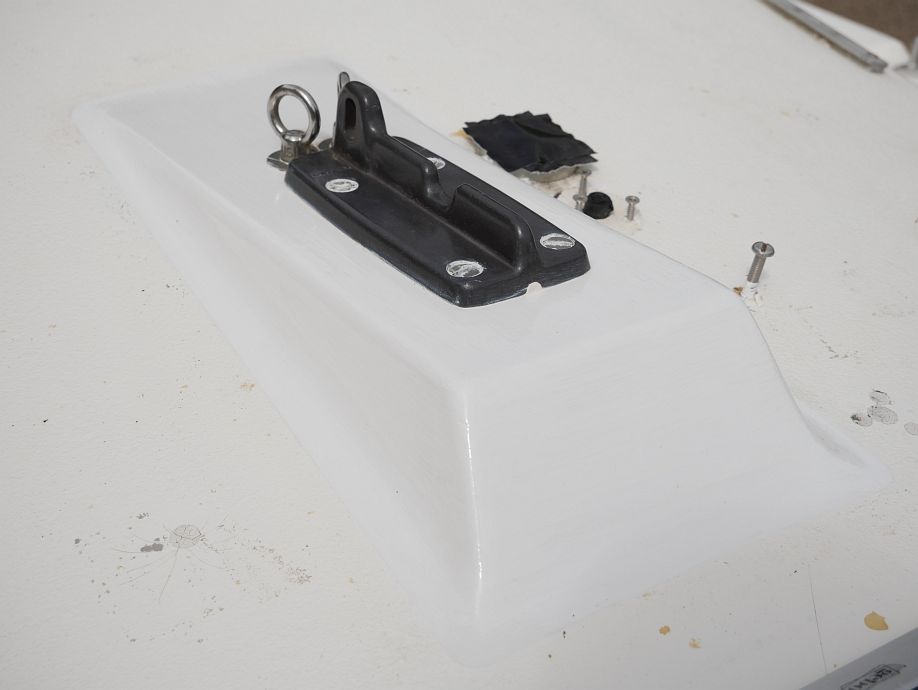
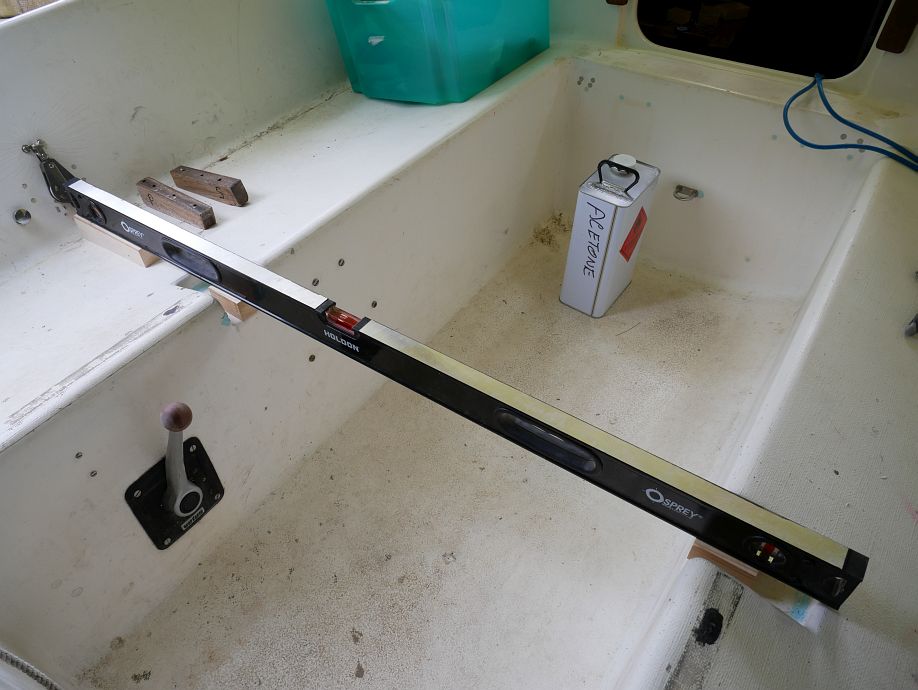
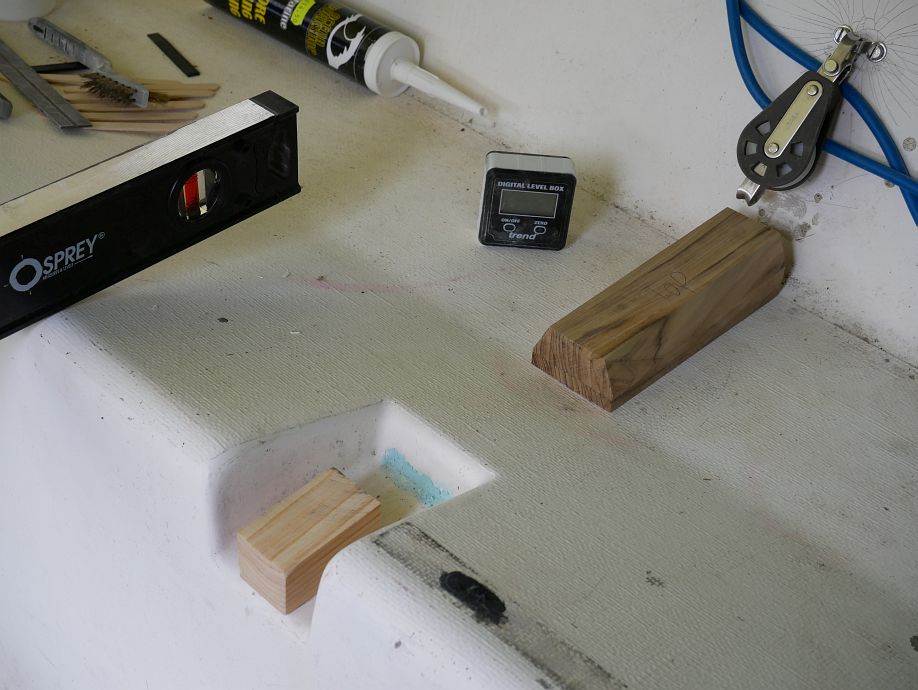
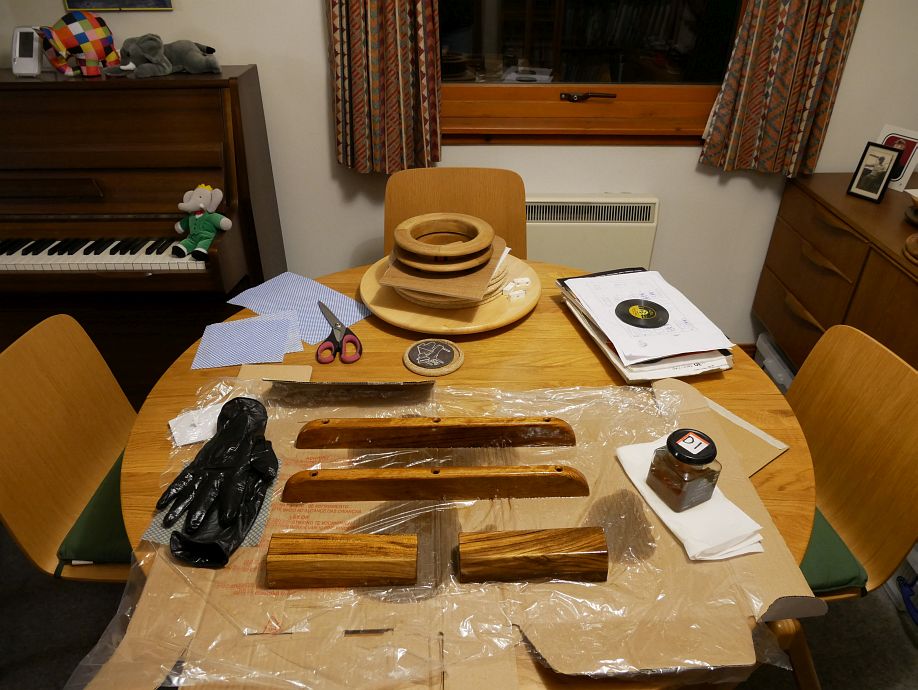
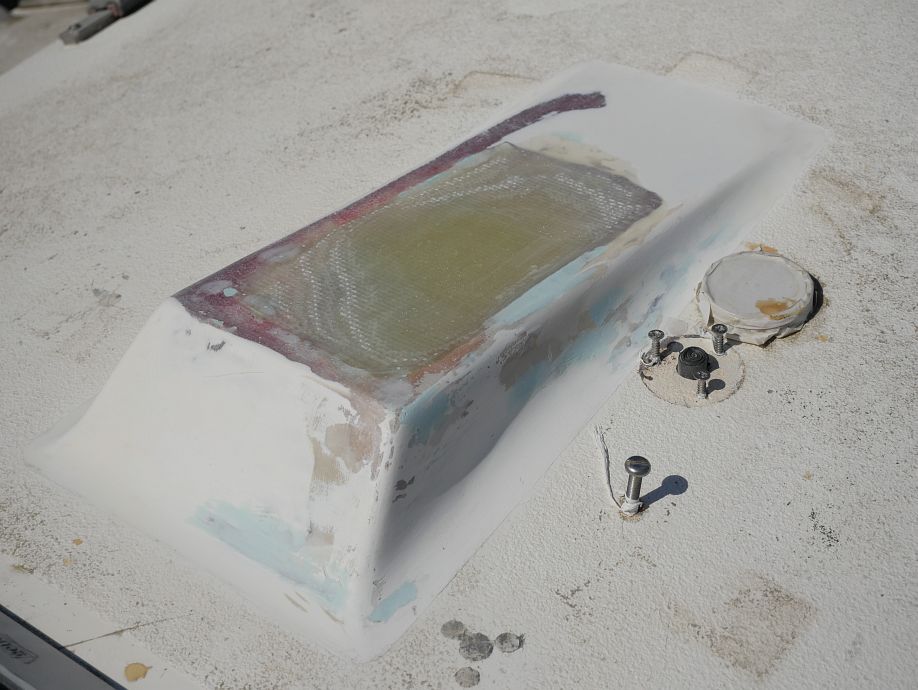
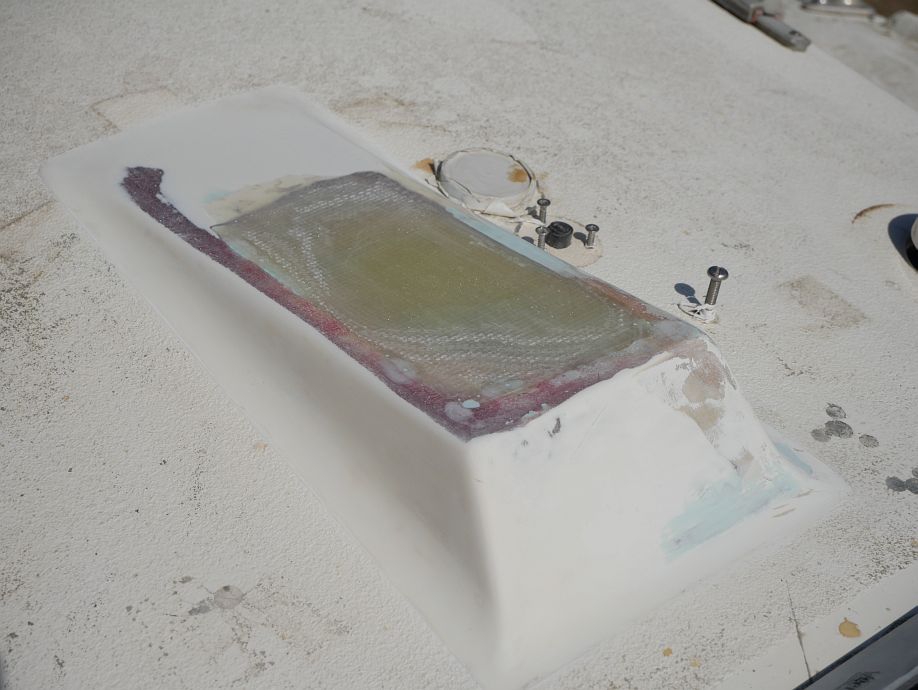
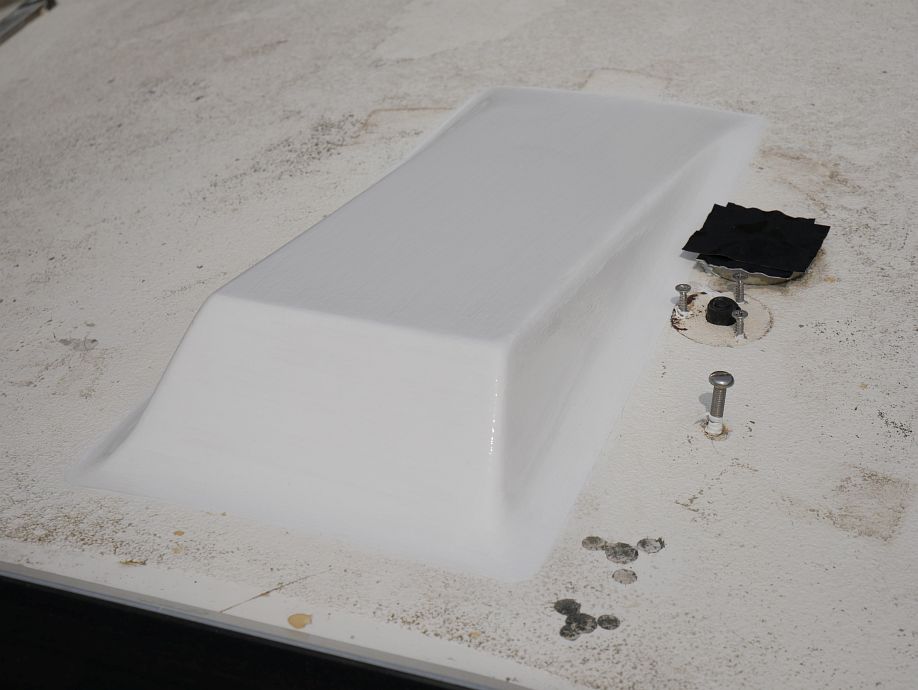
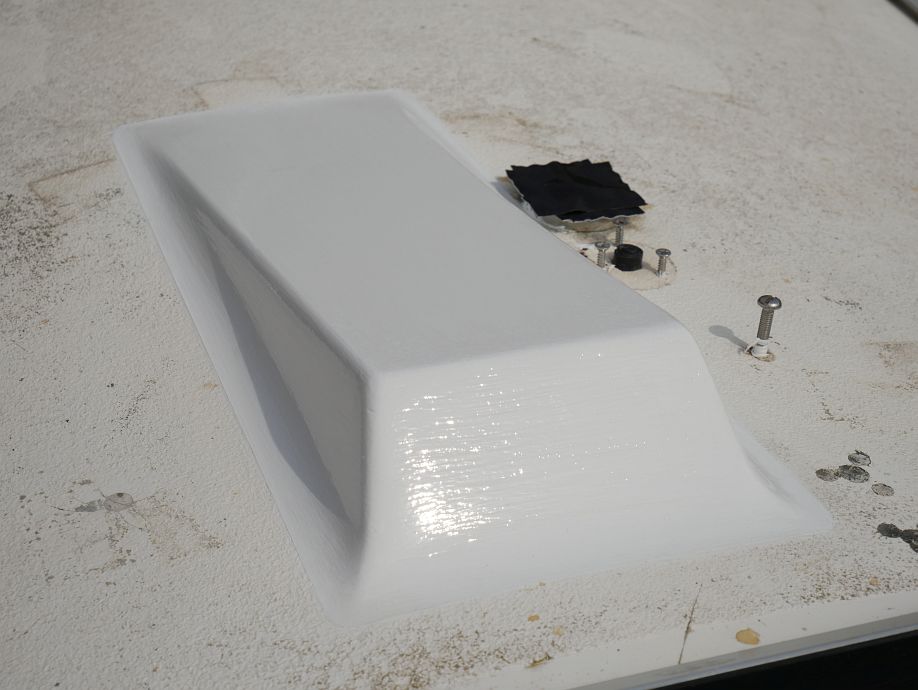
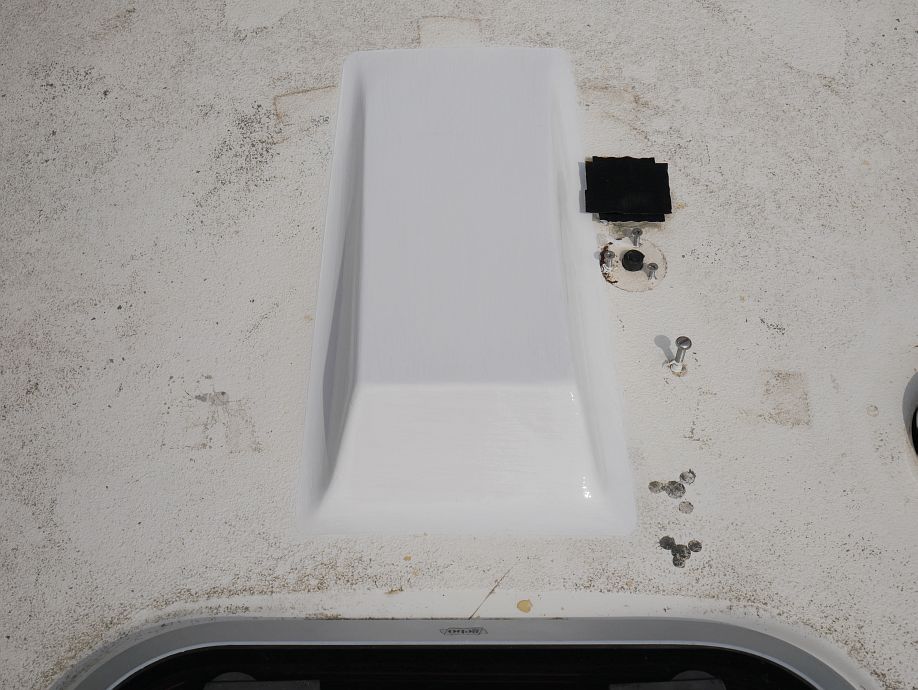
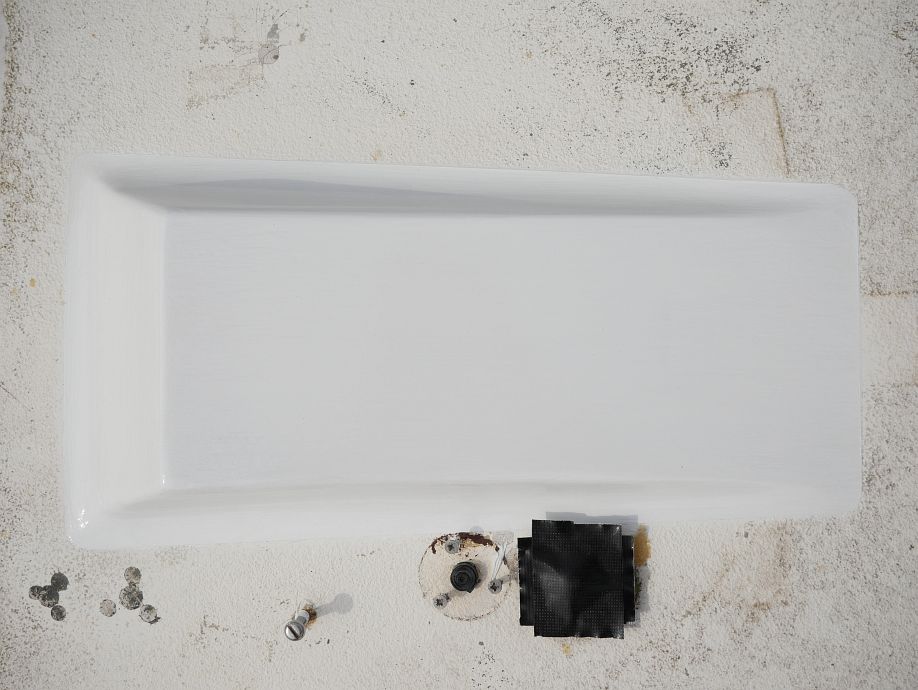
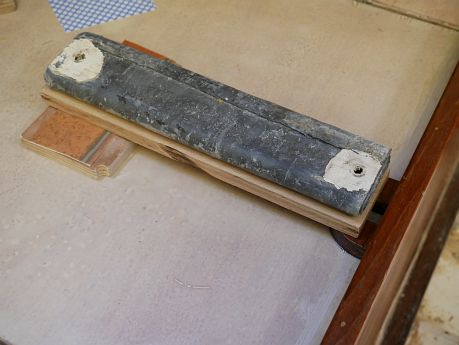
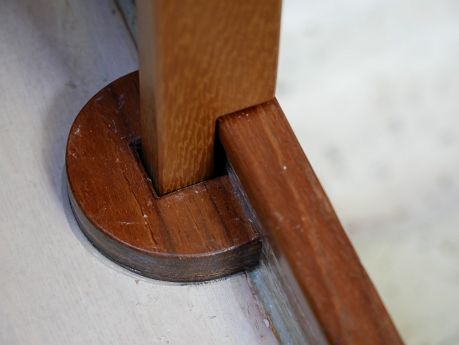
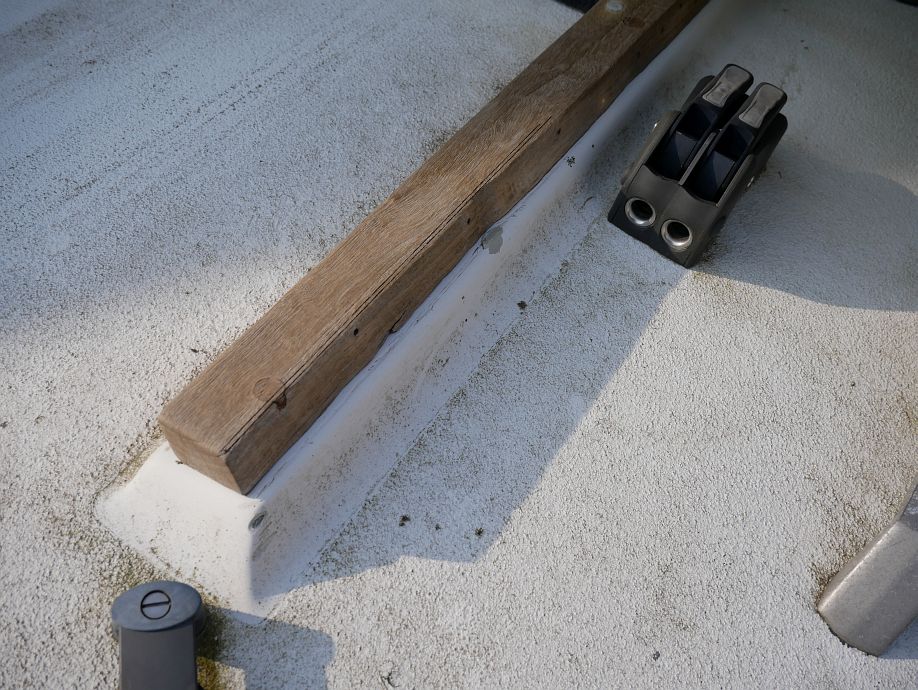
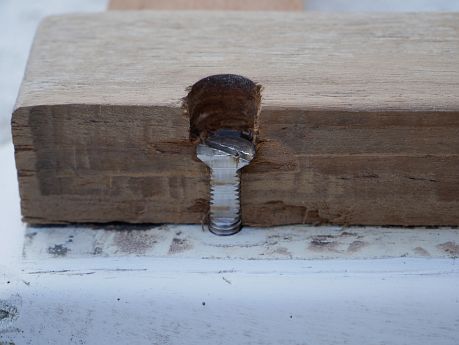
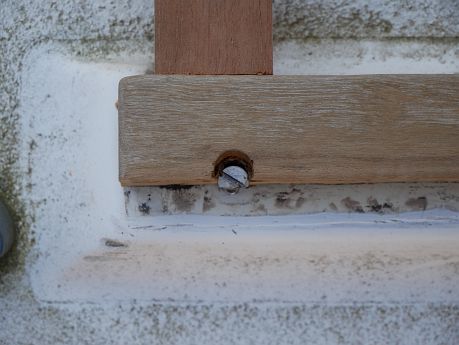
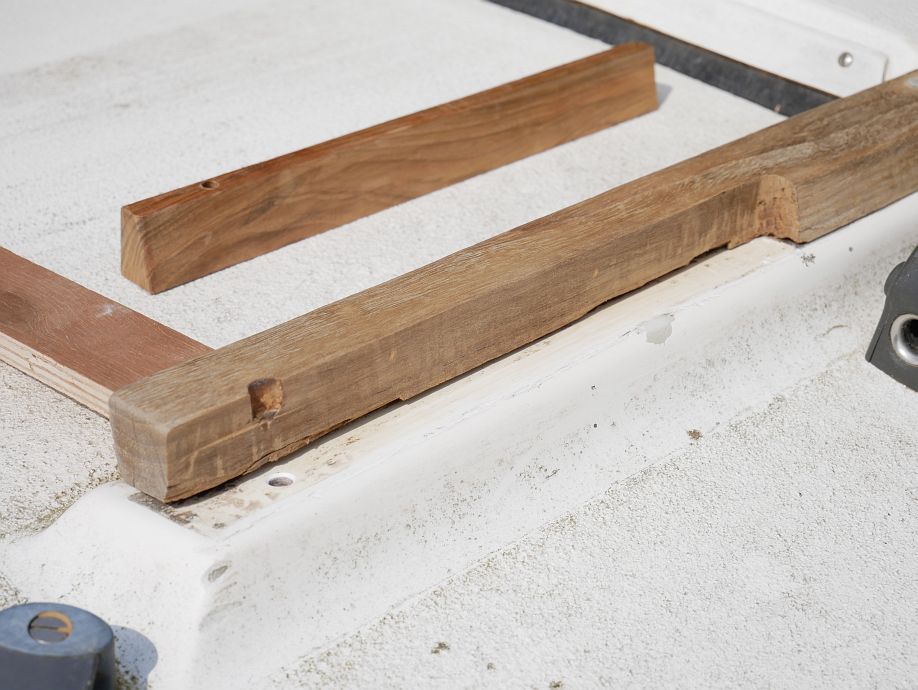
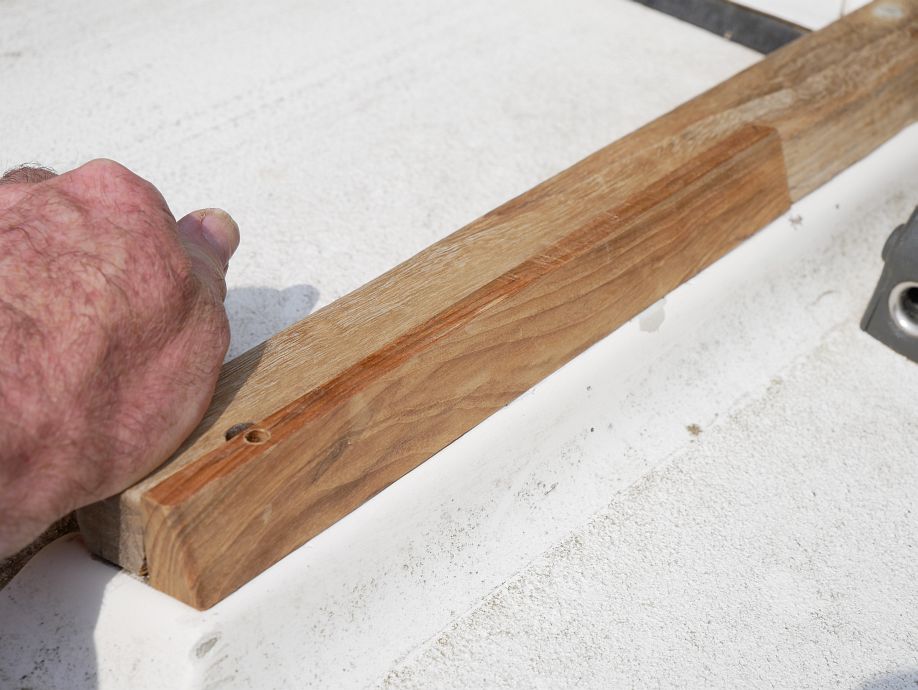
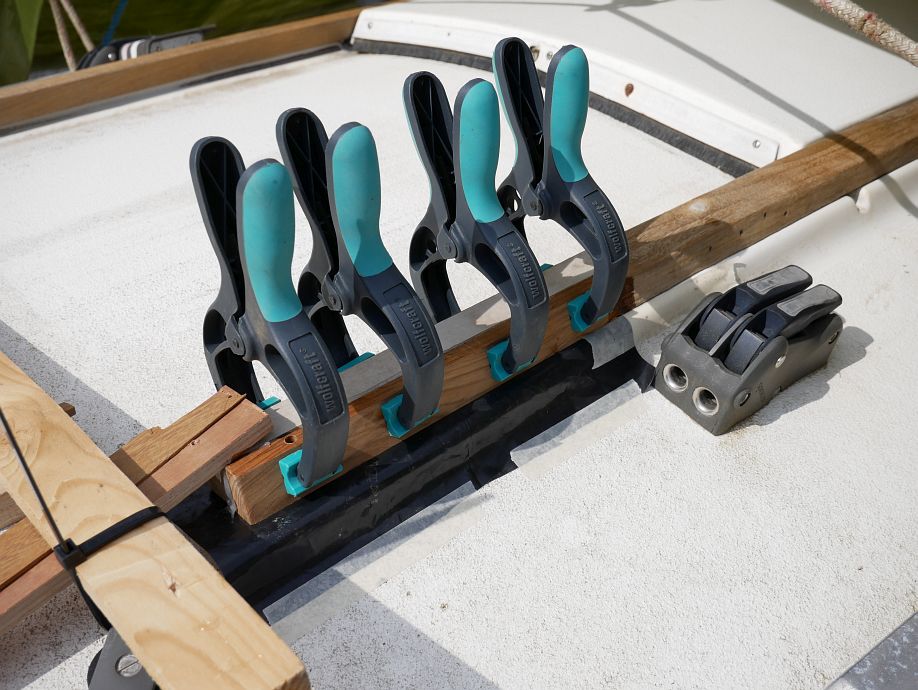
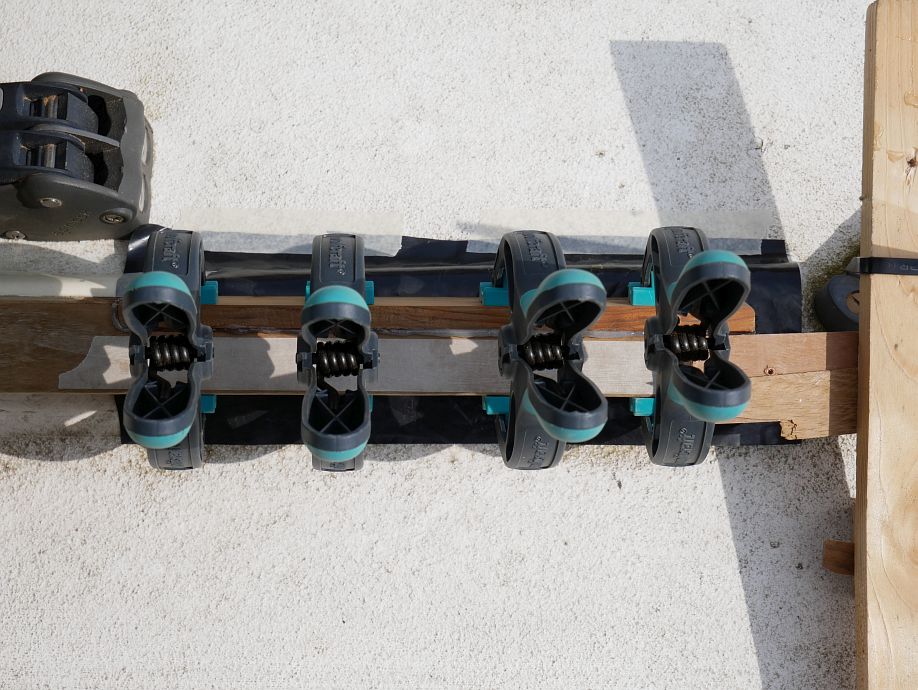
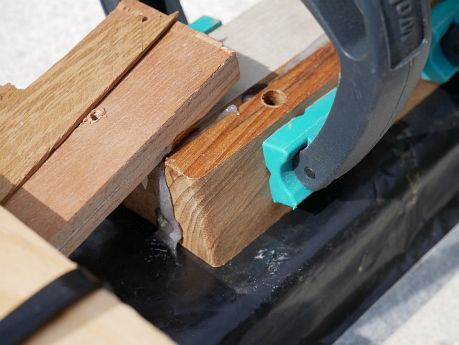
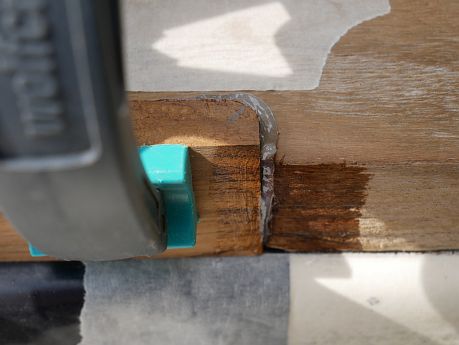
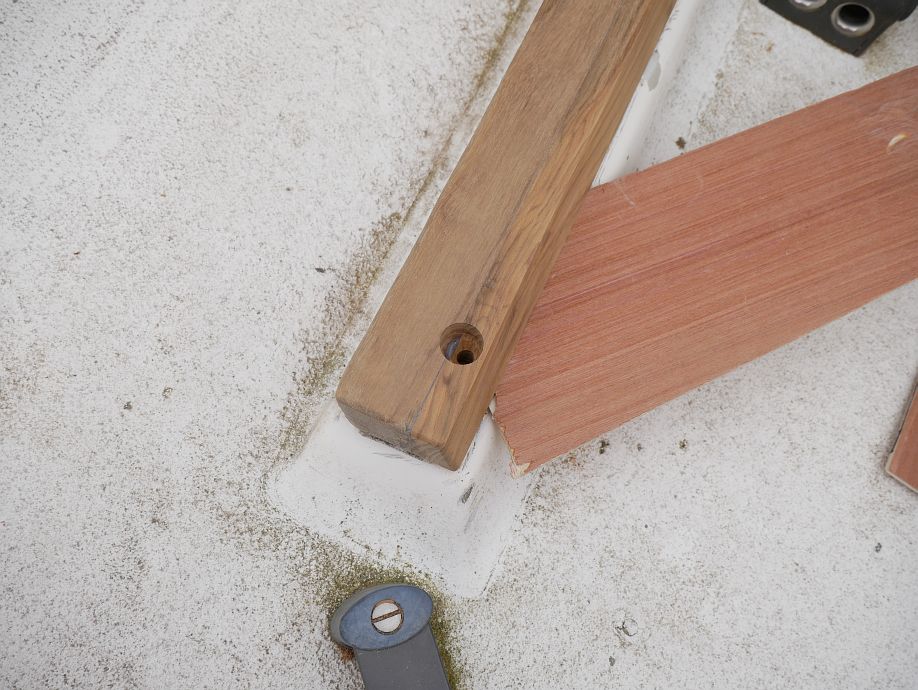
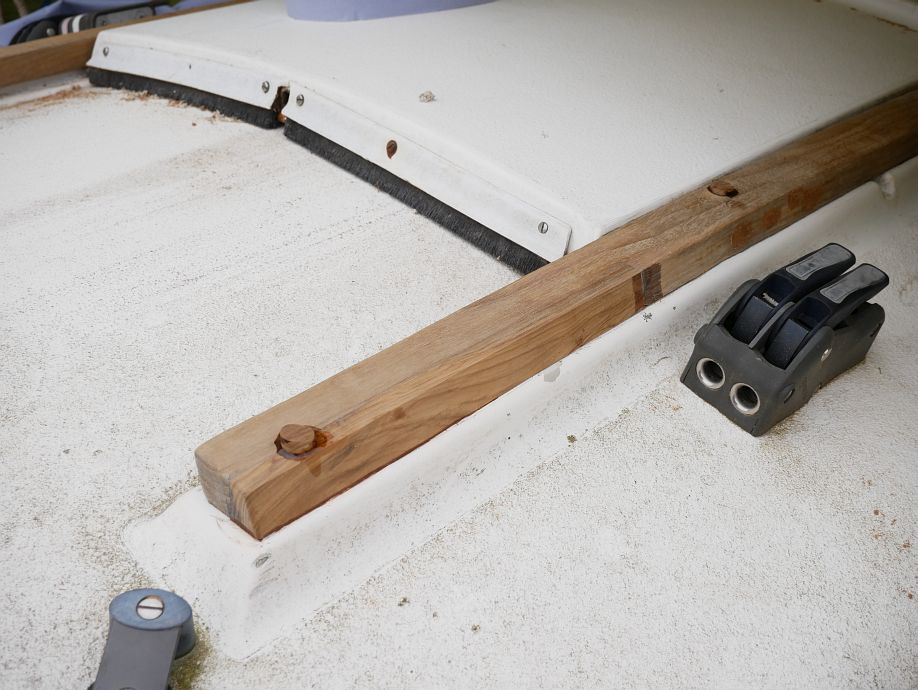
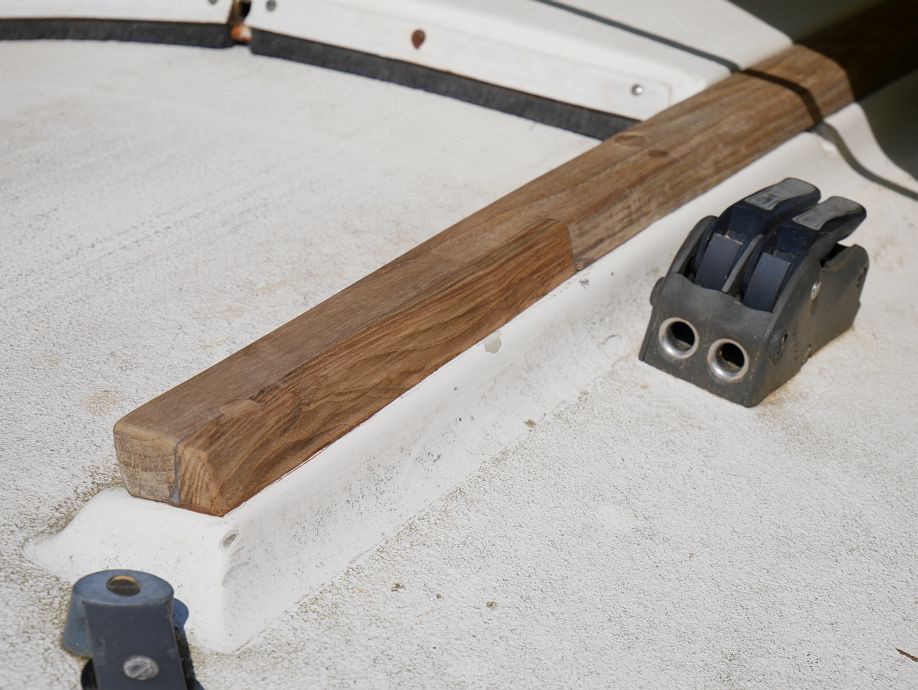
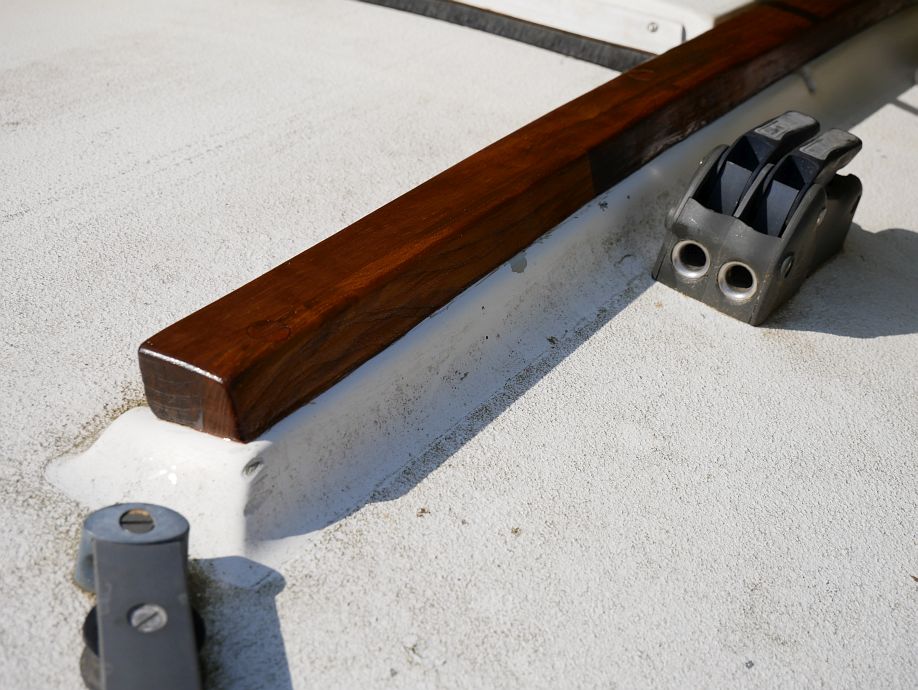
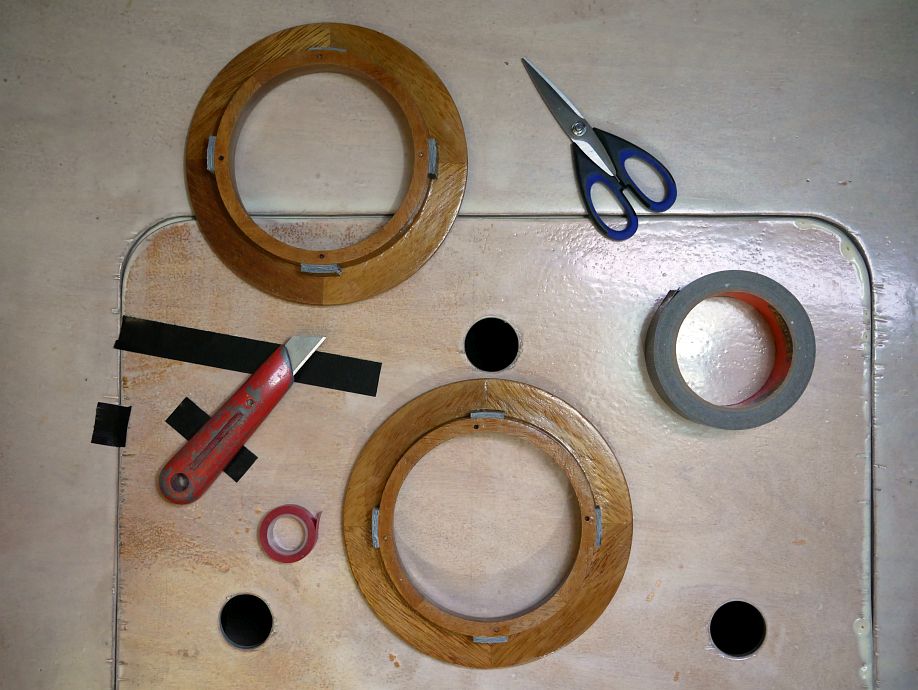
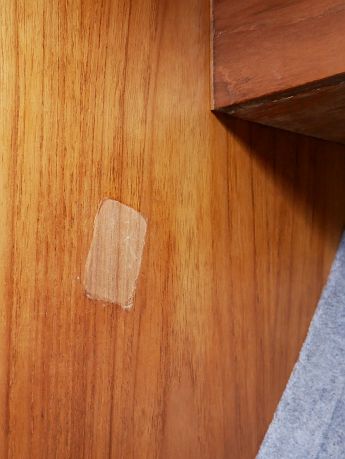
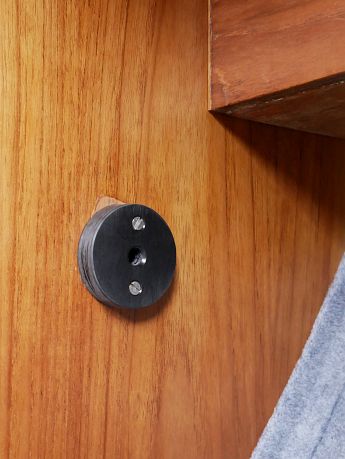
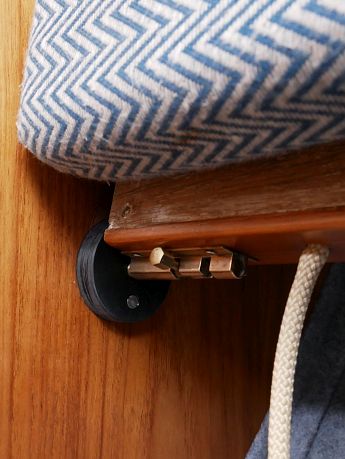
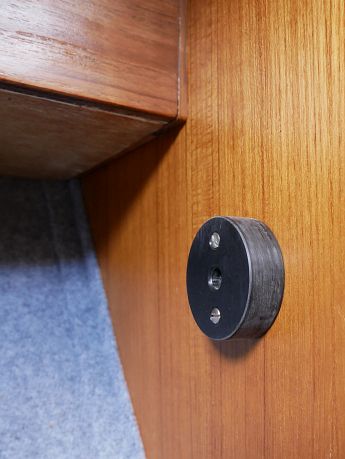
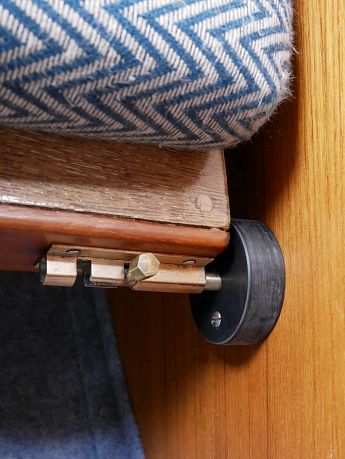
If I’d known the old socket for the starboard pilot berth bolt would no longer fit post-rebuild, I’d have had that wood block off before varnishing the bulkhead. But at least I got it off clean (thank goodness it wasn’t epoxied!) and can sort the varnish sometime. I made acetal discs to replace the original wood blocks with brass plates, but needed different thicknesses for port and starboard, with 12mm just right for starboard and 16mm (what I could get) adequate to secure the port bolt:

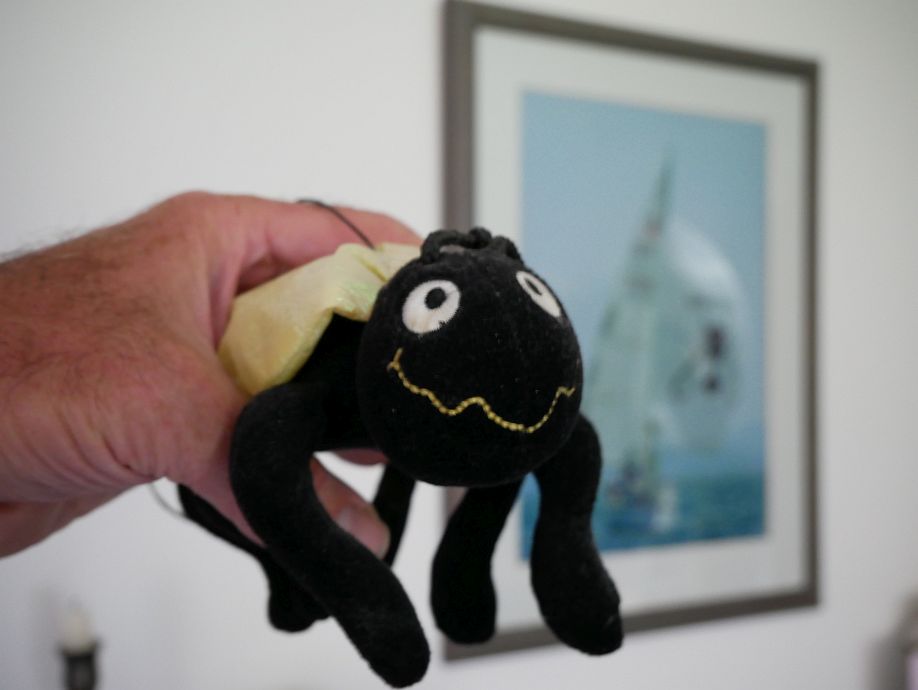
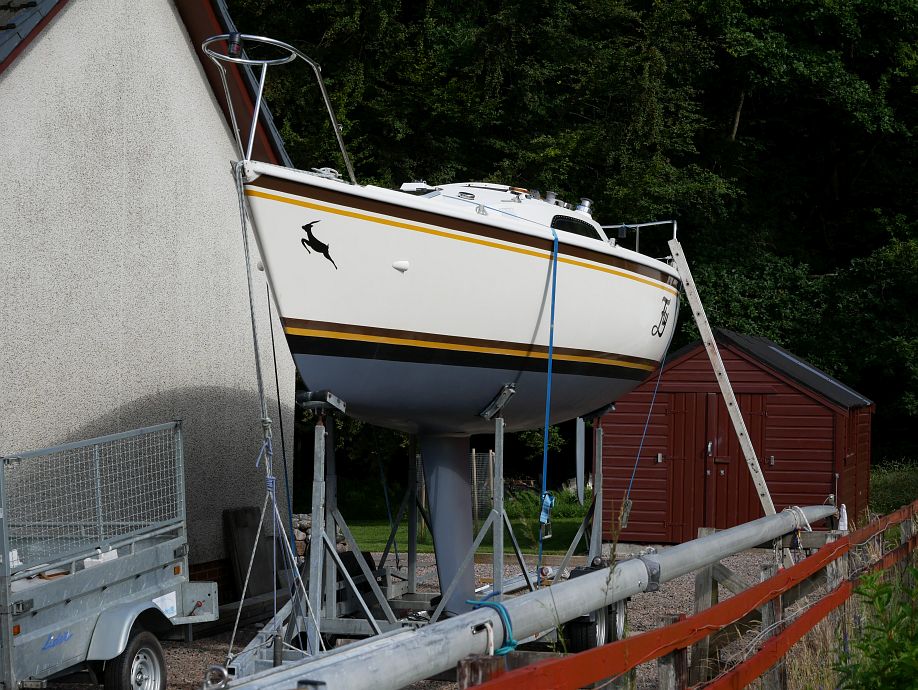
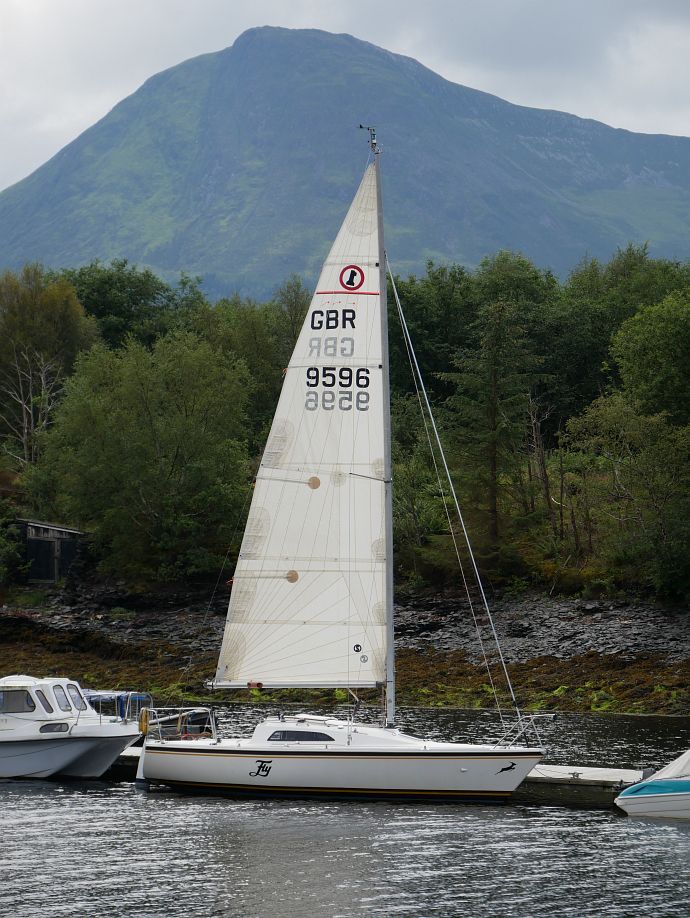
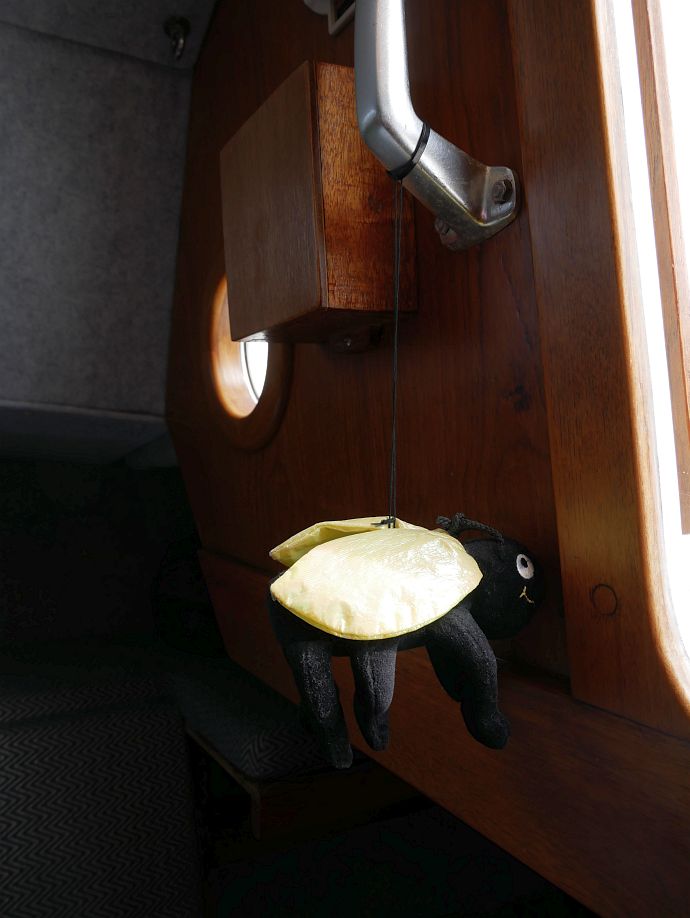
I tried to get the fly to face out for this photo but he/she/it was determined!

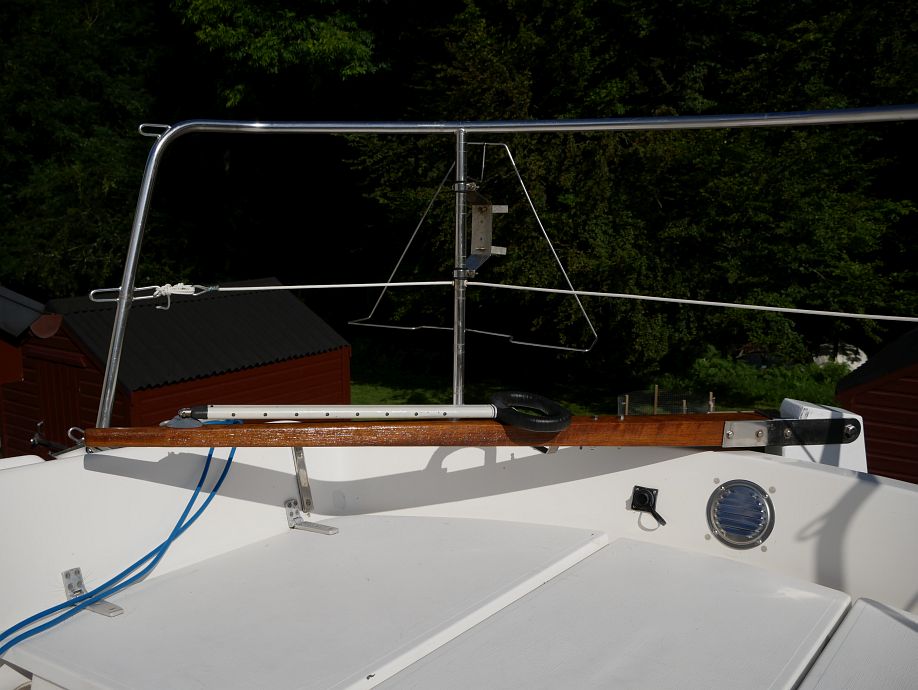
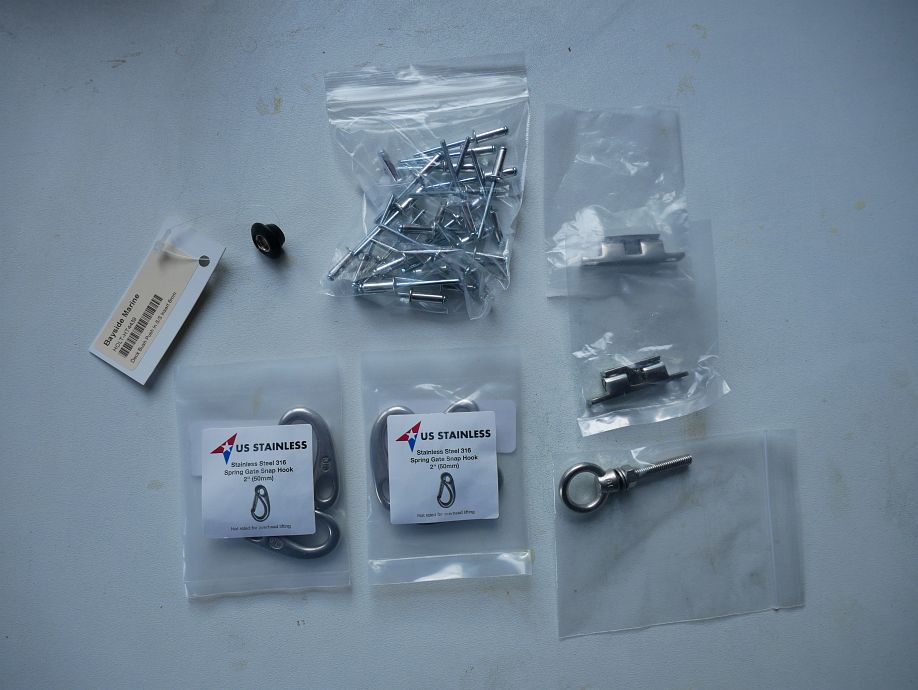
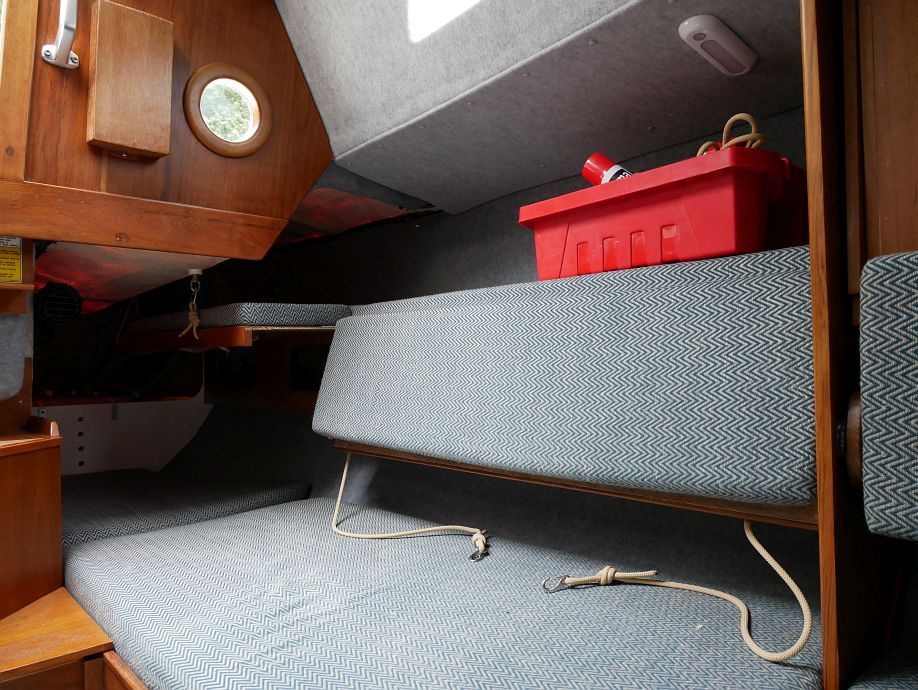
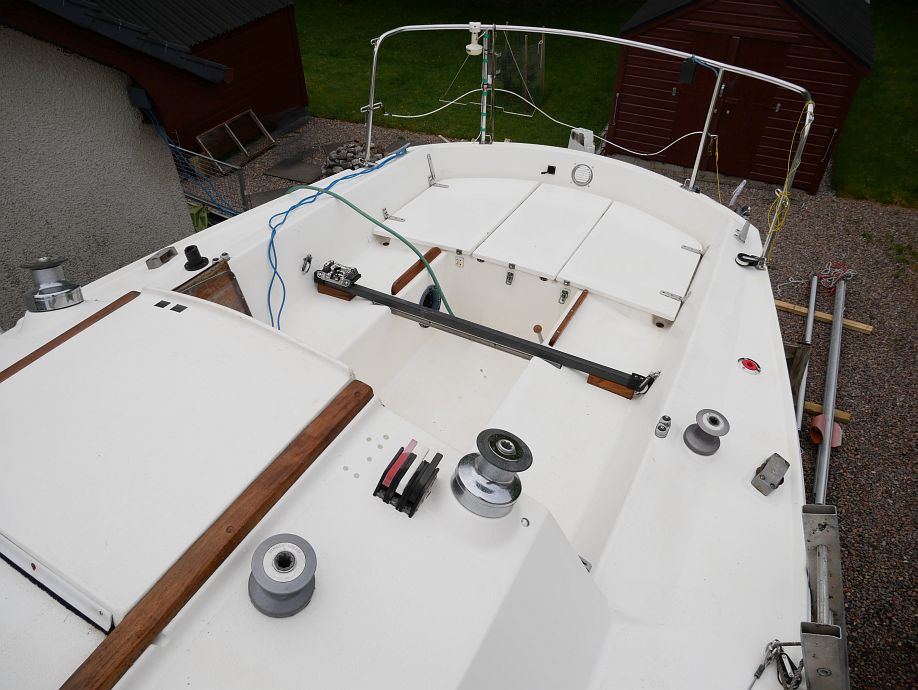
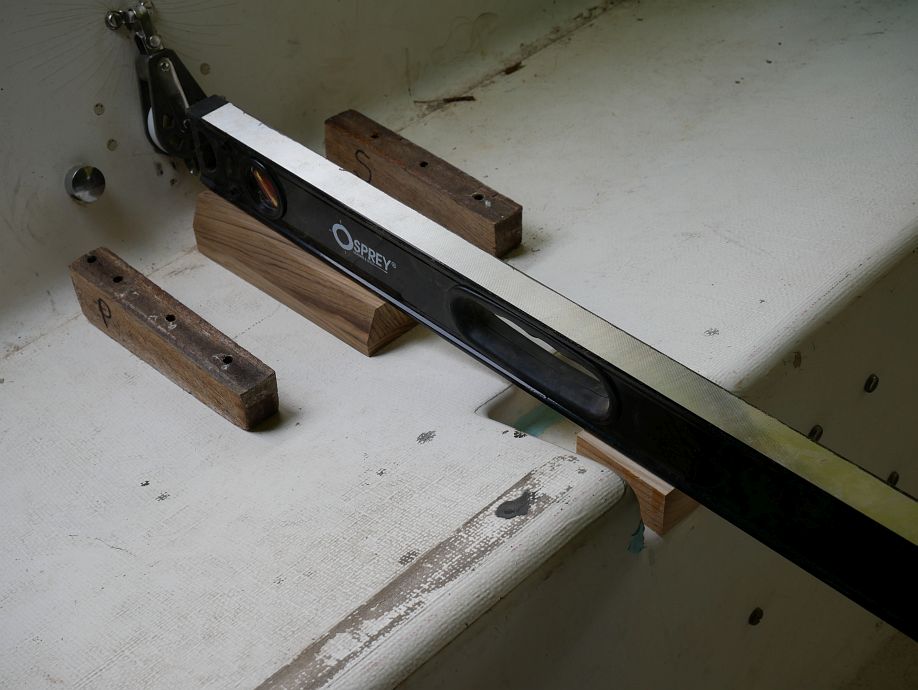
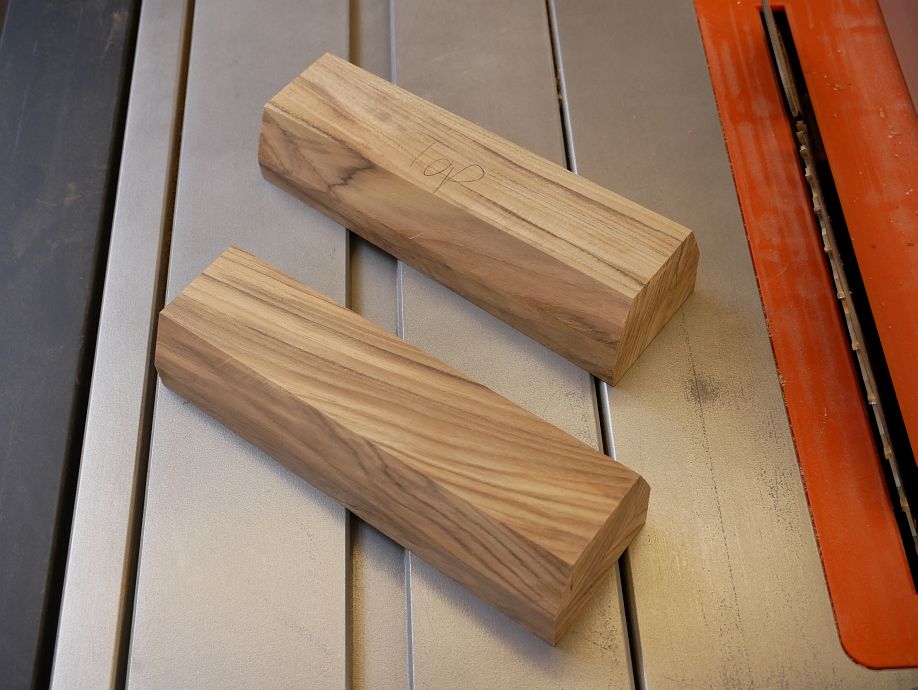
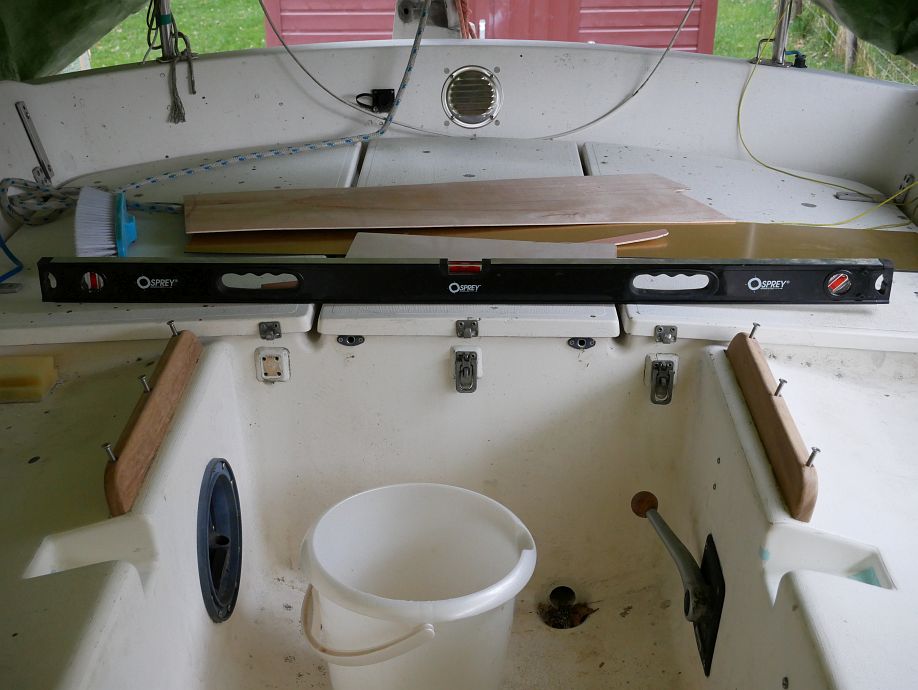
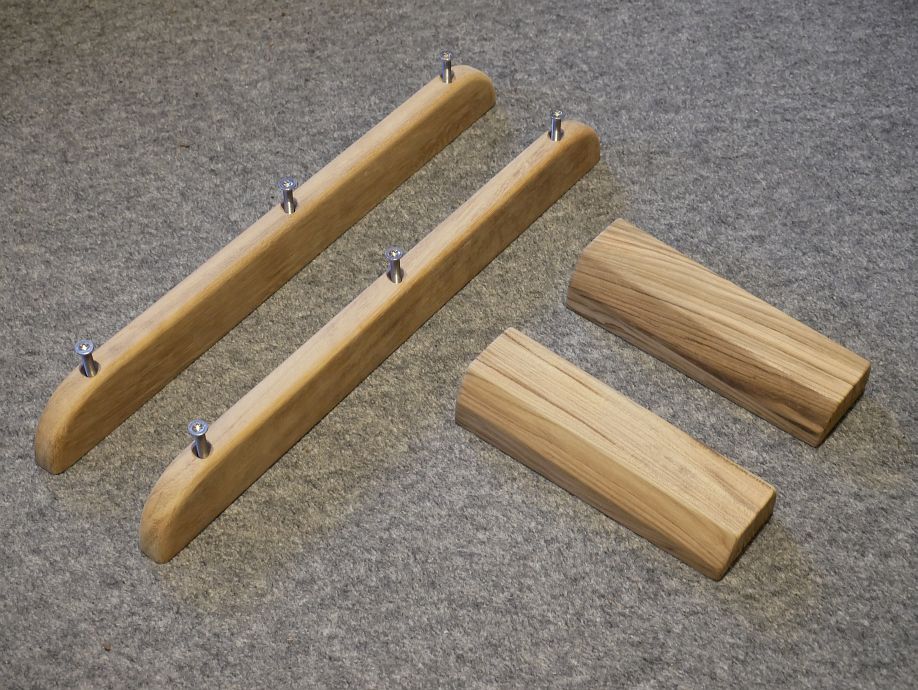
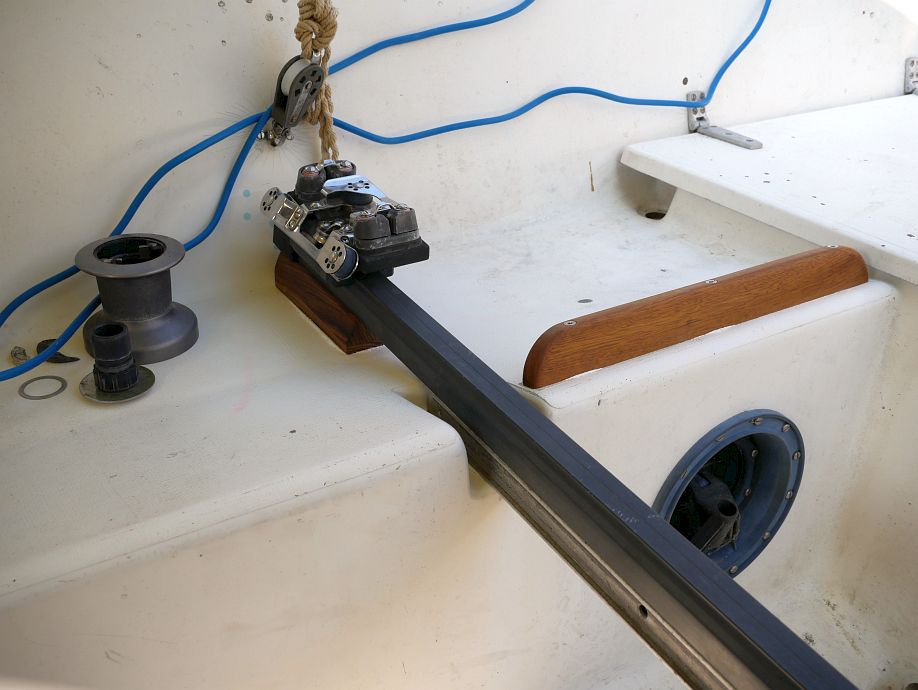
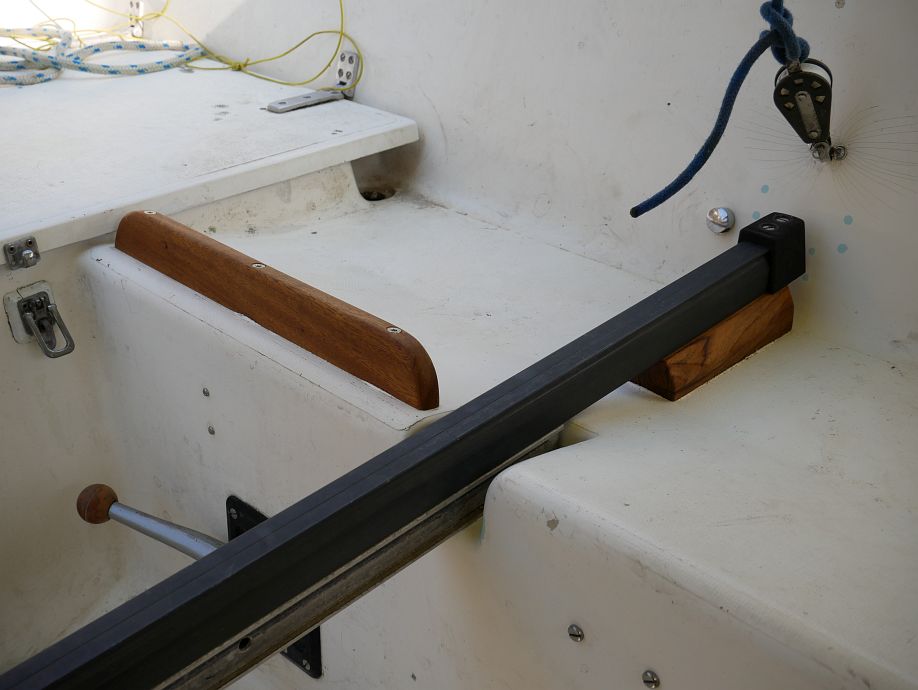
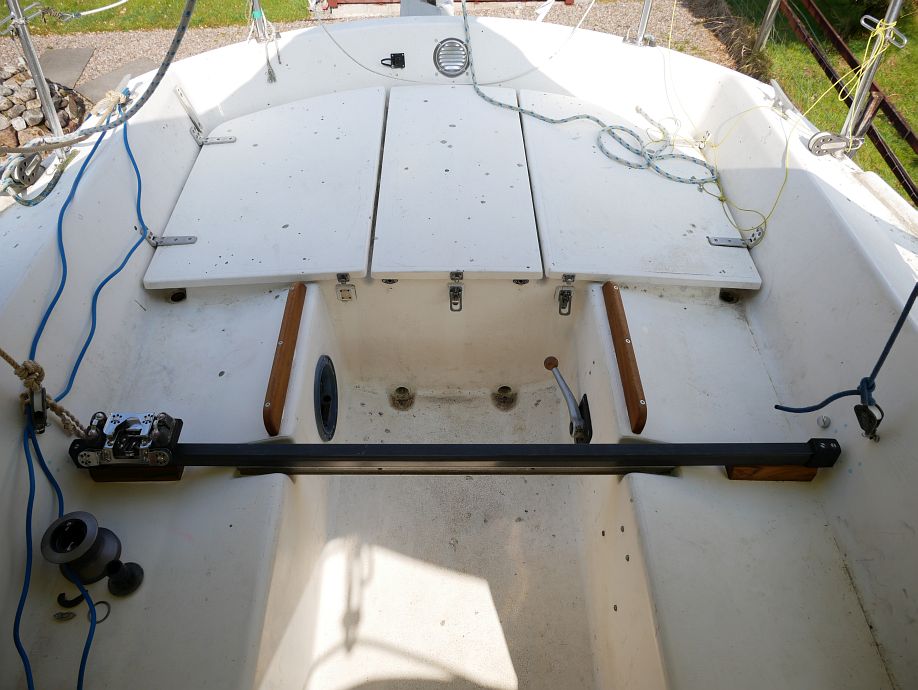
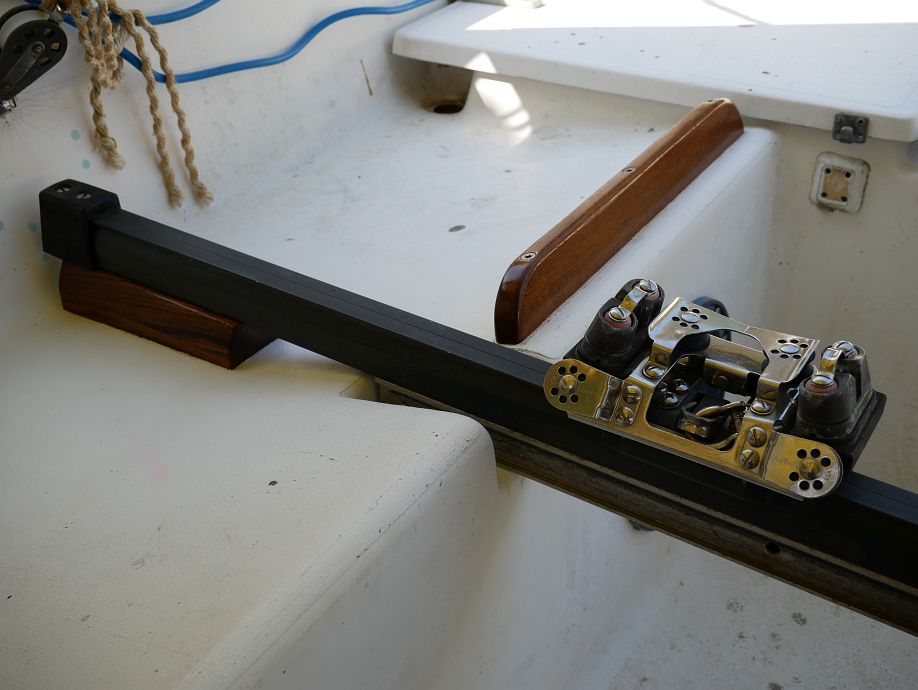
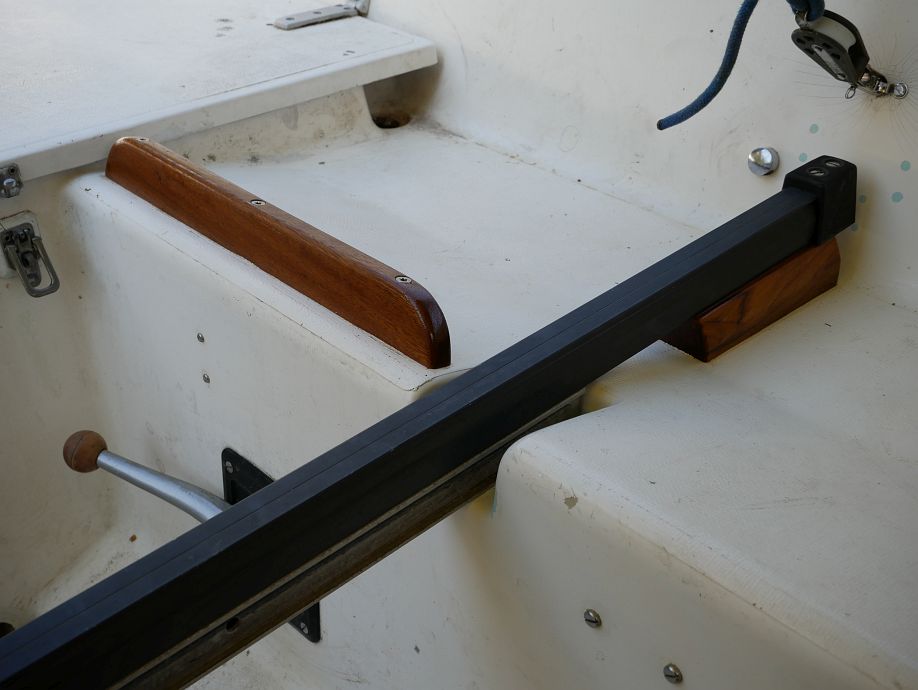
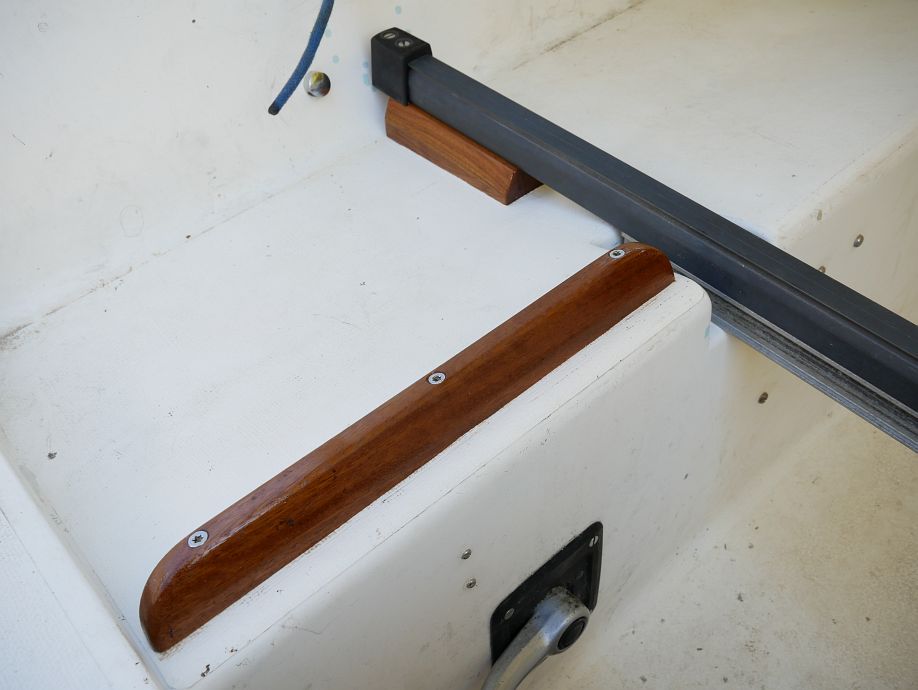
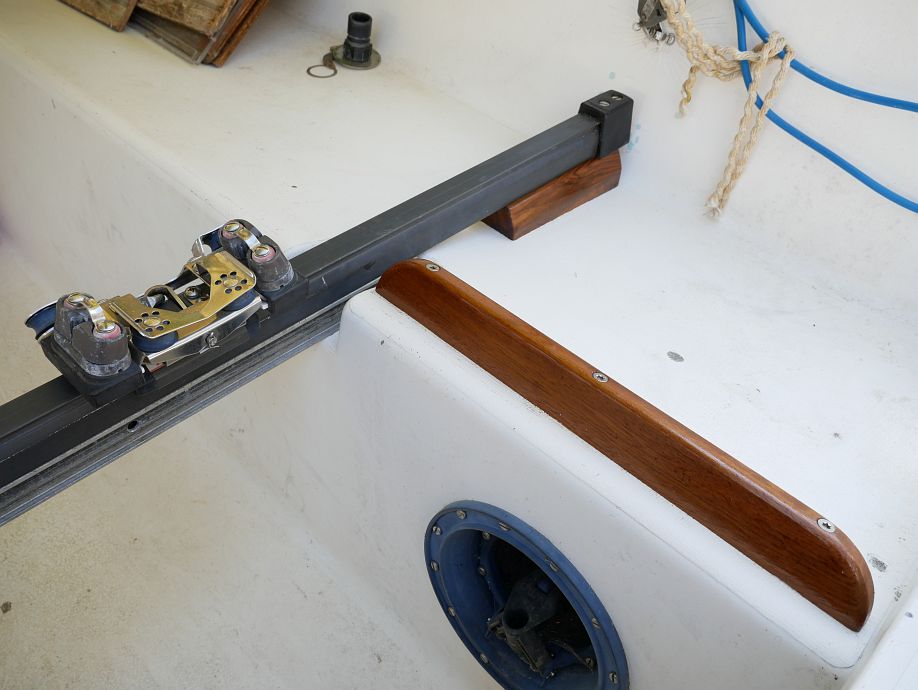
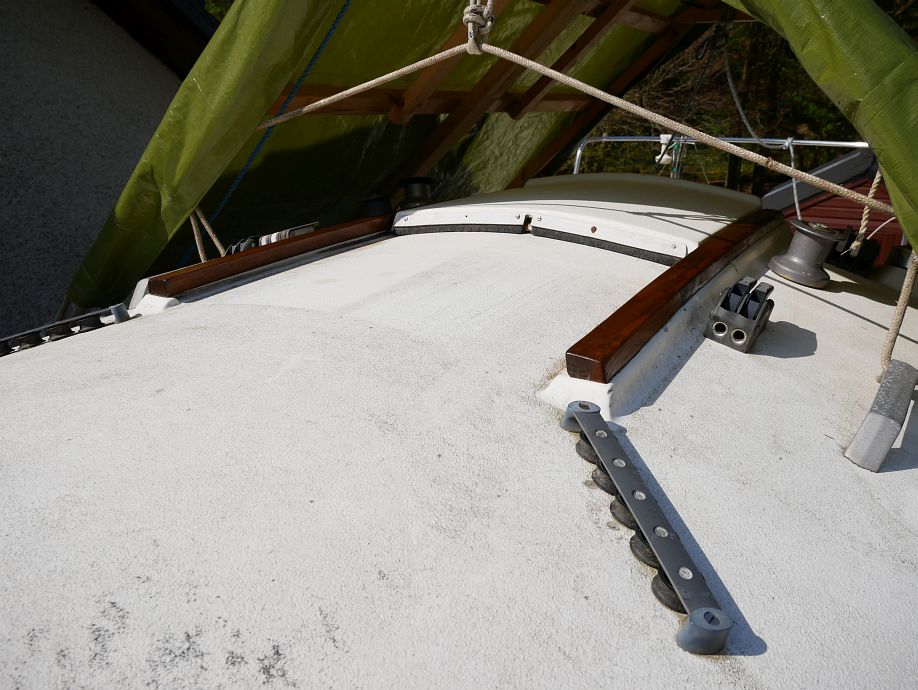
Yesterday I fitted the new lifelines collected from Owen Sails on Friday. For those not so acquainted with these things, the cord lacing forward is to help keep headsails on the deck when they’re down and the cushions aft for crew face-out on the rail (legs over the side and body between lower and upper lifelines) or just leaning against from the cockpit:

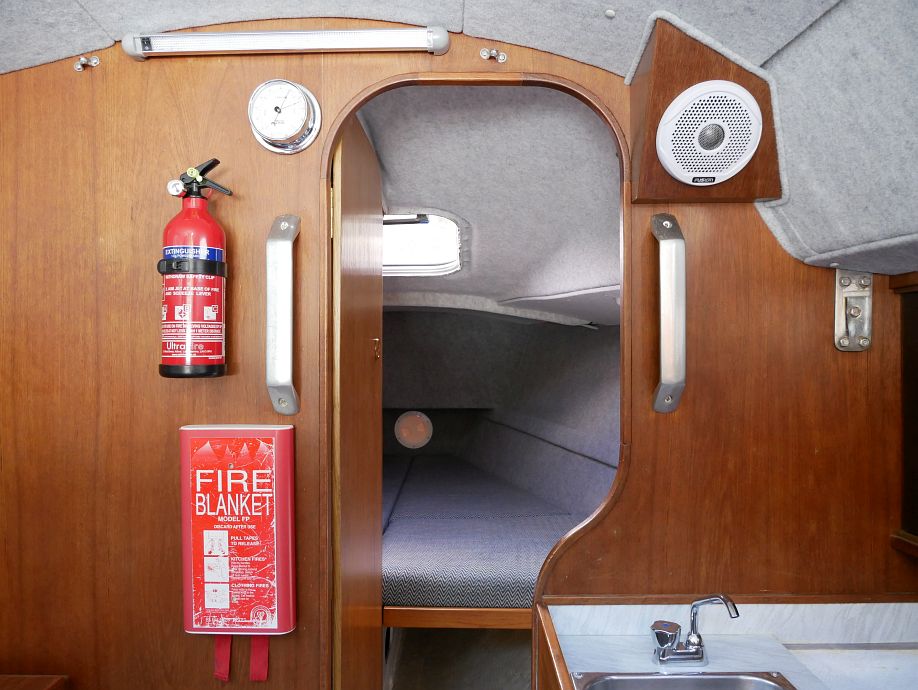
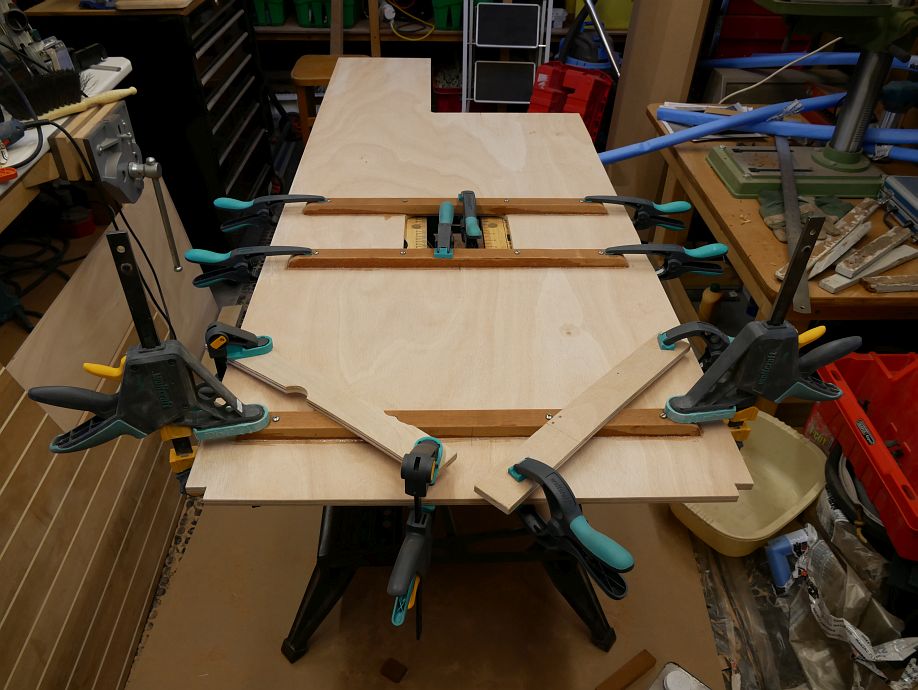
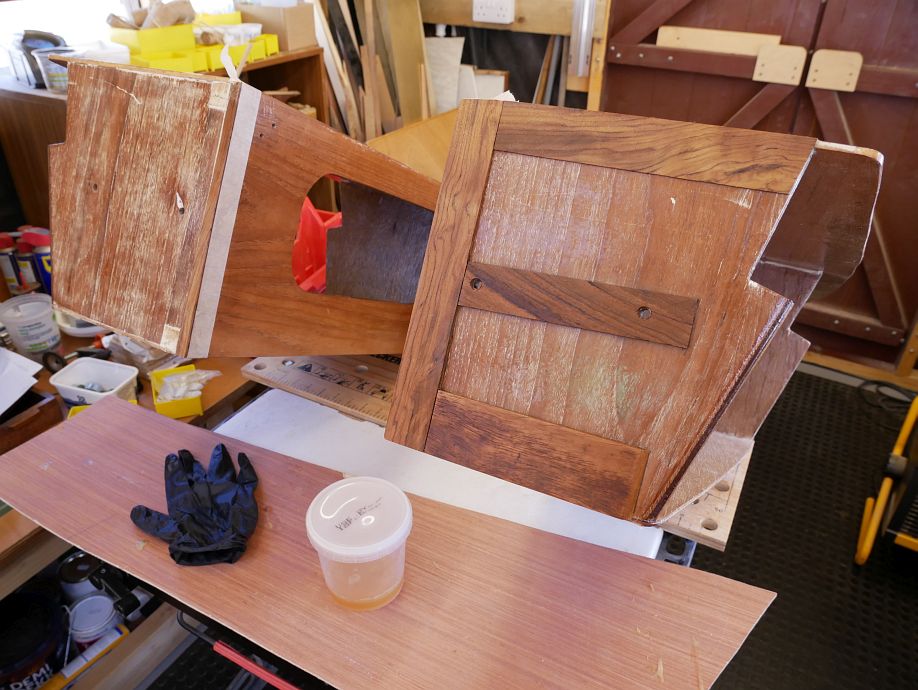
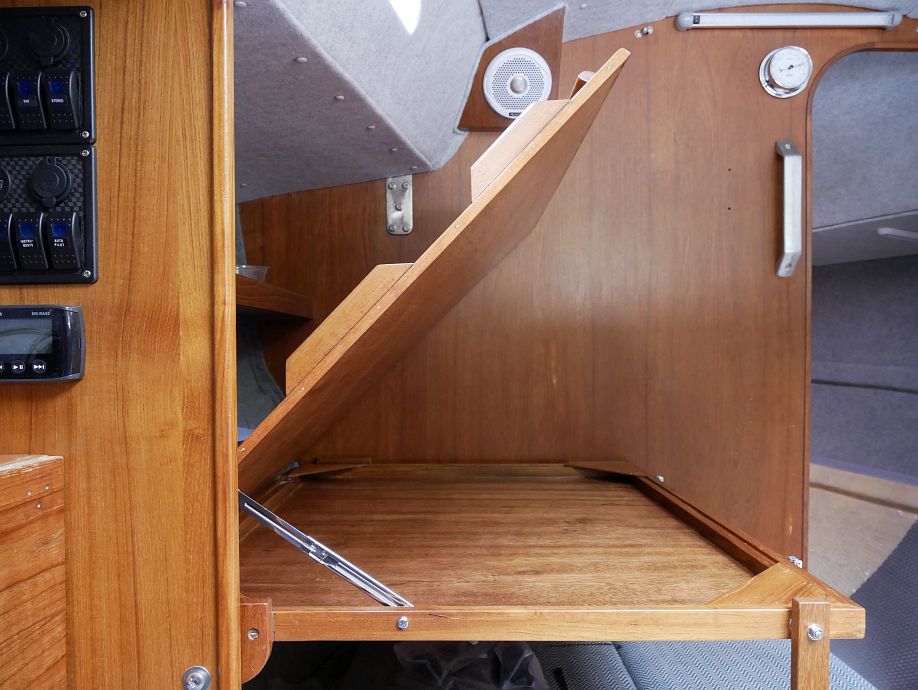
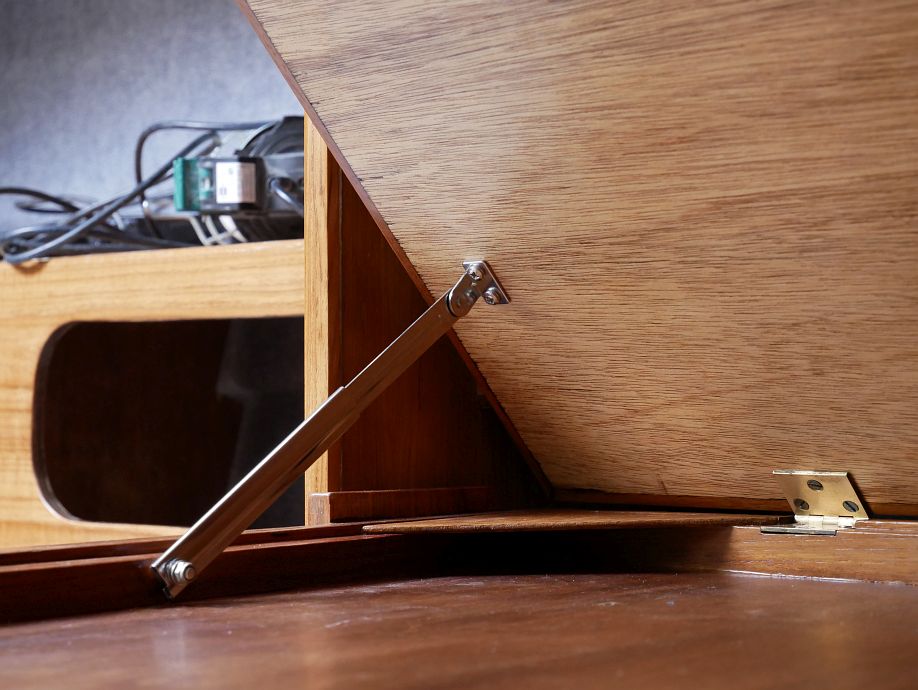
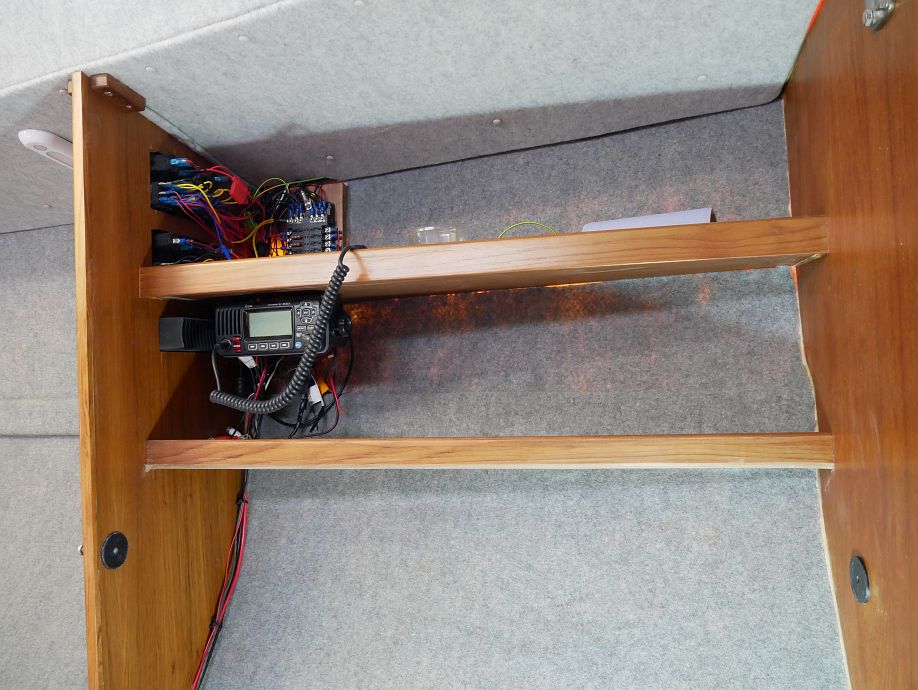
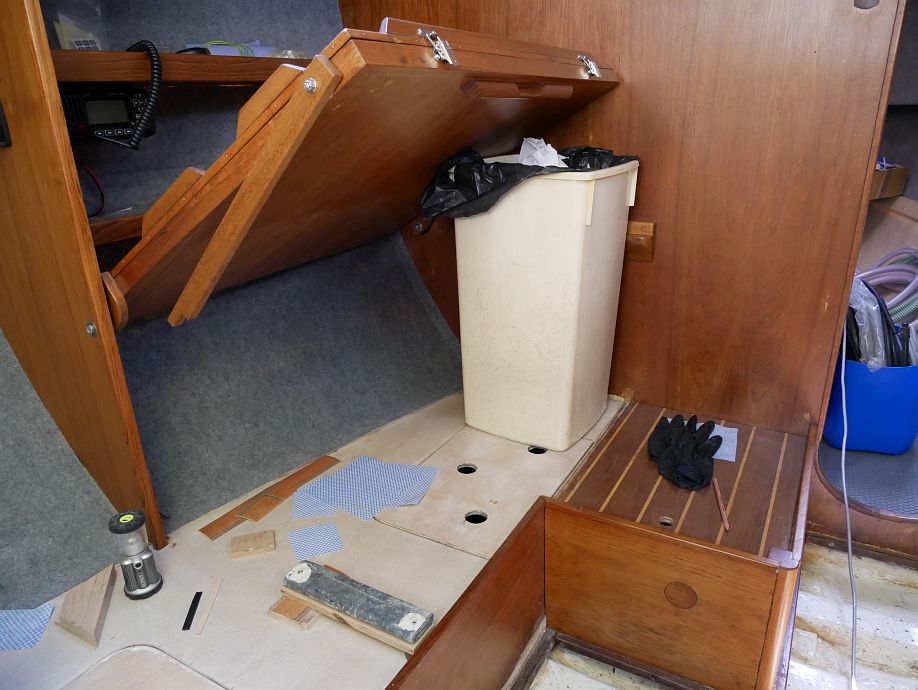
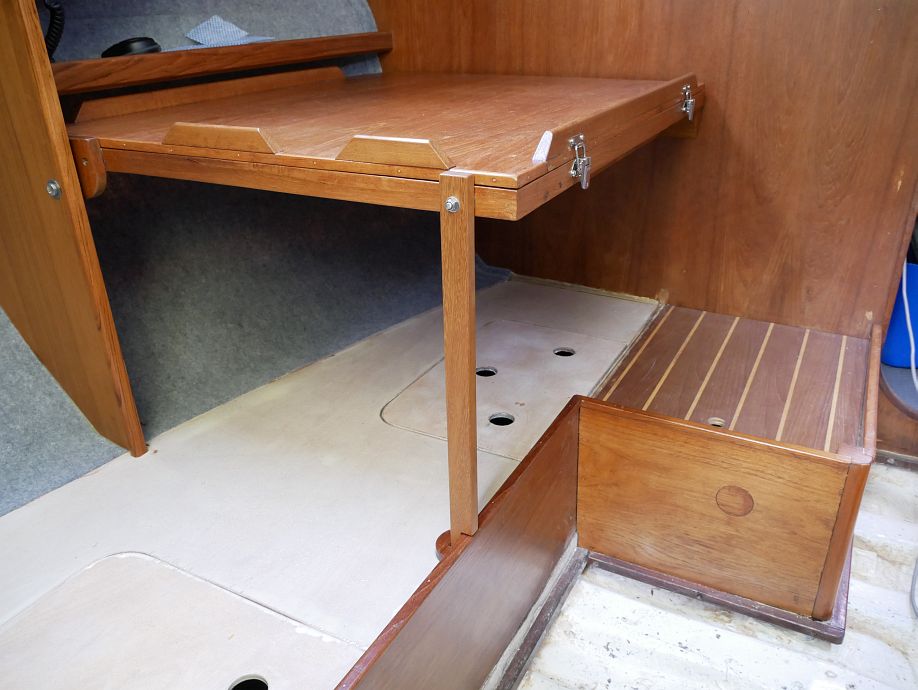
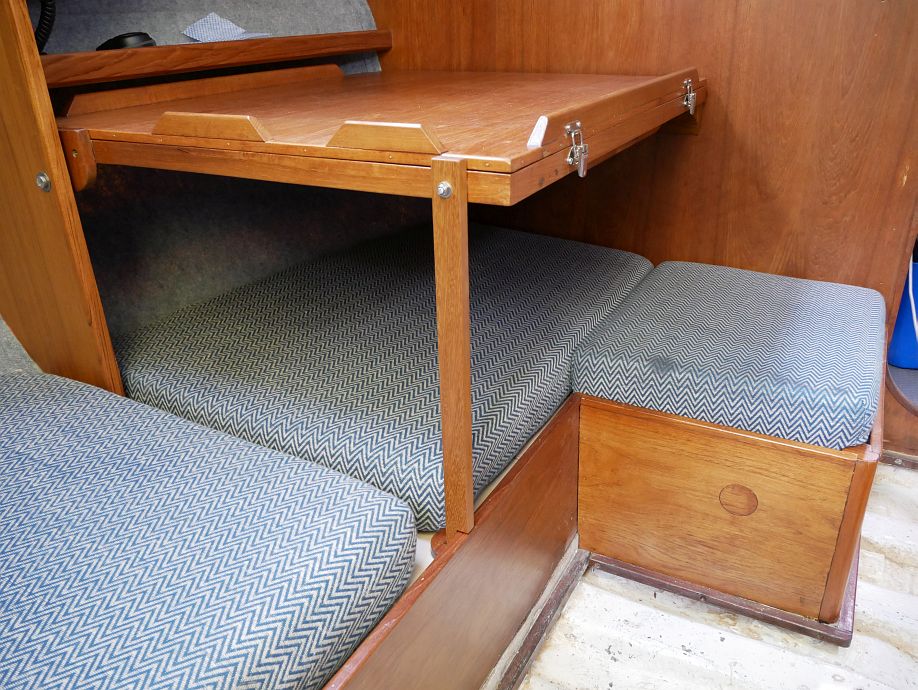
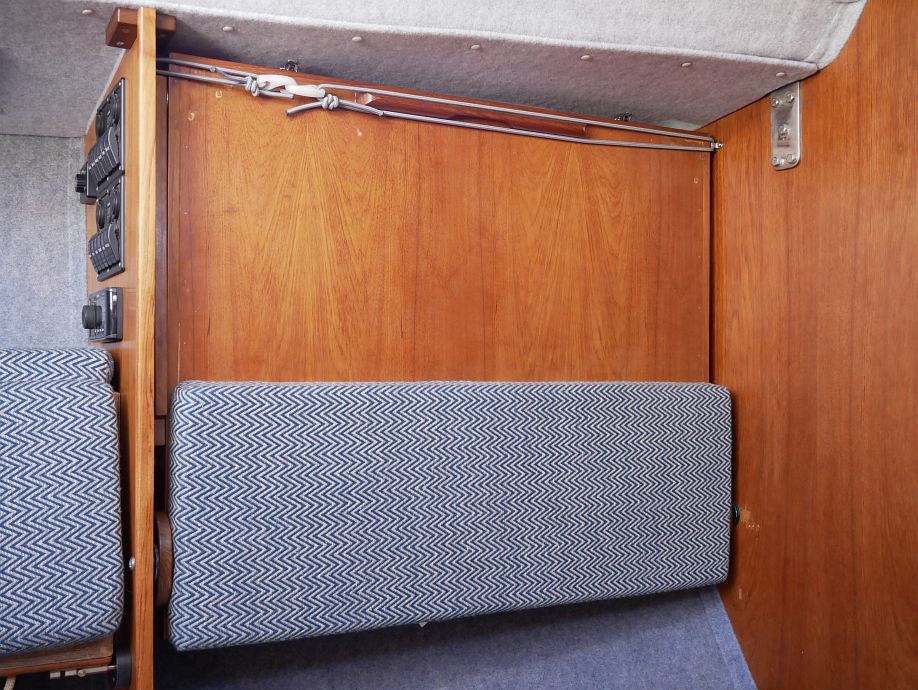
I’d spent much time pondering methods of securing the folded chart table, but sometimes simplest is best. That shockcord might not be as pretty as shiny hardware, but is much easier to fit and test, and probably does the job better with negligible tension sufficient to hold the table really firmly. You can also see the velcro-attached bookstop (not backstop!) to the right of the fuses, but you can’t put books up there (even flat) and sail with the chart table down because they just come flying over the fiddles. I’ll come up with a solution sometime:

Yesterday’s final act was to give the as-yet-unused water tank a final quick clean, throw in a purification tablet, half fill it with water, wait half an hour, pump some through, let the first wee bit drain through the sink, then drink a couple of mugfuls. And I’m still alive and well, which appears to be a good sign! It tasted a bit chloriney, but I couldn’t remember the tank capacity and might not have had enough water for the tablet, or perhaps it just always does (reviews seem to differ on this point)? Whatever, I’ll try adding some more water to dilute what’s already there and may not use tablet(s) with every refill, but am naturally still a little cautious of the unknown.

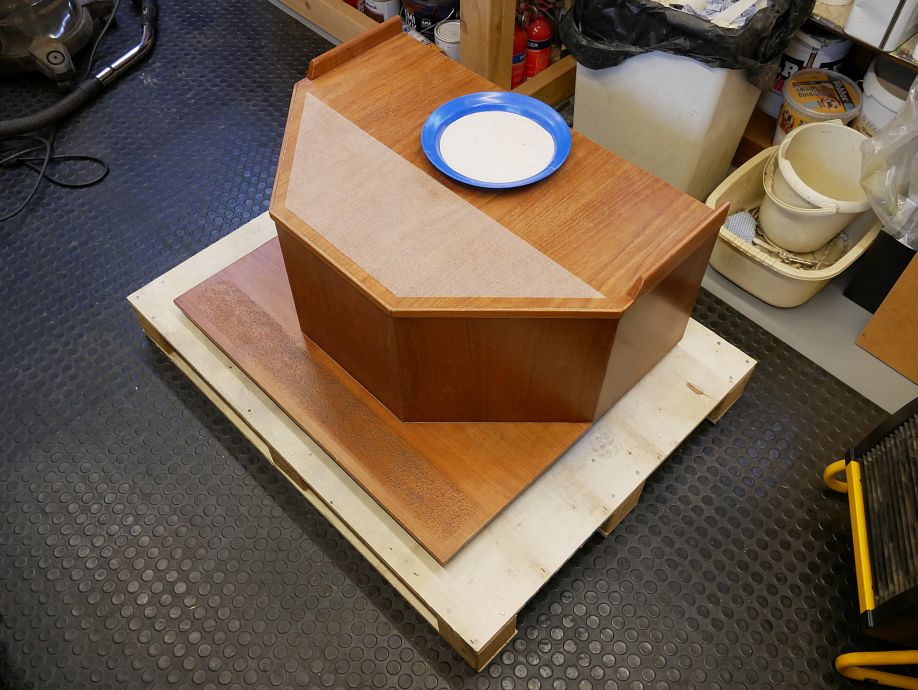
So where does that leave the ‘later?’ list? Some things were always going to be for next season once launch day caught up with them, like lining the underside of the main hatch (which somehow escaped getting done with the rest of the boat), finishing the cool box and sorting the rubber sealing strips under the cockpit locker lids. Others may get done if/when the opportunity arises, like fitting red film to the ‘chart table’ light. The Harken furler is operating as a headfoil, but not yet furling because leading the line aft from the drum (in the well) requires turning and through-deck blocks now sourced but not yet fitted. So that might or might not get finished afloat when establishing and at least marking the turning block position is the critical step while the rig’s up. And I’ll be seeing QD Plastics in Dumbarton shortly about nice new acrylic washboards, so might yet declare the blog ‘refit’ series done when I’ve got those because there’ll always still be things to do! The boat’s now essentially in commission and sailable, so we’ll see…

31 July 2019

Fly is afloat!

Filed under: Sailing — admin @ 10:33 pm

It’s not quite the end of the saga yet, but surely now into ‘endgame’ as far as the refit’s concerned…

Yesterday, Fly was launched at Creran Marine, taking to the water for the first time in 14 years! John Grant from Owen Sails was round to measure up for new lifelines (guard rails) while Peter Watt and I worked through the conundrum of new Harken foiler furl and inadequate clearance through the deck at the front of the bow well (solved with joint ingenuity and the tools Peter had in his containers), and then she was into the travel hoist and away when the tide was up far enough:

To say that I was close to tears as the hoist approached the water, the keel and the rudder touched it and then she was fully afloat would be, well, true! I’m always struck by how Fly turns from being quite a ‘big’ boat in the garden or on the road to a comparatively ‘wee’ one when the bits necessitating a ladder ashore drop nearly six feet into the sea, but that’s by the by; she’s perfectly formed as she is, I don’t want a bigger boat, a smaller one or a different one, and we’re talking years when perhaps nobody but me (or even me?) truly believed she’d ever sail again. If some emotion was involved, and still is, it feels good and perhaps I’ve earned that particular kind of feel-good…

Time for some levity, perhaps, so here’s the laughing fly brought to the boat so many years ago by regular crew and dear friend Gill Reavley, still laughing (amazed the battery hasn’t run out!) and now back onboard today:

And here’s Fly today on her way back from Loch Creran, this time by sea rather than by road. Peter and I had a tidal deadline at Ballachulish narrows (aka Peter Straits and, no, I didn’t make that up!) with little wind and some rain, so done mainly by engine with no mainsail, but we did get to try the old No.2 on the new foil. Fly will be moving to a mooring at Glencoe Boat Club in due course, but happy to have step-on access from the pontoon for a bit while I finish sorting her out:

And that’s (not quite) that. There will be further blogs with some refit content as I fit the new cabin sole, washboards, guard rails and stuff like that, but hopefully also some actual sailing this year because it’s been long enough coming! :-)

27 July 2019

Fly has left the garden!

Filed under: Sailing — admin @ 9:12 pm

Let’s do this blog backwards for a change and start with today’s pics before continuing to the ones I took yesterday:

Notice something? That’s Fly at Creran Marine (where she’ll be launched on Tuesday) in the first pic with Peter Watt and David Southcott (who came to do what I can’t do on my own, which is get her there!). The eagle-eyed might also spot the grotty old washboards I haven’t replaced yet, but they’re temporarily serviceable if incompatible with my pride in my otherwise-reborn boat. And that’s, well, a great big empty space beside the house in the second pic where she’s sat for so many years!

Continuing to work backwards, Peter came up yesterday with Jill Mills to help put together the new Harken twin-groove furler and fit the new masthead light (replacing one that I stupidly broke the other day), but I have no photos of that because we were Busy with a capital B. But here are a few I took earlier…

While Deks Olje D.1 doesn’t last forever, the tiller’s never looked this good! And we have the wheels back on (thanks to Alan Morrison for help with that!), tires up to pressure and boat tied down just pending mast etc. lifting up to be ready to go:

The fire extinguishers are both new but the (obviously unused!) blanket is not. The second extinguisher used to be mounted higher (where the heater outlet is now), but I’ve tried the bunk and don’t think it’s in the way here:

There used to be bolts inside and out on this door, but they’re just not necessary. I have a second stainless ball catch but think I can mount just the small part on the main (white) bulkhead and use the same main part. But seem to recall this one’s best positioned with the boat afloat and the rig tensioned?

And here’s the new cabin sole after six coats of Epifanes gloss varnish. It’s had a seventh today and might get an eighth tomorrow because it gets walked on and wants to be tough, but is looking so good I’ve abandoned my original plan to matt off the shine with the softer satin interior varnish used everywhere else. I only put the hatch in for the photo; it’s otherwise back out again while I’m finishing it off:

22 July 2019

A week from the water?

Filed under: Sailing — admin @ 10:13 pm

As explained last week, it’s been a while (too long!) since I’ve posted a ‘boat’ blog, but here’s a quick update based largely on available photos to show how close Fly’s got to an expected launch a week tomorrow…

So here’s the engine box on 31 May with renewed anti-slip sand on top. For various reasons, I had three goes at this, of which this is the first (subsequently spoiled along with the second!), but the principle is the same, with the sand sprinkled on varnish and then (not yet done here) varnished over:

And here’s the chart table cushion refitted on 2 June:

Here you see a selection of renovated brass hinges and bits on 16 June, cleaned with a nylon brush on electric drill and varnished, and some miscellaneous new bits and pieces exactly a month later on 16 July:

Porthole trim rings in, instrument covers back and folding pilot berth fronts (aka settee backs) partially hung (needing the stainless hooks from the previous photo to finish):

Topsides, coachroof etc. cleaned and T-Cut but not yet waxed (they are now!), boot topping and antifouling done, and top brown stripe restored:

Not yet Fly’s actual new cabin sole, but a template to test the changes from the old one (which was overweight, damaged and didn’t fit) before cutting into the priceless new striped plywood:

So I tested and retested the fit, revising my annotations more than once (but subsequently still chose to build it differently yet!):

Was I nervous about this sheet of plywood? If you know what it cost, you’ll know the answer!

I considered whether to move everything half a pattern to the side and make two cuts to get the stripes away from the edges where they’ll show against not-perfectly-straight bunk fronts, but decided finding them fortuitously symmetrical with no further waste of timber was more pragmatic! The piece on the right is the one for the cabin sole:

Hoping I know what I’m doing here:

Is it perfect? No. Is it the best I can do? Yes. Is it better than the old one? Yes. Is it good enough? Yes. There are gaps where I’ve trimmed down from the template, but you’ve also got to be able to get it in and out, and there are skirtings to cover the two main edges (note that it’s not varnished here, but that’s currently happening):

The final act of a testing day was making and fitting these battens. The screws were really just to stop the battens sliding about while clamping up (strength’s in the epoxy) and didn’t go in very far, so I took them back out the next day before epoxy-coating the back and edges:

I’m pleased with the teak rings I fitted to the heads door in lieu of the ugly old alloy handles, but did have to re-hang the door on filled and redrilled screwholes to get the fit I wanted:

You can see how the pilot berths work now; front halves double as settee backs and back halves as useful gear racks. The folding parts were built as continuous long sections, but we split them years ago because they’re far more practical like this. There are lee cloths somewhere to stop you falling out of pilot berths or main berths at sea, but not a priority to refit those right now:

The front edge of the forecabin Treadmaster needed protecting because I’d already kicked a couple of small chunks out of it which I’d had to stick back. So my first thought was some kind of solid edge trim, but I decided to try layered Gorilla Tape first as a less committing option. It doesn’t actually overlap the Treadmaster, but is built up half-width against its edge with a full-width piece over the top:

Because of repairs/modifications over the years (doubled starboard bunk front and inboard installation), the cabin sole didn’t have a lot to sit on in places. So I’ve added some more, screwed and Sikaflexed in place:

New shaft anode fitted:

And there’s lots more not even mentioned here as I continue to work through a diminishing, but by no means empty, list of ‘pre-launch’ and ‘later?’ jobs. Some small, less essential, things have inevitably migrated to ‘later?’ and I’ve somewhat stoically accepted that the boat will initially be launching with scruffy old washboards instead of shiny new ones, but, in terms of substantive work, she’s really nearly there now!

15 July 2019

More van-at-the-garage hills

Filed under: Sailing,Walking — admin @ 9:52 pm

While I’d been up Sgorr a’ Choise and Fraochaidh before, I hadn’t combined them into the single ridge traverse so obvious from the map, so took advantage of this year’s van-service-and-MOT day to get away from the boat refit and do exactly that. And it started, after a detour to the Ballachulish Co-op to augment my meagre scrabbled-together rations, with a full-on bash up the north side of Sgorr a’ Choise to leave a ‘pure’ traverse avoiding too much ‘out and back’ from the central bealach:

From Sgorr a’ Choise’s summit, and increasingly on the descent to the bealach and beyond, it was impossible to miss the proliferation of freshly-bulldozed forestry (?) tracks since I’d been up here before even if my photo selection’s spared you the worst of the scars up Glen Creran:

It feels like a long way to Fraochaidh, but the views from both undulating ridge and summit are excellent with familiar peaks and islands to admire in every direction:

And the return by the Duror–Ballachulish through-route maintains interest with attractive late prospects of Sgorr a’ Choise and the Pap of Glencoe amongst others:

It was a hot, dry day so I took two bottles of water and drank seven (!), but still suffered from the lack of ready supply on the long, central section of ridge.

Now perhaps you’re wondering why I’ve also filed this under ‘sailing’, so let me explain… it’s been nearly two months since I’ve posted a ‘boat’ blog, but work has continued unreported through a frenetic end to school term and the first week of my summer holiday. That long-anticipated, so-belated launch should be just a couple of weeks away, but I’m still working hard at it and just haven’t felt like blogging the minutiae as well (some ‘broader brush’ updates to come, I promise!). But what I did find on this very welcome boat-free day was quality time to mull over how and when to deal with some of the stuff I still want to get done, and was seeing how to get some consequential jobs (e.g. finishing templating and cutting Fly’s new cabin sole from the most expensive sheet of plywood I’ve ever bought) done right even as I walked. And you just can’t over-stress the importance of the right time away to work through this in your head!

20 May 2019

Trolley jack attack!

Filed under: Sailing — admin @ 8:34 pm

Some things have gone wrong! I’ve got perplexing new deck leaks (discovered on Saturday) from things already fixed, and nearly took my finger off with the trolley jack removing the trailer wheels to get the tires replaced when I thought to concentrate my single-day weekend effort on that instead…

It’s maybe not what you think when I was simply pulling an unloaded jack out from a chocked-up trailer and am no way stupid enough to go poking about the weighted jack, but I still somehow managed to trap and half-crush my finger where you see the plywood here and will never make that mistake again:

So I spied some people coming down the street, yelled for help, and was thankful to see Donna and Robert drop their bags and come running even if I subsequently worked out how to free myself (close the valve and pump the jack carefully back up far enough to escape). After which I had deep grooves in my finger for an hour or two and tingling for quite a bit longer, but count myself fortunate to be left with barely a mark now. And I did get the wheels off and trailer chocked securely, which unfinished job was oddly concerning me almost as much as ‘am I going to lose my finger?’ or ‘can I leave the boat like that to get the jack cut off?’ at the time:

The moral is of course to collapse the jack before removing it even under conditions of zero load, but hindsight’s a wonderful thing!

In other news, I’d already finished and fitted the pilot berth filler pieces trialled in my previous post, and am at least pleased with those:

6 May 2019

Crocked for the long weekend!

Filed under: Sailing — admin @ 9:28 pm

Couldn’t throw myself at Fly quite as planned this May Day holiday weekend after hurting my shoulder on Thursday night (more likely playing manhunt with S1 at Outward Bound than jumping/sliding down the Allt na h-Uamha — aka Laggan gorge — with them!), but one of the less physical things I’ve got done is fitting a stay to the chart table lid. A tricky job with its one and only position defined by needing to hold the lid as high as possible without lifting too far and sit far enough from the hinged edge to clear that corner gusset thing when telescoped into itself, but it’s turned out OK. Had to plug and redrill the pivot hole after drilling it too low first time even after testing with scrap plywood and a Gorilla Tape hinge, then drill the screw holes in the lid from the outside because there was no way I was getting them accurately marked and drilled from the inside, but it works. You might look and think why that position and that angle, but there’s simply no choice when it telescopes rather than folds!

Then, starting to get back on track with less discomfort today, you see the more awkward inner sides of the pilot berth fronts epoxy coated:

I’d got the pilot berth bases back in last Monday evening with Twig, but have been tweaking the fit by cutting teak filler pieces to cover some visible gaps, so will need to unscrew them once more to trim and glue these in. The port one’s needing more obvious treatment at front side and top (yes, I’ve cut a ‘horizontal’ piece as well as the vertical wedges you see):

Whereas the gap on the starboard one’s only the depth of the 12mm ply front, so I haven’t even tried to push my delicate filler wedge right in with the base in place!

We also fitted the new mast base last Monday evening. We got this lined up and holes drilled and tapped perfectly with a line strung along the boat and some measurements, then it settled slightly off as it was tightened down. Both perplexing and annoying (off-centre countersinks in the casting?) when it’s probably the thing I’d have liked to be perfect above all others, but I’ll just have to get over it when we’d done everything right and it’s still within reasonable tolerance:

28 April 2019

Taking the roof off

Filed under: Sailing — admin @ 9:39 pm

20 months ago, I built Fly a proper little roof so we could work inside with the hatch open in any conditions. Today I finally took it off when it became more hindrance than help as I sought to get the decks properly clean for the first time in eight-and-a-half years, and here’s the result after a similar effort to October 2010’s six hours of hard scrubbing:

So that was my Sunday, with Saturday spent mostly on workshop sorting and reorganisation, but I’ve also had a ‘production line’ going weekday mornings and evenings (before and after work!) to get pilot berth bases, heads door, cabin sole skirtings and forecabin bunk board trim varnished, and seen here on day one (Tuesday):

22 April 2019

Bumper Easter Fly blog

Filed under: Sailing — admin @ 8:33 pm

Last April (just over a year ago), I wrote:

It wasn’t a great winter for Fly. Consistently cold temperatures, flu and other things contributed to losing most of December, January, February and March, so we find ourselves coming into spring well behind a logical projected schedule from the summer and autumn.

But it’s different this year when so much work since suggests expectations of a 2018 launch to have been optimistic at best. Having stopped last summer just to paint the house external woodwork and make a quick sea trip to Stornoway (my ‘summer holiday’!), I think I’ve worked on Fly pretty well straight through every holiday since (October, Christmas, Easter) as well as most recent weekend days and evenings. A veritable slog, but no question that it’s all coming together now and we’re surely just weeks from the water even with Tuesday’s new school term to keep me from constant boat work…

So here you see the pilot berth bases, which I’d started stripping outside one strangely fine and un-chilly day over Christmas before waiting months to get back out to continue making the mess I didn’t want indoors. Now there’s a bit of a pilot berth saga here because Twig had taken them away years ago to measure up, possibly replace the tops (which the terrible paintwork suggested might be suffering) and then repaint, but his new paint had subsequently started flaking disturbingly back off. So we concluded that something was historically wrong there (no primer?) and they had to be stripped right back, which meant more work for me with numerous awkward inside corners making those bases absolute pigs to do, but the finally-revealed wood surprising us by its excellent condition:

So I was able to get most of the surfaces epoxy-coated like all the other bunk tops etc., leaving the teak-faced fronts (which show when the folding sections hinge up for access to the lockers within) for further sanding and varnishing. And here they are just coated with wee reminders that (at that stage) I’d forgotten to round off two corners I meant to do for a revised fit:

So that was the bases, but the folding sections still needed stripping, which was fortunately much quicker and easier at a single day’s work rather than a good four:

Next up we have some new wood parts I’ve made for the cockpit, with nice, big, teak traveller support blocks to replace decrepit undersized ones made of who-knows-what and iroko helmsman’s footrests to replace thin strips that provided support for nothing (all these things having been removed three years ago to stop the last of the serious deck leaks). So here you see some templating with the spirit level pretending to be the traveller, followed by test-fitting of the actual blocks as well as a dry-run for the footrests and a dining table Deks Olje job on the whole lot. The traveller blocks weren’t drilled yet because the holes for the old ones were all higgledy-piggledy and I was waiting to establish new positions along a line from Twig’s laser:

Now the new traveller blocks fitted beautifully with their new screw holes, but we ran into an unexpected problem with the footrests when the aft-most screws turned out to be disappearing vertically into the cockpit bulkhead and had to be set in epoxy with microfibres rather than done up with nuts. But it’s a good solid job either way, with the excess sealant being trimmed off and the new wood taking up some further oil after these photos were taken:

Two further things worth mentioning here are that the Lewmar 7 spinnaker winch you see out of place in the first pic above needs replacing because its centre stem has broken, and the gelcoat repairs to the recesses for the original short traveller supporting the longer one across its centre were made because it was marginally too long for its space before we rounded off its lower corners to prevent similar damage after refitting. But here are the new parts again with a fine satin sheen today:

Some history of the mast step repair (waiting since the autumn for weather to finish) can be found in my 21 October blog, but here is the plinth flattened and finished at last. It took two further passes of epoxy and some hard graft with a large/long block, 60-grit paper, straight edge and level gauge to get it flat, but it’s now both flatter and closer to level across the boat than ever (hence the conscious sacrifice of some gelcoat) as well as completely solid inside:

And of course it looks nice too now even if that’s technically less important:

Finishing the nav. station/chart table area starts with two potential ‘banana skin’ jobs I’m pleased to get done, which were trimming/chamfering the lower shelf’s fiddle to improve clearance for the chart table lid and sticking trim up the main bulkhead corner:

Next, we had to fit the table with its final spacers for me to bond in the socket for the chart table leg, which I’ve done where the leg wants to go most of the time despite (like so many things on boats!) not sitting perfectly square. So I took up the port-side cushions to see how they fitted with the leg there (NB you don’t actually lie over the gap between leg and bulkhead, but with your head to this side of it when the bit under the chart table’s just for sitting/lounging around) and, yes, I’ll admit to lying on the bunk and dreaming for a few minutes when that was done!

Having cleared the Deks Olje from the dining table, I was able to get back to varnishing small parts (it’s what dining tables are for, right?):

And we got my protective strip (made to my template by Mr Stainless) fitted to the companionway as well as the grab handles back on:

So why didn’t I get the hatch rails oiled when I did the washboard rails? Two reasons… needing drier conditions with their front ends not sheltered by my temporary roof, but more importantly having a long-desired repair (also requiring dry wood) to make to the port one first. This side had always been broken (possibly hacked off to accommodate the hatch garage Fly had when I bought her), and some heart-in-mouth moments ensued as I got started and had to cut out more than originally planned after routing into the screw well to the side of where its plug said it should be (note my two supposedly ‘safe’ and ‘unsafe’ pen lines!):

Still quite surprised a router can do this, but the screw head wasn’t exactly below the plug!

Here you see the new piece made and ready to glue when I work out how to hold everything where it should be, with this end of the existing rail better held down after springing up when the screw was removed. I’ve left the new piece tall deliberately because the top’s easy to take down later:

Here’s the glue-up after testing dry-fitting of my wedge-down and clamping methods. I left the countersinking/plug cutting for later so it couldn’t break out the side of the new piece before glue-up:

Two days later, a satisfying result is revealed with some shaping/sanding still to be done down the outside. The new plug’s offset to clear the edge of the rail and cover the old hole, and the second plug further along replaces the ugly grey filler we discovered to be covering a historic hole drilled in the wrong place!

So here’s the final shaping and multiple coats of Deks Olje done today… can’t totally disguise the repair, but it’s structurally sound, prettier than it was, and a satisfying improvement overall:

To finish by summing up other unphotographed happenings, the mast and boom sheaves all turn, the halyards etc. are clean, we’ve started servicing the winches and are also thinking about the trailer. There’s external cleaning, polishing and painting (mostly antifouling) to be done, but it’s starting to feel like a regular annual fit-out (remember those?) with that familiar anticipatory feeling somewhat magnified 14 years since it last happened! :-)

7 April 2019

Speakers’ corner(s)

Filed under: Sailing — admin @ 9:45 pm

Twig was here today, so we started with the tricky two-man job (one to hold and one to do!) of fitting my speaker boxes, and what a satisfying result after the three-month gestation of these things:

Might add that they work too, as tested with the new batteries also going in and America from West Side Story filling the boat from the first station we tuned in to (NB that’s the newly-fitted VHF, and not the stereo, whose heatsink you can see protruding through the bulkhead to its left, in the second shot):

While the eagle-eyed might also notice the new barometer, reinstalled grab handles and completion of the fixings for the lining panels, the most significant other thing achieved this weekend was my tuning the fit yesterday morning for the porthole rings, which now just require varnishing on their visible faces before permanent installation:

« Newer PostsOlder Posts »

Blog powered by WordPress. Feedback to webmaster@petestack.com.